
How to Remove Ceiling Fan Blades Without Stress
How to remove ceiling fan blades sounds simple right up until dust starts falling in your face, screws refuse to budge, and the ladder suddenly feels way too short. Plenty of people put this chore off because it turns into a balancing act mixed with grime, awkward angles, and a little bit of frustration. Still, dirty fan blades don’t stay hidden forever. Once buildup thickens, the fan can wobble, push dusty air around the room, and leave furniture coated again only days after cleaning.
Ceiling fans collect more than loose dust. Sticky kitchen residue, pet hair, humidity, and fine debris slowly cling to the blade surface over time. That layer can become surprisingly stubborn, especially near blade brackets and screw holes. A careful cleaning routine paired with the right removal steps helps protect the blade finish while preventing bent hardware or stripped screws. Nobody wants to turn a basic cleaning task into a repair project halfway through the afternoon.
How to remove ceiling fan blades also depends heavily on the fan style hanging overhead. Some older models use exposed screws that loosen quickly, while modern decorative fans may hide fasteners beneath trim pieces or light kits. A little patience goes a long way here. Rushing often leads to misplaced screws, scratched finishes, or blades installed unevenly afterward, which can create wobbling once the fan spins again.
Dust management matters too, honestly. One careless move and debris can scatter across bedding, couches, rugs, or countertops in seconds. Smart preparation helps keep the mess under control before the first screw even turns. Simple habits like laying down a sheet, organizing hardware in a bowl, and wiping blades before removal can save a surprising amount of cleanup later.
Then there’s the balancing issue. Ceiling fan blades may look lightweight, yet holding one steady while reaching overhead with a screwdriver can feel clumsy fast. Stable footing, decent lighting, and slow movements make the process far easier. Small adjustments during reinstallation also help maintain smooth airflow and quieter operation afterward.
How to remove ceiling fan blades becomes much less irritating once the process is broken into manageable steps. Clean blades improve airflow, reduce circulating dust, and help the entire room feel fresher without much effort. A little routine maintenance now and then keeps the fan looking cleaner, running smoother, and avoiding that embarrassing layer of gray fuzz hanging overhead.
How To Remove Ceiling Fan Blades For Cleaning
Dusty blades have a sneaky way of making a clean room feel unfinished. One spin, and that gray buildup can drift across bedding, shelves, kitchen counters, and freshly wiped furniture. That is where how to remove ceiling fan blades for cleaning becomes more than a random weekend chore. Done carefully, it helps control dust spread, protects the blade finish, and keeps the fan from turning a simple cleaning job into a wobbly mess.
Start With Safety And Setup
Power comes first. Always turn the fan off at the wall switch, then give the blades time to stop completely before touching anything. For extra caution, switch off the breaker if the fan has confusing wiring, a remote receiver, or a light kit that keeps acting up. That small step protects against accidental startup, which is the last thing anyone needs while standing on a ladder.
A sturdy ladder matters more than people think. A chair, rolling stool, or shaky step can turn a simple cleaning task into a bad day fast. The U.S. Consumer Product Safety Commission has warned for years that falls from ladders send many people to emergency rooms, so stable footing is not optional. Keep both feet planted, avoid leaning sideways, and move the ladder instead of stretching like a circus act.
Good lighting saves time and prevents stripped screws. Ceiling fan blade brackets often sit in shadow, especially near bowl lights or decorative motor housings. A small flashlight or headlamp makes screw heads easier to see before the screwdriver slips. That helps protect blade arms, screw slots, and painted finishes from avoidable scratches.
Set a towel, drop cloth, or old sheet below the fan before removing anything. Dust drops fast, and ceiling fan grime rarely lands politely in one neat spot. A simple barrier catches loose debris, loose screws, and tiny washers that love disappearing into carpet. This prep keeps the room cleaner and makes hardware recovery much less annoying.
Blade Removal Basics
Most ceiling fan blades attach with screws at the blade holder, also called the blade arm or bracket. Some screws connect the blade to the bracket, while others connect the bracket to the motor. Removing the blade from the bracket is usually easier for cleaning, but tight layouts may require removing the full bracket assembly. The key is choosing the method that gives enough room without stressing fan hardware.
Use the correct screwdriver size before turning the first screw. A loose fit can chew up the screw head, especially on older fans where dust and humidity have made everything stubborn. Press firmly, turn slowly, and support the blade with your other hand as the screw loosens. This reduces pressure on the bracket and helps prevent bent blade arms.
Labeling blades sounds fussy, but it can prevent wobble later. Many fans are balanced as a set, and reinstalling blades in different positions may create small vibration issues. A tiny piece of painter’s tape marked with numbers keeps each blade paired with its original location. That simple habit protects smooth rotation after cleaning.
Store screws in a bowl, magnetic tray, or zip bag right away. Loose ceiling fan screws are small enough to vanish under furniture, inside rugs, or between floorboards. Keeping them grouped by blade makes reinstallation calmer and quicker. Better yet, it prevents the classic “Where did that last screw go?” headache.
Handle Dust Before It Falls
Loose dust should come off before the blades are fully removed. A microfiber cloth, pillowcase, or soft duster can trap the top layer instead of sending it into the room. Slide a pillowcase over each blade, pinch lightly, and pull backward to collect dust inside the fabric. That little trick keeps airborne dust from spreading across furniture.
Kitchen fans usually need extra patience. Grease mixes with dust and creates a sticky film that dry wiping will only smear around. A damp cloth with mild dish soap can loosen residue without soaking the blade. Avoid harsh cleaners because they may dull finishes, lift veneer, or damage painted blade surfaces.
Bathroom and laundry room fans can collect humidity-heavy dust. That buildup may cling near screw holes and blade edges, where regular dusters miss it. Wipe slowly around brackets and seams, then dry the area before removing screws. Moisture left near hardware can encourage rust or make future removal harder.
Dust allergies make this chore feel even worse. A mask can help during heavy buildup, especially if the fan has not been cleaned in months. Keep windows open if weather allows, and run an air purifier nearby if dust tends to linger. Small steps like these reduce dust exposure while keeping the room from feeling gritty afterward.
Remove Screws Without Damaging Blades
Blade screws often sit close to the ceiling, which makes the angle awkward. Hold the blade steady with one hand while loosening screws with the other. Letting the blade hang by one screw can twist the bracket or stress the blade hole. Steady support protects blade alignment and keeps the job from turning clumsy.
Older screws may resist at first. A firm downward push on the screwdriver helps prevent slipping, while slow pressure usually works better than sudden force. If the screw still refuses to move, stop before the head strips completely. A manual screwdriver often gives better control than a drill around delicate fan parts.
Keep track of washers if your fan uses them. Some models include small fiber washers that reduce vibration between the blade and bracket. Losing them can lead to rattling after reassembly, even if the blades look correctly installed. Those tiny parts play a bigger role in quiet fan operation than most people expect.
Blade arms should not be forced sideways. If a blade feels stuck after the screws are removed, dust or old finish may be holding it in place. Wiggle gently near the bracket instead of pulling hard from the blade tip. A calm touch helps avoid warped blades, chipped finishes, and uneven reinstallation.
Clean Each Blade The Right Way
Flat blade surfaces clean best on a table or countertop covered with a towel. This keeps the blade stable and protects the finish from scratches. Wipe along the grain or length of the blade rather than scrubbing in circles. That approach gives better control and reduces streaks on wood-look finishes.
A mild cleaner is usually enough. Warm water with a small amount of dish soap handles most dust, fingerprints, and light grease. Spray the cloth instead of spraying the blade directly, since excess liquid can seep into edges or screw holes. Keeping moisture controlled protects laminated blades from swelling.
Stubborn grime near the bracket area may need a soft toothbrush. Use gentle pressure around screw holes, decorative ridges, and seams where dust likes to settle. Avoid abrasive pads because they can scratch painted metal or coated blade surfaces. Slow cleaning preserves surface finish better than aggressive scrubbing.
Let every blade dry fully before reinstalling. Damp blades can trap dust faster, and moisture near screws may create rust over time. A dry microfiber cloth helps remove leftover streaks and water spots. Clean, dry blades also make it easier to spot cracks, loose edges, or warped corners before they go back up.
Separately, better lighting can make overhead cleaning less of a guessing game. Brighten a desk or small work area with a focused upgrade like led desk lamp with adjustable light modes so tiny screws, washers, and finish marks are easier to see while you work.
Check Brackets And Fan Hardware
Blade brackets deserve a close look while everything is apart. Dust can hide small cracks, bent arms, or loose mounting points. A bracket that looks slightly off can create wobble even after spotless cleaning. Spotting hardware problems early saves repeat ladder trips later.
Tighten only what needs tightening. Over-tightening screws can crush blade material, strip holes, or stress metal brackets. Snug is the goal, not white-knuckle force. A balanced touch protects secure fastening without damaging the fan.
Inspect the motor housing area for dust clumps. Built-up debris near vents can make the fan look neglected and may affect airflow around the motor. Use a dry cloth or vacuum brush attachment around the housing, keeping moisture away from electrical areas. This adds a cleaner finish and supports better airflow.
Light kits can get in the way during blade removal. If the bulbs or glass shades block access, remove them carefully before working near the brackets. For kitchens, lighting matters after the fan is clean too, especially where cooking tasks need clear visibility. Upgrade brightness with light bulbs for kitchen ceiling fan when dull bulbs make the whole fixture feel tired.
Reinstall Blades Without Creating Wobble
Reinstall each blade in its original position if you labeled them earlier. Line up the holes before inserting screws, and start each screw by hand to avoid cross-threading. Tighten gradually instead of locking down one screw fully before the others. Even pressure supports balanced blade placement.
Keep the blade level while tightening. A tilted blade can pull against the bracket and create small alignment issues. Check that the blade sits flat against the bracket before the final snug turn. That small pause helps reduce fan wobble once the fan starts moving again.
After every blade is attached, give each one a gentle wiggle. Nothing should feel loose, rattly, or uneven. Look across the blade tips from below to see whether one appears higher or lower than the rest. Visual checks catch alignment problems before the fan runs.
Turn the fan on at the lowest speed first. Watch for wobble, clicking, scraping, or unusual movement before increasing speed. If something looks off, power it down and recheck screw tightness and blade placement. Slow testing keeps safe operation front and center instead of hoping the problem fixes itself.
Fix Common Cleaning Mistakes
One common mistake is cleaning only the visible side of the blade. The top surface collects the thickest dust, but the edges and underside still hold residue. Once the blade is off, clean every side before reinstalling it. Full cleaning keeps dust buildup from returning too quickly.
Another mistake is using too much water. Soaking fan blades can damage pressed wood, laminate edges, or painted finishes. A damp cloth should clean the surface without leaving it wet. Controlled moisture protects blade durability and prevents swelling around screw holes.
Some people mix up screws between blades and brackets. Similar screws can have slightly different lengths, and using the wrong one may cause poor fastening. Keep hardware grouped as you remove it, especially on older fans with mixed replacement screws. Organized parts make reassembly smoother and safer.
Skipping the final balance check can undo all that careful work. A fan that ran quietly before cleaning may wobble if one blade is slightly loose or installed in a different position. Low-speed testing catches the issue before it becomes loud and irritating. That final check protects quiet performance and keeps the fan feeling steady.
Know When Removal Is Not Worth It
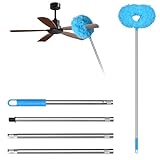
Some blades do not need full removal for routine dusting. Light buildup can often be handled with a pillowcase, microfiber duster, or extendable cleaning tool. Removing blades too often may wear screw holes over time, especially on budget fans with softer blade material. Save full removal for deep cleaning, sticky grime, repainting, or hardware inspection.
Very old fans need extra caution. Brittle blade material, rusty screws, or loose brackets can make removal risky. If a screw spins without tightening or the bracket looks cracked, the fan may need repair parts before cleaning continues. Pushing through damaged hardware can create safety concerns.
High ceilings add another layer of difficulty. Tall ladders, awkward angles, and heavy dust overhead are not a friendly mix. In that situation, hiring help may be smarter than stretching beyond a safe reach. Safe access matters more than proving you can handle ceiling fan maintenance alone.
Cold sore light therapy is unrelated to fan cleaning, so it belongs as a separate note instead of being forced into the ceiling fan workflow. For a different home wellness need, compare red light therapy for cold sores if targeted lip-area care is on your list.
How To Reinstall Ceiling Fan Blades After Cleaning
A clean blade can still cause trouble if it goes back on crooked, loose, or in the wrong spot. The room may look fresher, but a rattling fan will steal the win pretty fast. After learning how to remove ceiling fan blades for cleaning, the next job is putting everything back with steady alignment, secure screws, and enough patience to avoid that annoying wobble that shows up at medium speed.
Match Each Blade To Its Original Spot
Blade position matters more than it seems. Many ceiling fans settle into a balanced pattern over time, and swapping blades around can throw that rhythm off. Use the tape labels from removal to return each blade to its original bracket. That tiny bit of organization protects smooth spinning, quiet operation, and the clean finish you just worked for.
Start each screw by hand before tightening anything fully. This helps the threads catch correctly and prevents cross-threading, which can ruin a screw hole fast. Keep the blade supported from underneath so it does not pull against the bracket while you work. A supported blade keeps mounting pressure even across the hardware.
Tighten screws in small turns instead of cranking down one side first. Uneven pressure can twist the blade slightly, even if everything looks fine from the floor. Move from screw to screw until each one feels snug. That slow pattern helps preserve blade balance without crushing softer blade material.
Look at the gap between the blade and bracket before stepping down. The blade should sit flat, not tilted or pinched at one edge. A small misalignment now can become a loud click later. Fixing blade seating while the ladder is still in place saves another climb.
Test The Fan Before Calling It Done
Low speed tells the truth first. Turn the fan on gently and watch the blade tips for uneven movement. A slight tremble may mean one screw needs another snug turn or one blade is sitting a bit off. Testing slowly protects fan stability and keeps small issues from getting louder.
Listen closely for clicking, scraping, or pulsing sounds. A clicking noise often points to a loose screw, a washer out of place, or a blade bracket touching something it should not. Stop the fan before making adjustments. Working on moving blades is never worth the risk, even for a quick hardware check.
Run the fan through each speed after the first low-speed check looks normal. Medium speed usually exposes wobble better than low speed, while high speed can make small imbalances obvious. Watch from a safe distance and keep the ladder away while the fan is running. Careful testing helps confirm clean airflow without guessing.
A balancing kit can help if the wobble stays after every screw is checked. These kits usually include small clips and adhesive weights that fine-tune blade movement. Use them only after confirming the blades are clean, dry, and properly installed. Balance weights work best after the basics of secure reinstallation are already handled.
Clean The Area Around The Fan
The blades are only one part of the mess. Dust usually lands on the motor housing, light shades, ceiling texture, and nearby furniture during removal. Wipe the housing with a dry microfiber cloth, then clean any reachable trim around the fan. This finishes the job with less leftover dust and a cleaner-looking ceiling area.
Glass shades need gentle handling if your fan includes a light kit. Remove fingerprints, bug specks, and fine dust with warm soapy water, then dry them completely before reinstalling. Damp glass can leave cloudy streaks once the bulbs warm up. A clean shade improves light clarity without needing a full fixture change.
Kitchen fans often leave the biggest cleanup zone. Greasy dust may settle on cabinet tops, nearby walls, or the upper side of appliances. Wipe those nearby surfaces after the blades are reinstalled so fresh dust does not drift back onto the fan. This keeps cleaning results from getting undone too quickly.
Outdoor or covered patio fans can gather pollen, insects, and damp grime around the motor area. Larger fans need more careful handling because longer blades can flex if unsupported. For patios with broad coverage needs, compare best 72 inch outdoor ceiling fans before replacing an old fixture that keeps wobbling after basic maintenance.
Prevent Dust From Building Up Again
A quick wipe every couple of weeks beats a heavy deep clean every few months. Dust is easier to remove before humidity, grease, or pet hair turns it sticky. Use a microfiber duster or pillowcase method while the blades are still mounted. This habit keeps routine maintenance simple and less messy.
Rooms with pets need more frequent attention. Fur and dander float upward, then cling to blade edges where airflow keeps pushing them around. A light cleaning schedule can reduce the dusty ring that forms along the leading edge. That helps with cleaner air movement and fewer gray streaks overhead.
Kitchen fans need a different plan because grease changes the texture of dust. A dry duster may not be enough after a week of regular cooking. Use a barely damp cloth with mild soap, then dry the blade right away. This protects blade finish while keeping sticky buildup from hardening.
Bedroom fans deserve attention before allergy season. Dusty blades can stir up particles while people sleep, which makes the room feel stuffy by morning. Keeping blades clean helps the space feel fresher without adding another noisy appliance. It is a small chore with a real comfort payoff.

Know Which Tools Make The Job Easier
A short list of tools usually covers the whole job. Keep a screwdriver, microfiber cloths, painter’s tape, a small bowl, mild soap, and a stable ladder nearby. Having everything within reach prevents awkward climbs up and down. Good prep makes ceiling fan cleaning feel less like a juggling act.
A magnetic screwdriver can help, especially with tiny screws near the motor housing. Dropped screws are frustrating on hard floors and worse on thick carpet. Still, avoid using too much force just because the tool feels secure. Gentle pressure protects screw heads and bracket holes.
A soft toothbrush earns its keep around brackets and decorative grooves. Dust loves tight corners, and cloths often miss the grime packed around screw holes. Use light strokes instead of scrubbing like you are cleaning grill grates. The goal is detail cleaning, not wearing down the finish.
Some household tools belong nowhere near fan blades. Abrasive pads, strong solvents, and soaking wet rags can damage blade edges or leave dull patches. Power drills can also over-tighten screws before you notice. Simple hand tools give better control for delicate ceiling fan parts.
Handle Special Fan Styles With Care
Flush-mount fans can feel cramped because the motor sits close to the ceiling. The tight space makes screw access harder and increases the chance of scraping the ceiling paint. Use a shorter screwdriver if the angle is too tight. A calm setup protects ceiling finish and fan trim.
Fans with decorative blade irons need extra patience. Curved brackets, scrollwork, and painted details can trap dust in tiny ridges. Clean those areas before reinstalling the blades so grime does not smear onto freshly cleaned surfaces. Small details make the whole fan look properly refreshed.
Remote-control fans may include receivers tucked inside the canopy or housing. Blade removal usually does not touch those parts, but avoid pulling wires or spraying cleaner near electrical areas. Keep moisture on the cloth, not on the fan. That keeps electrical safety out of the danger zone.
Outdoor fans may use weather-resistant materials, but that does not mean they enjoy rough cleaning. Pollen, moisture, and fine grit can scratch surfaces if rubbed too hard. Rinse removable plastic blades only if the manufacturer allows it, then dry all hardware completely. Careful drying helps prevent rusted screws and stubborn future removal.
Avoid Mistakes That Cause Wobble
Wobble usually starts with something small. A loose screw, missing washer, uneven blade position, or swapped blade location can all create vibration. The fan may look fine while standing still, then shake once the blades reach speed. That is why final alignment matters as much as cleaning.
Do not ignore a blade that looks slightly bent. Even a small bend in the blade arm can shift the blade angle enough to affect balance. Compare all blade tips from below and look for one sitting higher or lower than the rest. A careful look helps catch uneven blade pitch before it becomes noisy.
A fan that wobbled before cleaning may need more than clean blades. Loose mounting hardware, worn brackets, or an uneven ceiling box can also cause movement. Blade cleaning may reduce dust weight, but it cannot fix a weak mount. Persistent shaking deserves a deeper safety inspection.
Random household hacks can make wobble worse. Taping coins to blades, forcing brackets into place, or using mismatched screws may create new problems. Use a proper balancing kit if adjustment is needed. Safe fixes protect fan performance without turning the fixture into a patchwork repair.
Plan Maintenance Around Real Life
Fan cleaning fits best into routines that already happen. Pair it with bedding changes, seasonal dusting, or kitchen deep cleans so it does not feel like a separate project. A small recurring habit beats waiting until the blades look fuzzy from across the room. Regular care keeps dust control manageable.
Homes with open windows may need more frequent cleaning. Pollen, road dust, and outdoor debris settle quickly on spinning blades. Covered patios and sunrooms can collect even more grime during dry or windy weather. A flexible schedule works better than pretending one cleaning routine fits every home environment.
Good visibility makes every maintenance job easier. Dim rooms hide dust until the buildup gets thick, and tiny screws become harder to track. For a completely different tool topic, use how to use flashlight attachment ark only if that specific gear setup is what you need, not as a substitute for safe household lighting. Clear light and stable footing still matter most for fan blade cleaning.
Seasonal checks help catch problems before the fan gets heavy use. Spring cleaning can remove winter dust, while late-summer cleaning helps clear pollen and humidity grime. Before long stretches of daily fan use, check screws, blade edges, and wobble at low speed. That simple routine supports safer operation, cleaner airflow, and fewer annoying rattles overhead.


Best Small Flush Mount Ceiling Fans 2026 Ultimate Picks

Best Smart Ceiling Fan India 2026 For Effortless Comfort

Best Smart Ceiling Fans with Lights for 2026: Top Picks

Best Smart Home Non Ceiling Fans 2026 For Ultimate Comfort

Best Outdoor Misting Ceiling Fan 2026 For Ultimate Comfort

Best Ceiling Fans With Lights For Vaulted Ceilings 2026 Top Picks

Best Outdoor Ceiling Fans For Porch 2026 With Style And Breeze

Best WiFi Enabled Ceiling Fan 2026 For Effortless Comfort





