
How to Remove Ceiling Fan Blades With Clips Fast
How to remove ceiling fan blades with clips sounds simple until those tiny metal fasteners refuse to budge. One wrong pull can bend the blade arm, crack older wood blades, or send dust flying straight into your face. Plenty of people start the job thinking it’ll take a minute, then suddenly they’re balancing on a ladder while wrestling with stubborn clips that haven’t moved in years. Frustrating? Absolutely. Still, the process gets a whole lot easier once you understand how the clips actually lock the blades into place.
Older ceiling fans often hide layers of grime around the blade mounts, especially near the motor housing. Dust buildup can make clips stick tighter than expected, which explains why some blades feel glued on even after the screws are removed. A slow, steady approach protects the mounting hardware and prevents unnecessary wear. That matters because replacement blade brackets for discontinued fan models can be surprisingly hard to track down.
Clip-style ceiling fan blades usually rely on spring tension or slide-lock mechanisms instead of traditional exposed screws. That design keeps the fan looking cleaner, but it also creates confusion during maintenance. Some clips release with light pressure while others need a flathead screwdriver to gently pry the locking tab loose. Knowing the difference saves time and keeps those small metal components from snapping under pressure.
Cleaning is another big reason people search for how to remove ceiling fan blades with clips. Sticky kitchen grease, pet hair, and seasonal dust storms can turn fan blades into a mess before anyone notices. Wiping the blades while they’re still attached often leaves dirt trapped near the brackets, so removing them completely allows deeper cleaning and better balance afterward. A cleaner fan also reduces wobbling caused by uneven dust accumulation.
Some ceiling fans include delicate decorative finishes that scratch easily during removal. Matte black coatings, faux wood grain surfaces, and painted edges can chip if the clips are handled too aggressively. Soft cloths, careful hand placement, and controlled movements make a huge difference. Little details like that help avoid cosmetic damage that sticks out every single time the fan spins overhead.
Ladders, oddly enough, create half the struggle. Standing too close to the fan limits leverage, while standing too far away forces awkward arm angles that make clip removal harder. Positioning yourself correctly before touching the clips keeps the process smoother and safer. Small adjustments in body position often matter more than brute force.
How to remove ceiling fan blades with clips becomes far less intimidating once the mechanism clicks in your head. Instead of tugging randomly and hoping for the best, each step starts feeling predictable and controlled. That confidence matters, especially with older fans that may already have worn hardware or slightly loose mounts. A careful removal process helps the fan stay balanced and stable once everything goes back together.
How To Remove Ceiling Fan Blades With Clips Safely
A wobbly ladder, dusty blade edges, and a clip that refuses to move can turn a simple fan-cleaning job into a real pain. Many ceiling fans look straightforward from the floor, yet the blade clips can hide behind brackets, paint buildup, or years of sticky grime. That is where how to remove ceiling fan blades with clips becomes less about yanking parts loose and more about using steady pressure, safe positioning, and a little patience. The goal is simple: remove each blade without bending the clip, scratching the finish, or knocking the fan out of balance.
Clip Blade Removal Basics
Ceiling fan blade clips usually hold the blade to the blade arm with spring pressure, a slide lock, or a small retaining tab. Some models also use screws near the clip, so the blade may not release until both the screw tension and clip tension are handled. A quick glance is not always enough because dust can hide the release point. Use a flashlight and look closely before touching anything, especially near the blade bracket and motor housing.
Power safety comes first, even if the job feels harmless. Turn the fan off at the wall switch, then use the breaker if the fan is connected to a light kit or remote receiver. Fan blades can spin from a small bump, and a moving blade near your hand is a nasty surprise. Let the fan sit completely still before climbing up and checking the clips.
A good ladder setup saves more trouble than any tool in the box. Place the ladder slightly off-center so your chest is near the blade you are removing, not stretched across the fan. Keep one hand supporting the blade while the other works on the clip release. Awkward reach creates bad leverage, and bad leverage is how brackets get bent.
Older clips may stick because paint, grease, and dust settle into the joint over time. A dry microfiber cloth can clear the area enough to reveal whether the clip slides, lifts, or pinches. Avoid spraying cleaner directly into the motor area because liquid can drip into places it should not go. A damp cloth on the blade surface is fine, but the clip area needs a lighter touch.
Tools That Make The Job Easier
A basic flathead screwdriver often helps with stubborn ceiling fan clips, but it should be used like a lever, not a crowbar. Slip the tip under the clip edge only if the release tab is visible and the blade is supported. Twist gently instead of prying upward with force. That small difference protects the blade arm from warping.
Painter’s tape can prevent scratches on decorative finishes. Place a small strip near the clip before using a screwdriver, especially on matte black, brushed nickel, or painted wood-look blades. Fan finishes can chip faster than people expect, and once a blade edge is damaged, it is hard not to notice it from below. A little tape feels fussy until it saves the finish.
A small container or magnetic tray keeps screws and clips from disappearing. Ceiling fan hardware has a bad habit of rolling off shelves, vanities, and ladder tops. Labeling parts by blade position also helps if the fan had a slight wobble before removal. Matching the same blade back to the same arm can preserve fan balance better than mixing everything around.
Heat and stale air can make overhead work feel miserable, especially in garages, enclosed patios, or bedrooms without airflow. To stay comfortable while working around a switched-off fan, compare airflow options with this best portable fan for sporting events guide before long repair or cleaning sessions. A separate fan pointed across the room helps reduce sweat on your hands, which makes handling small clips less slippery.
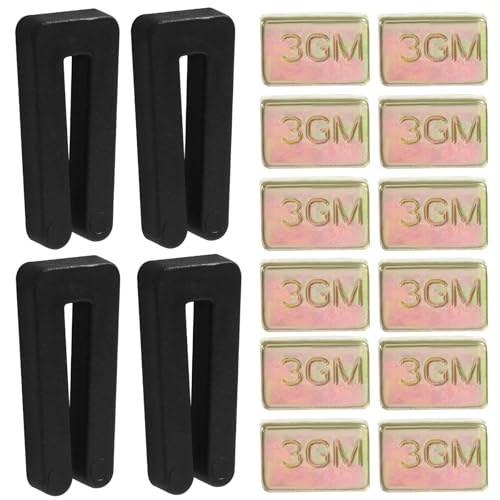
Replacement parts deserve a careful look before removal begins. Some clip systems are tied to the light kit housing or decorative lower assembly, so removing blades may expose wiring covers or trim pieces. For compatible fan upgrades, review this builders best ceiling fan light kit option before changing parts around the motor housing. Mixing random hardware with an older fan can create wobble, noise, or uneven blade spacing.
Finding The Clip Release Point
Clip style determines the whole removal method. A spring clip usually needs inward pressure before the blade slides free, while a tab-style clip may lift slightly before releasing. Some blade clips hide beneath a decorative cover that looks like part of the bracket. Feel for movement with your fingers before using tools because a clip that wiggles usually tells you where it wants to go.
Start with the easiest blade, not the dirtiest or most stubborn one. The first successful removal shows how the rest of the fan is built. Once you see the angle of the clip and the direction of release, the next blades come off with less guesswork. That saves the blade arms from repeated twisting and reduces the chance of breaking old hardware.
Support the blade from underneath as the clip loosens. A fan blade can drop suddenly once tension releases, and that quick fall can crack the blade near the screw holes. Keep your palm flat under the blade close to the bracket, not at the far tip. Supporting the blade near the center gives better control and protects the mounting point.
A stuck clip should be worked in tiny movements. Press, pause, wipe, and try again. Forcing the clip in one hard motion can bend the metal just enough to make reinstallation annoying later. Small movement, repeated carefully, beats brute force every time with ceiling fan blade clips.
Some clips release only after a screw is loosened a few turns. Do not remove every screw at once unless the blade is fully supported and you know the bracket design. Loosening one screw slightly may reduce clip pressure without letting the blade fall. That controlled approach keeps the fan hardware organized and prevents sudden shifts.
Removing Each Blade Without Damage
How to remove ceiling fan blades with clips works best as a repeatable routine. Pick one blade, inspect the clip, support the blade, loosen any screw tension, release the clip, then slide the blade away from the bracket. Do not bounce between blades halfway through the process. A steady order keeps the hardware matched and prevents confusion.
Blade direction matters. Some clipped blades slide outward from the motor, while others slide sideways along the arm. If the blade does not move after the clip releases, stop and check for a hidden screw or second tab. Pulling harder in the wrong direction can widen the mounting holes or bend the retaining clip.
Painted-over clips need extra care. Older fans in remodeled rooms sometimes have paint along the bracket edges, especially if the ceiling was sprayed or touched up without removing the fan. Score the paint line lightly with a utility blade only around the bracket edge, not across the blade surface. Breaking that paint seal prevents peeling chunks from the blade finish.
Dust patterns can show where the blade normally sits. Before fully removing the blade, take a quick photo of the clip and bracket position. That photo becomes handy during reassembly, especially with unusual clip angles. It also helps you spot whether a blade was already slightly misaligned before you touched it.
An unrelated but practical home-care note fits here: after ladder work, sore shoulders can creep in, especially after holding fan blades overhead for a while. For a separate wellness upgrade, compare options in this best red light therapy for cellulite guide. It is not part of fan repair, but it may fit a broader home routine focused on comfort and self-care.
Cleaning The Blade Area Before Reinstalling
Blade cleaning should happen while the blades are off, not after they go back up. The bracket side collects the grime most people miss during regular dusting. Use a damp cloth on the blade surface and a dry brush around screw holes or clip channels. Keeping moisture away from the clip channel helps prevent rust or sticky residue later.
Grease near kitchen fans needs a mild cleaner, not harsh soaking. Spray cleaner onto a cloth first, then wipe the blade instead of spraying overhead or near the motor. Thick grease can hide cracks, swollen blade edges, or worn clip marks. Cleaning slowly gives you a better look at blade condition before reassembly.
Clip channels should be clear before each blade goes back into place. Packed dust can stop the clip from seating fully, which may cause ticking or wobbling at medium speed. A soft toothbrush works well for tight grooves. Avoid metal brushes because they can scratch the clip and remove protective coating.
Check every blade for swelling, cracks, or loose laminate. Moisture-damaged blades may not sit flat against the bracket even if the clip still locks. A warped blade can make the fan shake after reinstalling, and tightening the clip harder will not fix that. Replace damaged blades rather than forcing them back into place.
Balanced reassembly starts before the first blade returns to the fan. Keep each blade paired with its original clip and bracket whenever possible. Reinstall one blade at a time, tighten hardware evenly, and check that the clip sits flush. A fan that looks even from below usually runs quieter and puts less strain on the motor.
How To Clean And Reinstall Ceiling Fan Blades With Clips
Loose blades, rattling sounds, and uneven spinning usually show up after the blades go back on the fan. Plenty of people remove the clips correctly, then rush the reassembly and wonder why the fan suddenly shakes at medium speed. That second half of the job matters just as much as removal because clip alignment, blade spacing, and balanced tightening all affect how the fan performs afterward. A slow, organized reinstall keeps the fan quieter and helps the motor avoid extra strain.
Checking Blade Arms Before Reinstalling
Blade arms can bend slightly during removal without looking obviously damaged at first glance. Hold each arm at eye level and compare the angle against the others before reinstalling the blades. Even a tiny difference can create wobble once the fan reaches higher speeds. Most people notice the problem only after the fan starts clicking or swaying overhead.
Dust buildup around the mounting holes can also create uneven spacing. Wipe the bracket surface thoroughly before sliding the blade back into place. Tiny debris trapped under the blade edge may tilt the blade enough to affect rotation. Clean contact points help the blade sit flatter against the bracket.
Clip tension should feel firm but not aggressive during reinstallation. A loose clip may allow vibration, while an overly forced clip can stress the blade edge over time. If the clip feels distorted or weak, replacing it usually makes more sense than trying to bend it back into shape. Thin metal clips rarely return to their original strength after repeated twisting.
Some older ceiling fans develop warped blade arms from years of heavy dust accumulation. Thick dust adds surprising weight near the blade tips, especially in humid rooms where particles cling together. Fans installed near kitchens often deal with sticky buildup that pulls debris into the bracket joints. For compact fan ideas in smaller rooms, compare airflow layouts in this 44 outdoor hugger ceiling fan with remote guide before replacing an aging ceiling fan entirely.
Consistent screw pressure matters more than over-tightening. Tighten each screw gradually in small turns instead of fully locking one side immediately. Uneven tightening can shift the blade position slightly off-center. Balanced hardware pressure helps preserve smooth rotation across all speed settings.
Reducing Ceiling Fan Wobble After Blade Removal
Fan wobble often starts after blades are removed and reinstalled in random order. Matching each blade back to its original bracket position can reduce balance issues. Ceiling fan manufacturers sometimes compensate for slight weight differences during assembly. Swapping blade positions may accidentally throw that balance off.
A simple tape label system helps during removal. Number each blade and blade arm with painter’s tape before disconnecting anything. That tiny step saves confusion later, especially on larger fans with decorative clip systems. Reassembly becomes faster because every blade returns exactly where it started.
Blade alignment should be checked from below once the blades are attached. Stand back and look across the blade edges while slowly rotating the fan by hand. One blade sitting lower than the others usually points to a bent bracket or uneven clip tension. Catching that early prevents more annoying troubleshooting later.
Humidity can quietly affect blade balance too. Wood composite blades sometimes absorb moisture and swell slightly near the mounting holes. Bathrooms, covered patios, and coastal homes tend to see this issue more often than dry indoor spaces. A swollen blade may still fit the clip but spin unevenly afterward.
Minor shoulder tension tends to creep in after repeated ladder work and overhead adjustments. For home recovery ideas unrelated to fan maintenance, compare heat therapy options in this best red light therapy sauna at home guide after long cleaning sessions. A little recovery support feels pretty nice after holding fan blades over your head for an hour.

Handling Fragile Or Decorative Fan Blades
Decorative ceiling fan blades scratch more easily than people expect. Faux wood grain, glossy paint, and textured coatings can chip from simple contact with metal clips or screwdrivers. Wrap tools with a microfiber cloth if you need extra leverage near visible surfaces. That small barrier helps protect finishes from accidental marks.
Glass accent blades need extra support during removal and reinstalling. Never hold decorative blades only from the outer tip because the pressure can stress the mounting point. Support the blade near the center where the structure is strongest. Stable hand placement prevents cracks and keeps the clip aligned during installation.
Painted blade edges sometimes stick lightly to the bracket after years of heat exposure. Slow pressure works better than quick pulling because brittle paint can split along the edge. Tiny finish cracks tend to spread once the blade starts flexing. Gentle movement keeps cosmetic damage from turning into visible peeling.
Clip covers and decorative trim pieces can also become brittle with age. Plastic trims near light kits may crack if twisted too sharply during blade removal. Set removed pieces on a towel instead of a hard countertop to avoid scratches. Small cosmetic details make a bigger difference than people realize once the fan is back overhead.
Storage matters during cleaning too. Leaning blades against a wall can slowly warp thinner materials, especially in warm rooms. Lay blades flat on a clean surface while cleaning and inspecting them. Flat storage helps preserve blade shape and keeps the clip edges from bending.
Common Mistakes That Damage Blade Clips
Rushing the clip release causes more problems than stubborn hardware itself. A quick yank may seem harmless, yet it can widen the clip opening just enough to create vibration later. Once metal clips lose tension, the blade may shift slightly while spinning. That movement often creates ticking noises that get louder over time.
Wrong screwdriver size creates another headache. A large flathead can slip off the clip edge and gouge the blade surface in seconds. Smaller precision tools usually provide better control near tight clip channels. Careful leverage matters far more than raw force.
Over-cleaning can also damage clip systems. Heavy liquid sprays near the bracket area may seep into the motor housing or soften adhesive finishes around decorative trim. Use damp cloths instead of soaking the blade assembly. Controlled cleaning protects both the electrical components and blade surfaces.
Ignoring loose screws before reinstalling blades creates unnecessary stress on the clip system. Check every visible fastener around the bracket and motor plate while the blades are removed. A slightly loose bracket can mimic a bent blade during operation. Tightening loose hardware early saves time later.
People often assume every fan uses identical clip hardware. That assumption leads to forced movement in the wrong direction. Some clips release sideways while others require downward pressure or a slight inward pinch. Watching how the first blade releases usually reveals the pattern for the remaining blades.
Signs The Clips Need Replacement
Loose blade movement after reinstalling usually points to worn clips. A properly seated blade should feel stable with minimal shifting at the mounting point. Slight movement may not seem serious at first, but repeated spinning increases stress on the bracket. That extra vibration can shorten motor life over time.
Visible rust around the clip edge is another warning sign. Surface discoloration may look cosmetic, yet corrosion weakens the clip tension gradually. Humid rooms accelerate this problem, especially near bathrooms or covered patios. Replacing rusty clips helps maintain safer blade support.
Warped clips often appear after someone pried too aggressively during earlier maintenance. Bent metal loses its original shape and may not grip the blade evenly anymore. Straightening clips by hand rarely restores proper tension completely. New clips usually provide better long-term stability than reused damaged hardware.
Strange noises can point toward clip fatigue too. Clicking sounds during medium speed often happen because the blade shifts slightly under rotation. A fresh clip may solve the issue faster than repeatedly tightening screws. Mechanical movement tends to worsen gradually rather than disappear on its own.
Replacement clips should match the original size and mounting design exactly. Generic hardware may fit loosely even if it looks similar at first glance. Compare width, thickness, and locking shape carefully before installation. Properly matched clips help maintain balanced blade spacing and smoother fan operation.


Best Small Flush Mount Ceiling Fans 2026 Ultimate Picks

Best Smart Ceiling Fan India 2026 For Effortless Comfort

Best Smart Ceiling Fans with Lights for 2026: Top Picks

Best Smart Home Non Ceiling Fans 2026 For Ultimate Comfort

Best Outdoor Misting Ceiling Fan 2026 For Ultimate Comfort

Best Ceiling Fans With Lights For Vaulted Ceilings 2026 Top Picks

Best Outdoor Ceiling Fans For Porch 2026 With Style And Breeze

Best WiFi Enabled Ceiling Fan 2026 For Effortless Comfort





