
How to Remove Ceiling Fan Cover Without Screws Easily
How to remove ceiling fan cover without screws sounds simple at first, yet plenty of people end up tugging, twisting, or forcing the wrong part. That’s where frustration kicks in. Some covers hide clips, tabs, or twist-lock systems so well that the whole thing feels glued in place. A little patience and the right approach can save you from cracked glass, bent metal, or a fan that suddenly rattles afterward.
Ceiling fans don’t always follow the same design. Older fixtures often use hidden grooves or pressure-fit covers, while newer models may rely on magnetic mounts or snap-on rings. That tiny detail changes everything. Trying to pry off the wrong section usually leads to chipped paint or damaged trim, and honestly, nobody wants a quick repair turning into a weekend headache.
Safety matters more than speed here. Turning off the power first prevents accidental fan movement and lowers the risk of electrical issues. A stable ladder also makes a huge difference because awkward angles tend to cause slips and rushed decisions. Funny enough, most cover damage happens from impatience rather than complicated hardware.
Some fan covers loosen with a gentle counterclockwise twist, while others need light pressure near hidden clips. You might hear a faint click before the housing releases. That small sound can feel oddly satisfying after struggling with a stubborn fixture for twenty minutes straight. Using your hands instead of sharp tools usually keeps scratches and dents from showing up later.
How to remove ceiling fan cover without screws also depends on the material of the fixture itself. Glass bowl covers can become slippery, especially in humid rooms, while plastic covers sometimes stick because of dust buildup or old paint around the edges. A microfiber cloth improves grip without damaging the finish. Little tricks like that save a surprising amount of hassle.
Dust accumulation often hides the release points completely. Wiping the edges before attempting removal makes it easier to spot seams or locking tabs. Also, ceiling fans installed in kitchens tend to collect grease residue that acts almost like adhesive over time. A gentle cleaning pass can loosen the housing naturally without excessive force.
Proper handling keeps the fan balanced after reassembly. Pulling unevenly or twisting too aggressively may shift brackets or loosen internal fittings. That’s why slow, controlled movement matters so much. The goal isn’t brute force. It’s understanding how the cover was designed to come off in the first place.
Once the cover is removed, cleaning the blades and motor housing becomes much easier. Dust buildup affects airflow more than people expect, and neglected fans often become noisier over time. A quick maintenance session while the cover is off helps extend the fixture’s lifespan. Small upkeep habits really do pay off down the road.
How To Remove Ceiling Fan Cover Without Screws
A stuck fan cover can make a simple bulb swap feel like a wrestling match on a ladder. The fixture looks smooth, the screws are nowhere in sight, and one wrong pull could crack the glass or bend the trim. That’s why how to remove ceiling fan cover without screws starts with reading the shape, the seams, and the way the cover sits against the fan body. Slow hands, steady footing, and safe power control matter more than muscle.
Start With Power And Setup
Safety comes before the cover moves even a little. Turn the fan off at the wall switch, then cut power at the breaker if you’ll be near wiring, bulbs, or the light kit. A fan that suddenly spins while your hands are near the glass can turn a small job into a nasty surprise. Keep the remote away too, because one accidental button press is all it takes.
A steady ladder makes the whole job less awkward. Place it so your chest faces the fan, not so you’re twisting sideways with one hand stretched over your head. That position gives you better control over the fan cover and keeps the glass from slipping if it releases suddenly. Shoes with grip help more than bare feet on a chair, and yeah, that chair shortcut is asking for trouble.
Good lighting also saves time. Use a flashlight or headlamp to inspect the seam where the cover meets the housing. Hidden tabs, shallow grooves, and twist-lock notches can blend into dust or painted edges. A quick wipe with a dry cloth often reveals the release points that were invisible a minute earlier.
Set a towel or small blanket below the fan before you start. It won’t rescue a heavy glass bowl from every fall, but it can soften minor slips and protect flooring from dust or dropped parts. Keep both hands free, and avoid holding your phone, screwdriver, and cover all at once. The less juggling involved, the smoother this gets.
Read The Cover Style First
Most screwless ceiling fan covers use one of a few common holding methods. Some are twist-lock covers, some rely on spring clips, and others use pressure-fit rims. A few newer designs even use magnetic trim, especially on low-profile fixtures. The trick is not guessing too hard before the fixture gives you clues.
A bowl-shaped glass cover usually needs support from underneath. Place one palm flat against the bottom, then try a gentle counterclockwise turn with the other hand near the rim. If it moves slightly and stops, don’t force it. That small movement usually means the cover is sitting in a groove and needs a little lift or wiggle to clear the tabs.
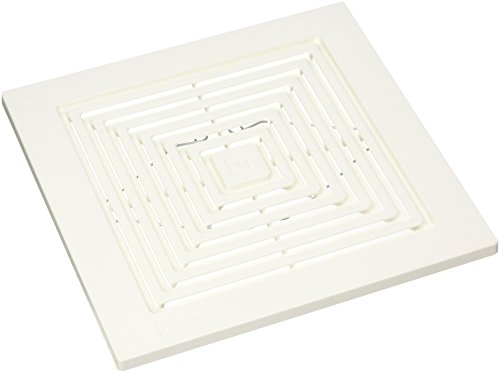
Flat covers behave differently. Many sit flush against the light kit and release through clips hidden along the edge. Pressing lightly around the rim can reveal a spot that flexes more than the others. That soft spot often marks the spring clip or latch point, so work there carefully instead of prying around the whole fixture.
Paint can make a cover feel permanently sealed. Ceiling paint, kitchen grease, or years of dust can glue the seam just enough to resist movement. A microfiber cloth wrapped around the rim gives better grip without scratching the finish. For nearby lighting upgrades, compare heat and bulb style before replacing parts, and use this guide to filament light bulb basics if the old bulb shape has you second-guessing the socket.
Use Gentle Pressure Instead Of Prying
Force is the enemy here. A screwless cover is usually designed to release through motion, not leverage. Prying with a metal tool can chip glass, dent the housing, or leave ugly marks around the fan body. Start with hand pressure because your fingers can feel movement before damage happens.
For twist-lock covers, push upward slightly while turning counterclockwise. That upward pressure takes weight off the locking tabs and helps the cover slide out of its track. Move slowly, then pause if the cover binds. A little back-and-forth motion often works better than one hard twist.
For clip-on covers, press the rim inward near one side while supporting the center with your other hand. You may hear a soft click as the clip releases. Don’t yank after the first click because the opposite side may still be attached. Ease one side down, then shift your support before freeing the rest.
Plastic covers need extra patience. Older plastic can become brittle from heat and age, especially around bulbs. If the cover creaks sharply, stop and inspect the seam again. Slow pressure protects the tabs, and replacing a broken plastic lens is often more annoying than the original repair.
Deal With Dust, Grease, And Stuck Edges
Dust does more than look bad. It hides seams, packs into grooves, and makes smooth glass harder to grip. Wipe the cover edge, housing, and lower bowl before trying again. That small cleaning step can turn stuck ceiling fan glass into a cover that finally moves.
Kitchen fans often collect a thin film of grease. That residue can act like weak glue around the rim, especially on fixtures above breakfast nooks or open kitchens. Use a slightly damp cloth with mild dish soap on the outside edge, then dry it fully before twisting. Wet hands on glass are a bad combo, so keep the grip dry before applying pressure.
Humidity can also make parts cling together. Bathrooms, laundry rooms, and covered patios tend to create sticky seams over time. A gentle tap around the metal rim with the heel of your hand may loosen buildup without damaging the cover. Keep the taps light because glass covers can crack from shock even if they look thick.
Painted-over edges need a careful touch. Run a plastic card along the seam to break the paint line, not a knife unless there’s no safer choice. A blade can slip fast above shoulder height, and the repair gets ugly in a hurry. For tight rooms where fan height and clearance already feel cramped, compare fixture depth with a low profile ceiling fan before replacing the whole unit.
Protect Wiring And The Light Kit
Once the cover loosens, don’t let it hang by surprise. Some covers drop straight down after the final tab clears, and that sudden release can tug on nearby bulb sockets or decorative rings. Keep one hand under the cover at all times. Controlled removal prevents cracks and protects the light kit from bending.
Look inside before touching wires or sockets. Burned marks, brittle insulation, or loose connectors mean the job should slow down right away. Replacing a bulb is one thing, but dealing with damaged wiring is another lane entirely. Cutting power at the breaker becomes even more important if anything looks scorched or loose.
Bulb heat can make covers stubborn too. Let the fixture cool before handling it, especially after using incandescent or decorative bulbs. Warm glass expands slightly, and hot bulbs can burn your fingers while you’re focused on the cover. A cool fixture gives you better grip and fewer surprises.
Never pull the light kit downward to make room. The wiring inside usually has limited slack, and tugging can loosen wire nuts or strain connections. Support the housing instead and work the cover free from its own locking system. Light kit protection keeps a simple cleaning job from becoming an electrical repair.
Know The Signs Of Different Release Systems
A twist-lock system usually has a shallow seam and a cover that moves a fraction of an inch before stopping. That tiny shift is your clue. Push up, rotate, and lower the cover only after the tabs clear. Twist-lock removal should feel firm but not violent.
A spring-clip cover often flexes along one side. Press near the edge and listen for a click or feel for a slight drop. These clips can be stiff from age, so don’t panic if the first press does nothing. Work around the rim with patient pressure instead of forcing one spot until it bends.
A magnetic cover feels different because it releases with a smooth pull rather than a twist or click. These are common on some modern, minimalist fixtures. Use both hands and pull evenly so the cover doesn’t tilt and scrape the housing. The magnetic hold may feel surprisingly strong at first, then release all at once.
A bayonet-style cover combines pushing and turning. The tabs sit inside short slots, so the cover must move upward before rotating free. This design can confuse people because turning alone does almost nothing. For lighting projects that overlap with indoor plant shelves or utility rooms, compare light spread and heat output through quantum board grow lights before mixing plant lighting with ceiling fixtures.
Handle Glass Covers Without Cracks
Glass covers deserve a slower rhythm. Support the bottom with your palm, then cup the side with your fingers so it can’t roll out of your hand. A wide bowl can feel secure until the last tab releases, then it shifts fast. Two-hand support keeps the weight balanced.
Don’t squeeze thin glass near the rim. Many covers are stronger at the curve than at the edge, and pressure in the wrong spot can create a crack. Hold the broadest part you can reach and keep your wrists relaxed. A death grip sounds safer, but it often causes slips.
Use a towel if the glass is dusty or slick. Wrap it loosely around the cover for grip, not so thick that you can’t feel movement. That bit of texture helps with stubborn twist-lock bowls. Better grip beats harder twisting almost every time.
Place the removed cover on a soft surface right away. Don’t set it on the ladder tray, washer lid, or edge of a counter where it can wobble. A towel on the floor or table gives it a safe landing spot. Small habits like that keep the project from turning into a cleanup job with broken glass.
Remove Stubborn Ceiling Fan Cover Without Damage
Some ceiling fan covers refuse to budge no matter how carefully you twist or press them. Your arms get tired, the ladder starts feeling less stable, and suddenly that “quick fix” turns into an annoying evening project. A lot of people hit this wall while trying to clean the fan, replace bulbs, or stop rattling noises. That’s why safe removal techniques, patience, and a better read on the fixture design matter so much.
Spot Signs Of A Jammed Cover
A cover that feels completely frozen usually has more going on than a simple locking tab. Dust buildup, paint overlap, moisture, or warped plastic can all create resistance around the seam. Look closely at the outer edge before forcing anything loose. Tiny clues like uneven gaps or sticky residue often point directly to the problem.
Kitchen ceiling fans tend to collect greasy film near the light kit. That grime hardens over time and makes twist-lock covers feel glued into place. A damp microfiber cloth with mild soap can loosen buildup enough for the cover to rotate again. Dry the rim afterward so your grip stays secure.
Bathroom fans create a different headache. Steam and humidity can swell certain plastic trims slightly, especially in older fixtures. The cover may release easier after the room cools and dries out for a while. Small environmental factors really do change how these covers behave.
Painted ceilings sometimes overlap the fan trim during touch-up work. That thin paint edge locks the cover more tightly than people expect. Run a plastic card carefully along the seam to separate the layers without scratching the housing. Gentle seam clearing protects the finish and avoids chipped paint around the fan body.
Keep Your Hands Safe During Removal
Glass bowl covers can slip fast once the locking tabs release. Always support the bottom with one hand before attempting any rotation or pressure near the rim. A falling cover can crack tiles, dent furniture, or worse, slice your fingers on impact. Controlled handling matters more than speed.
Wear gloves only if they improve your grip. Thick work gloves sometimes reduce finger control and make smooth glass harder to stabilize. Thin rubberized gloves tend to work better because they keep your hands steady without sacrificing feel. If the gloves slide, bare dry hands may actually be safer.
Never pull downward aggressively. A lot of screwless covers release with upward pressure first, especially bayonet or groove-lock systems. Pulling too early strains the housing and can loosen internal mounting hardware. Slow movement keeps the fixture balanced while you work.
Ladders deserve more respect than people give them. Leaning too far sideways while twisting a cover shifts your center of gravity quickly. Keep your chest square to the fixture and reposition the ladder instead of stretching awkwardly. Stable positioning lowers the chance of drops, slips, and rushed mistakes.

Handle Older Ceiling Fan Designs Carefully
Older fans often use brittle plastic rings or aging glass that doesn’t tolerate rough handling anymore. Years of bulb heat can dry out plastic around the tabs, making it crack with very little pressure. That’s why older fixtures need a slower pace and lighter touch. Aging materials react differently than newer fan covers.
Metal trim rings can also seize slightly from oxidation. A gentle back-and-forth motion helps loosen the connection better than one hard twist. You’re trying to wake the mechanism up, not overpower it. Tiny movements usually reveal where the cover wants to release.
Some vintage fixtures hide the retaining clips deeper inside the housing. Flash a light upward through the glass edge if possible. You may spot small metal tabs or grooves that explain why the cover isn’t moving. Knowing the lock style changes the whole approach.
If the fan shakes every time you touch the cover, stop and inspect the mounting bracket first. Loose ceiling fans create extra stress during removal and can make a simple task feel dangerous. For outdoor installations that already struggle with vibration or moisture exposure, compare airflow and lighting balance with an outdoor ceiling fan led light setup before replacing the fixture entirely.
Clean The Inside Before Reassembly
Once the cover comes off, take advantage of the open access. Dust around the motor housing and blade brackets builds up quietly over time. That buildup can reduce airflow and make the fan sound rougher during operation. Interior cleaning keeps the fixture running smoother and looking better.
Use a dry microfiber cloth first before reaching for cleaners. Excess moisture near sockets or wiring creates unnecessary risk. If grease or sticky residue is present, lightly dampen the cloth instead of spraying cleaner directly inside the fixture. A controlled wipe works better than soaking the area.
Inspect the bulb sockets while the cover is off. Dark discoloration, loose bulbs, or bent socket tabs may explain flickering lights or intermittent power. Small issues become easier to fix while everything is accessible. Catching those problems early can prevent future electrical headaches.
Fan blades deserve attention too. Dust buildup changes blade balance more than people realize, especially on lightweight blades. Wipe each blade evenly so one side doesn’t end up noticeably heavier than the others. Balanced cleaning helps reduce wobbling and annoying humming sounds later.
Put The Cover Back Without Misalignment
Reinstalling the cover the wrong way creates just as many problems as rough removal. Misaligned tabs can make the cover wobble, vibrate, or refuse to lock completely. Match the grooves carefully before applying pressure. A calm approach saves you from repeating the whole process again.
Twist-lock covers should rotate smoothly once the tabs line up correctly. If resistance appears immediately, stop and reposition instead of forcing the turn. Grinding or scraping sounds usually mean the tabs missed their track. Proper alignment protects both the housing and the cover edge.
Clip-on designs need even pressure around the perimeter. Press one side too hard and the opposite clip may pop back out. Work around the rim slowly until each section clicks into place. That soft snap is usually the sign the cover seated correctly.
Some homeowners struggle with remote syncing after reinstalling the fan cover or replacing bulbs. Electrical resets and remote interference can cause confusion, especially with smart setups. For nearby entertainment areas or smart home adjustments, compare signal reliability and controls with a remote control samsung smart tv setup that handles everyday use more smoothly.
Avoid Common Mistakes That Crack Covers
Metal screwdrivers are one of the biggest reasons fan covers end up chipped or cracked. Sharp edges concentrate pressure into one small point, especially on glass or thin plastic trim. Your hands spread force more evenly and let you feel resistance before damage happens. Tool-free pressure is usually the safer path.
People also rush once the cover finally moves a little. That tiny shift creates excitement, then the cover gets twisted too hard and slips free unexpectedly. Slow down after the first movement instead of speeding up. The final inch is often where accidents happen.
Hot bulbs create another hidden problem. Fixtures that were running recently stay warmer than expected, especially enclosed designs with older bulbs. Warm glass becomes harder to grip comfortably, and sweaty hands make slipping more likely. Let the fan cool completely before touching the housing.
One-handed removal rarely ends well with larger covers. Wide glass bowls become awkward fast once the locking tabs release. Use both hands whenever possible, even if the fixture looks lightweight. Balanced support prevents drops, chipped edges, and bent retaining rings.
Know When The Fan Needs Replacement
Sometimes the issue isn’t the cover at all. Older fans with warped housings, loose light kits, or damaged mounting brackets become harder to maintain safely. If the cover constantly sticks, rattles, or refuses to align, the fixture itself may be wearing out. Repeated mechanical problems usually signal deeper wear.
Cracked glass should never be ignored. Even hairline fractures can spread from vibration and heat changes during normal operation. Replacing only the cover may work if compatible parts still exist, but older models can make replacement parts frustratingly difficult to track down. At some point, swapping the fixture becomes the simpler option.
Fans installed in humid outdoor spaces face faster deterioration. Rusted clips, corroded sockets, and warped plastic covers show up more often on patio or porch fixtures. Moisture exposure quietly shortens the lifespan of many ceiling fan components. Regular cleaning helps, but it won’t stop every issue forever.
Noise changes deserve attention too. Clicking, grinding, or wobbling after reinstalling the cover can point to loose internal parts rather than the cover itself. Shut the fan off and inspect the mounting hardware before continuing regular use. Early troubleshooting helps prevent larger repair costs and keeps the fixture safer overhead.


Best Small Flush Mount Ceiling Fans 2026 Ultimate Picks

Best Smart Ceiling Fan India 2026 For Effortless Comfort

Best Smart Ceiling Fans with Lights for 2026: Top Picks

Best Smart Home Non Ceiling Fans 2026 For Ultimate Comfort

Best Outdoor Misting Ceiling Fan 2026 For Ultimate Comfort

Best Ceiling Fans With Lights For Vaulted Ceilings 2026 Top Picks

Best Outdoor Ceiling Fans For Porch 2026 With Style And Breeze

Best WiFi Enabled Ceiling Fan 2026 For Effortless Comfort





