
How To Remove Ceiling Fan Light Cover No Screws Fast
How to remove ceiling fan light cover no screws sounds simple until that stubborn glass dome refuses to budge. Plenty of people twist too hard, pull the wrong direction, or end up standing on a ladder wondering why nothing’s moving. Hidden clips, pressure-fit grooves, and locking rings can make a basic bulb replacement feel oddly frustrating. One wrong move, though, and that fragile cover can crack before you even realize what happened.
Ceiling fan manufacturers love using concealed mounting systems because they look cleaner and blend smoothly into modern rooms. That sleek appearance often hides tiny details most people miss at first glance. Some covers release with a gentle counterclockwise twist, while others need upward pressure before rotating. A few models even use spring-loaded clips tucked behind decorative trim, which explains why brute force usually backfires.
Safety matters more than speed here. Slippery glass, awkward arm angles, and dusty fixtures can turn a quick task into a mess if you rush it. Turning off the power first helps avoid accidental switch activation while working overhead. Also, placing one hand underneath the shade while loosening it prevents that heart-dropping moment when the cover suddenly slips loose.
Older ceiling fans create another headache because years of dust and heat can make glass covers stick tightly against the housing. Humidity sometimes worsens the issue, especially in kitchens or bathrooms where grime builds around the edges. A soft rubber glove often improves grip without applying excessive pressure. Little tricks like that save time and reduce the temptation to yank aggressively.
How to remove ceiling fan light cover no screws also depends heavily on the fixture style. Bowl-shaped domes, flush-mounted covers, and decorative globe fixtures each behave differently. Some designs include hidden notches or tiny tabs that release only from a certain angle. Missing those clues leads plenty of people into unnecessary frustration, especially late at night during a quick bulb swap.
Small details make a huge difference. Dusting the rim before twisting can loosen compacted debris around the edge. Supporting the glass evenly prevents uneven pressure that might crack thinner shades. Then again, some covers simply need patience instead of muscle. Slow, steady movement almost always works better than forcing the fixture.
Plenty of homeowners run into the same issue after moving into a new place where the ceiling fan manual disappeared years ago. That uncertainty makes the process feel more complicated than it really is. Once the locking mechanism becomes obvious, though, the entire task usually takes only a few minutes. A calm approach, solid footing, and careful handling keep the process smooth from start to finish.
How To Remove Ceiling Fan Light Cover No Screws Safely
A stuck glass shade can turn a simple bulb change into a weird little standoff on a ladder. The cover looks smooth, clean, and harmless, yet it refuses to move because the fasteners are hidden inside the design. That is where how to remove ceiling fan light cover no screws becomes less about strength and more about reading the fixture. A steady grip, safe footing, and a patient approach usually beat twisting harder every single time.
Hidden Fasteners
Most screwless ceiling fan light covers still have a locking system, even if nothing obvious shows from below. The trick is spotting whether the shade uses twist-lock grooves, spring clips, a pressure ring, or a snap-fit rim. Smooth glass domes often hide their release points along the upper edge where the shade meets the metal housing. A quick look around that seam can save you from pulling in the wrong direction.
A twist-lock cover usually needs light upward pressure before it turns. Press the glass gently toward the fan body, then rotate it counterclockwise with slow, even movement. The important point is not to squeeze the shade from one side because uneven pressure can crack thin glass. Use both hands if the ladder position allows it, and keep one palm underneath the cover as a safety catch.
Spring-clip covers behave differently. They may feel stuck because the clips are holding tension behind the rim, not because the glass is screwed in place. Slide your fingers around the edge and feel for tiny gaps, tabs, or areas that flex slightly. That little bit of movement often reveals the release direction without forcing the fixture.
Some modern bedroom fans use low-profile light kits that hide the cover almost flush against the motor housing. These designs look cleaner, but they can be less obvious during maintenance. Compare the style with a related fixture guide like ceiling fan design bedroom if the fan’s shape makes the cover hard to identify. A sleeker design usually means the locking mechanism is tucked higher and closer to the rim.
Before You Touch The Cover
Power should be off before your hands go near the light assembly. A wall switch can get bumped, and a remote-controlled fan can surprise you if someone else walks into the room. Turn the fan off, let hot bulbs cool, and use a sturdy ladder instead of a chair. That boring prep work protects your fingers, your balance, and the glass cover.
Glass shades collect dust, cooking grease, and humidity film over time. That buildup can glue the rim to the metal housing, especially in kitchens, laundry rooms, and bathrooms. Wipe the seam with a dry microfiber cloth first, then try moving the cover again. A cleaner edge gives your hands better traction and reduces the chance of sudden slipping.
Rubber gloves can make a stubborn cover much easier to control. Smooth glass gets slick fast, especially if your hands are warm or the fixture is dusty. A glove adds grip without harsh pressure, which matters because the cover may release all at once. Keep your face slightly to the side rather than directly beneath the shade.
Good lighting helps more than people expect. Shine a flashlight across the rim from an angle so tiny grooves, tabs, or clips cast shadows. That angled view can reveal the hidden release point you missed from directly below. Separately, if indoor plants sit below the fan and need better lighting after the cover comes off, upgrade the setup with a desk lamp for plants for steadier leaf growth away from the fixture.
Twist Lock Covers
Twist-lock covers are probably the most common screwless style. They rely on small internal lugs that slide into curved slots inside the fixture housing. The cover may move only a fraction of an inch before it releases, so don’t expect a big dramatic turn. Slow pressure and controlled rotation are the whole play here.
Place one hand under the center of the shade and the other around the side. Push upward gently, then turn counterclockwise. If nothing happens, stop and try a tiny clockwise movement first because some covers tighten slightly before releasing. The safe method is to test movement, not wrestle with it.
Heat can make the shade stick against the housing. Older incandescent bulbs throw off enough warmth to bake dust and grime around the rim. Let the fixture cool fully, then work the shade back and forth with small motions. That patient rocking can break the seal without stressing the glass.
A cover that drops suddenly can chip on a countertop, ladder, or floor before you can react. Hold it from beneath the whole time, even after it starts turning freely. Once the grooves clear the locking points, lower the shade straight down. That final move keeps the glass lip from scraping the fan housing.
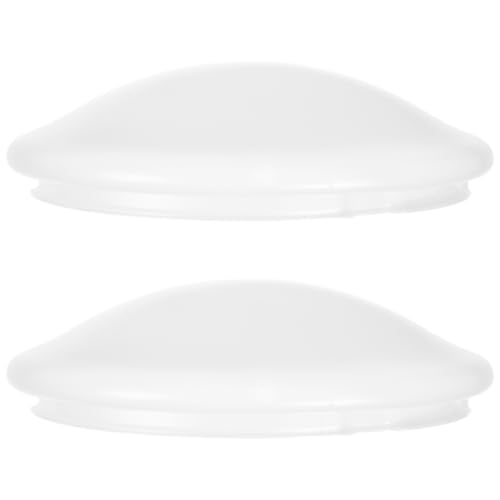
Clip On Covers
Clip-on covers can feel trickier because they don’t always rotate. These fixtures often use small spring clips that grab the shade from inside the rim. One side may loosen first while the opposite side stays locked. That uneven release is normal, but it demands gentle handling.
Feel around the shade edge for a spot that flexes. Press the clip inward or pull the glass slightly away from that side while supporting the bottom. The movement should feel springy, not gritty or forced. A stuck, grinding feeling usually means you’re pushing against the wrong part.
Some covers need one clip released first, then the shade tilts out at an angle. Keep the tilt small because glass rims can chip if dragged against metal. Once one side clears, support the weight and ease the rest of the cover free. The key factor is balance, not speed.
Never pry a clip cover with a screwdriver unless the manufacturer clearly designed a notch for it. Metal tools can scratch the finish, crack the shade, or bend a clip that still needs to hold the cover later. Use fingers, gloves, or a soft plastic tool if a little leverage is truly needed. Even then, soft pressure should do the work.
Stuck Glass Fixes
A stuck screwless cover usually has a reason. Dust, paint overspray, humidity, and heat can all make the shade cling to the housing. Start by cleaning the visible seam and giving the glass a few light taps with your fingertips. Those small vibrations can loosen debris without risking a crack.
Painted ceilings cause another headache. During room touch-ups, paint can bridge the gap between the fan trim and the light cover. Run a plastic card gently around the seam to break that thin paint line. Avoid blades near the glass because one slip can scar the fixture or your hand.
Rubber jar openers work surprisingly well on smooth domes. Wrap one around the glass to spread pressure evenly, then twist with steady hands. That extra friction helps without squeezing the cover too hard. The goal is controlled grip, not maximum force.
Warm rooms and damp air can make the rim tacky over time. If the fixture is in a bathroom, wait until the room is dry and cool before trying again. Moisture makes your grip worse and can make old grime feel sticky. A dry surface gives you a better shot at a clean release.
Common Mistakes
The biggest mistake is assuming no visible screws means the cover should pull straight down. Many screwless shades are locked into tracks, so pulling only increases tension. That can bend clips, chip glass, or loosen the light kit from the fan body. Direction matters more than muscle.
Another mistake is grabbing the shade from one narrow edge. Thin glass doesn’t like uneven pressure, especially near the rim where small imperfections may already exist. Support the center and side together so the load spreads across your hands. That simple habit protects the cover edge.
People also forget to check the decorative ring. Some fans hide a retaining ring above the shade that must turn separately from the glass. If the cover won’t move, try rotating the trim ring by hand while holding the glass still. A hidden ring can fool even someone who has removed plenty of regular fixtures.
Rushing the job creates avoidable mess. Broken glass on the floor, a damaged clip, or a loose housing turns a bulb change into a bigger repair. Slow down, scan the rim, and test each release style before applying more pressure. That approach keeps how to remove ceiling fan light cover no screws practical instead of risky.
Room Conditions That Matter
Ceiling fans in kitchens tend to collect the worst buildup. Grease floats upward, sticks to the light cover, and traps dust along the seam. The shade may look clean from below while the rim is practically sealed. Cleaning that area first makes the removal process far smoother.
Bathroom fans face humidity instead of grease. Moisture can leave mineral residue around the glass, especially if the fixture sits near a shower. A dry cloth and patient twisting usually help, but avoid spraying cleaner overhead. Liquid can run into the socket area, and that’s not a headache worth inviting.
Bedrooms usually have less grime, but low-profile fans can be harder to read visually. The cover may blend into the motor housing with no obvious seam. Use a flashlight from the side and look for tiny shadow lines. Those lines often mark the release path.
Plant rooms and indoor garden corners add their own twist because humidity and soil dust can settle around fixtures. To keep plant care separate from ceiling maintenance, compare lighting options through a desk lamp for plants instead of depending on a fan light for leaf support. Fan lights are usually built for room brightness, not targeted plant growth. That difference matters if consistent lighting is part of the setup.
Light Cover Safety Checks
Inspect the cover before reinstalling it. Look for chips along the rim, hairline cracks, or cloudy stress marks where the glass meets the housing. A damaged shade may still fit, but it can fail later from fan vibration. Replacing a cracked cover is safer than trusting weakened glass above your head.
Check the clips or grooves too. Bent clips may hold unevenly, while dirty twist tracks can make the cover hard to reinstall. Wipe the rim and housing before putting the shade back. Clean contact points help the locking system seat correctly.
Bulb choice affects future maintenance. Hot bulbs can bake dust onto the shade and make removal harder next time. Use bulbs that match the fixture rating and avoid oversized shapes that press against the cover. Proper clearance protects both the light kit and the shade.
Reinstall the cover with the same calm pace used for removal. Align the grooves or clips, support the glass from below, and listen for a soft seat rather than a harsh snap. The cover should feel secure without rattling. If it wobbles, remove it and reset the mounting points before turning the fan back on.
How To Open Stubborn Ceiling Fan Glass Cover Without Damage
Some ceiling fan covers seem almost welded into place after years of dust, heat, and vibration. You twist carefully, nothing moves, then suddenly the whole fixture shifts just enough to make your stomach drop. That awkward moment frustrates a lot of people because how to remove ceiling fan light cover no screws rarely feels obvious the first time around. Small details like hidden tabs, aging clips, and tight glass seals usually cause the trouble, not lack of strength.
Old Ceiling Fans Create Extra Problems
Older fans tend to develop stubborn light covers because heat slowly hardens dust and residue around the rim. Incandescent bulbs make this worse since they throw off far more warmth than modern LEDs. Over time, the grime almost acts like glue between the glass and metal housing. A slow approach with light pressure normally works better than trying to overpower the fixture.
Fans installed more than ten years ago often use brittle plastic locking tabs hidden above the glass edge. Those tabs may crack if the cover gets forced sideways instead of rotated properly. That is why checking the seam carefully matters before doing anything aggressive. The safest move is identifying the mounting style first.
Paint buildup creates another headache in older homes. Ceiling repainting sometimes seals the decorative trim ring directly against the light cover without anyone noticing. Run a plastic card carefully around the edge before twisting. That tiny step can free the glass shade without scratching the finish.
Outdoor ceiling fans age differently because moisture and temperature swings affect the hardware constantly. Corrosion around the rim can tighten the fit over time, especially near patios and covered porches. If the fixture outside feels harder to move than indoor fans, compare maintenance styles through 60 inch outdoor ceiling fan setups that deal with changing weather conditions more effectively. Durable outdoor fixtures still need careful handling during bulb changes.
Best Hand Position For Safe Removal
Hand placement matters more than most people expect. Grabbing the edge only with fingertips creates uneven pressure that can stress thin glass. Support the center from underneath while guiding the side gently with the other hand. That balanced grip protects the rim strength and keeps the shade stable if it suddenly loosens.
Standing directly under the cover is risky because some shades release faster than expected. Shift your body slightly to one side while keeping the ladder centered beneath the fixture. That angle gives you room to lower the cover safely instead of catching it awkwardly near your face. A little positioning change improves control and safety.
Dry hands usually work better than bare sweaty palms. Glass becomes slippery fast under warm lighting, especially after the fan has been running. Soft rubber gloves improve traction without squeezing the cover too tightly. Better grip means less panic and fewer sudden movements.
Some wide dome covers feel heavier than they look. Support the bottom even after the locking mechanism releases because the weight shifts quickly once the grooves disengage. That smooth lowering motion prevents chipped edges and cracked globes. Keeping steady pressure underneath protects the light fixture from accidental drops.
How To Spot Hidden Release Points
Not every screwless light cover releases the same way. Some twist slightly before dropping, while others tilt downward after one clip disengages. Tiny tabs or grooves near the edge often reveal the correct release point if you know where to look. A flashlight held sideways across the seam helps expose those hidden details.
Decorative trim rings can confuse the whole process. Many people try twisting the glass itself while the retaining ring above it is actually the movable piece. Test both parts separately using gentle motion rather than forcing either one. The correct section usually shifts slightly before the rest follows.
Low-profile bedroom fans hide seams especially well because the fixture blends into the motor housing. That clean appearance looks great until maintenance time arrives. Compare fixture layouts with a reading light not disturb partner setup if softer nighttime lighting matters more than relying heavily on overhead fixtures. Layered lighting can reduce how often the fan light even needs attention.
Some covers contain three internal locking tabs spaced evenly around the rim. Rotating the glass slightly while supporting upward pressure helps those tabs line up with release slots. Tiny movement matters here. The trick is patience and consistent pressure, not forceful twisting.

Glass Covers That Refuse To Twist
A cover that will not rotate at all usually has buildup trapped inside the seam. Dust mixed with humidity forms a sticky layer that tightens the fit around the housing. Wipe the edge thoroughly with a dry cloth first, then try small back-and-forth motions. That gradual movement often loosens the locking groove enough to release.
Some people make the mistake of using oil sprays around the fixture. That approach creates a mess near electrical parts and attracts even more dust later. Dry cleaning methods are safer and easier to control overhead. A rubber jar opener typically provides enough extra grip without introducing slippery residue.
Temperature also changes how the cover behaves. Warm glass expands slightly, which can tighten the connection against the housing. Wait until the fixture cools completely before trying removal again. Cooler glass usually responds better to gentle rotation.
Bulbs pressed tightly against the shade can create pressure from inside the fixture too. Oversized bulbs sometimes reduce the small movement needed for release. Double-check the bulb size listed for the fan before reinstalling everything. Correct bulb clearance protects both the glass dome and socket housing.
Removing Covers With Spring Clips
Spring clip covers feel different immediately because they usually flex slightly instead of rotating. Press one side carefully and you may feel tension pushing back against your fingers. That bounce means the clips are still holding the glass firmly in place. Controlled movement matters more than strength during this type of removal.
One clip generally releases first while the others continue supporting the shade. Tilt the cover gently once the first side loosens rather than yanking downward. Sudden movement can twist the remaining clips awkwardly against the glass edge. A smooth angle protects the clip hardware from bending.
Metal clips sometimes develop rust in humid rooms. Bathrooms and enclosed patios tend to create the worst buildup around spring mechanisms. If the clips feel gritty or frozen, stop and inspect carefully before forcing anything. Damaged clips may no longer hold the light cover securely afterward.
Replacement clips are not always easy to match later. Older ceiling fan brands may no longer sell identical hardware, which makes careful handling even more important. Keeping the original clips intact saves time, money, and frustration. Gentle removal preserves the fixture stability for future bulb changes.
Safer Bulb Changes After Removal
Once the cover comes off, most people rush straight to the bulb swap. That is usually the moment fingerprints, loose screws, or dropped bulbs become a problem. Set the glass shade somewhere stable first before touching anything else. A folded towel on a table protects the glass surface from small chips.
Check the socket while the fixture is open. Loose bulbs can flicker because vibration from the fan slowly affects the connection over time. Dust buildup inside the housing can also trap extra heat around the socket area. Cleaning lightly with a dry cloth helps maintain safe airflow around the components.
LED bulbs generally make future maintenance easier because they produce less heat. Lower heat reduces sticky grime around the rim and helps protect plastic locking parts from becoming brittle. That simple switch often means smoother cover removal later. Cooler fixtures place less stress on the internal hardware.
Some bedrooms benefit from softer layered lighting instead of relying entirely on the ceiling fan fixture. Explore a reading light not disturb partner option if nighttime lighting needs to stay focused and low-glare. Smaller task lighting can reduce how often the fan light gets used during late evenings. Less frequent use often means less heat and slower dust buildup around the light cover assembly.
Reinstalling The Cover Correctly
Reinstalling the shade too quickly creates many of the same problems that make future removal difficult. Dirt trapped in the grooves can jam the locking system before the cover seats properly. Wipe both the rim and housing first so the connection stays clean. A smooth fit protects the mounting points from unnecessary strain.
Twist-lock covers should turn smoothly without grinding sounds. If resistance feels uneven, stop and realign the grooves before tightening further. Forcing the rotation can chip the edge or cross the locking tabs inside the fixture. Proper alignment keeps the glass shade balanced while the fan runs.
Clip-on covers need equal pressure across all sides during installation. Push gently upward until each clip catches the rim securely. One loose side can create rattling noises once the fan starts spinning again. Stable attachment protects the light kit structure over time.
After reinstalling the cover, run the fan briefly on a low setting and watch for wobbling or vibration near the light fixture. A correctly seated cover should remain steady without rattling sounds or shifting movement. That final check helps confirm the locking system engaged properly and the glass sits evenly against the housing.


Best Small Flush Mount Ceiling Fans 2026 Ultimate Picks

Best Smart Ceiling Fan India 2026 For Effortless Comfort

Best Smart Ceiling Fans with Lights for 2026: Top Picks

Best Smart Home Non Ceiling Fans 2026 For Ultimate Comfort

Best Outdoor Misting Ceiling Fan 2026 For Ultimate Comfort

Best Ceiling Fans With Lights For Vaulted Ceilings 2026 Top Picks

Best Outdoor Ceiling Fans For Porch 2026 With Style And Breeze

Best WiFi Enabled Ceiling Fan 2026 For Effortless Comfort





