
How to Remove Ceiling Fan Light Cover With Clips
How to remove ceiling fan light cover with clips sounds simple until that stubborn cover refuses to budge. One wrong twist, a little too much pressure, and suddenly the glass feels like it might crack right in your hands. Plenty of people hit that wall after replacing bulbs, cleaning dusty fixtures, or trying to stop an annoying rattle overhead. Frustration builds fast because clip-mounted covers rarely look complicated, yet they can feel oddly tricky once you're standing on a ladder staring straight up.
Ceiling fan manufacturers love using spring clips because they keep the light cover snug and clean-looking. Still, those clips can grip tighter over time due to heat, dust buildup, or simple wear. A gentle approach matters more than brute force here. Small details like supporting the glass evenly, locating hidden pressure points, and understanding clip tension can save a whole lot of hassle and prevent cracked shades or bent hardware.
Removing ceiling fan light covers with clips also becomes more annoying in older homes where fixtures have collected years of grime. Sticky residue, paint overspray, and warped plastic parts can turn a quick bulb replacement into a mini headache. Nobody wants to wrestle with a fragile glass dome while balancing awkwardly overhead. Slow, steady movements usually work far better than aggressive pulling or twisting.
Different ceiling fan styles use slightly different clip systems, which explains why one fixture pops off easily while another feels practically glued in place. Some designs hide clips inside decorative trim rings. Others rely on spring-loaded tabs that release only when pressure is applied at the correct angle. Spotting those differences early helps avoid unnecessary force and keeps the fixture intact.
Safe handling matters just as much as technique. Dust-covered glass can slip unexpectedly, especially during warm weather or after long-term use near kitchens and bathrooms. A microfiber cloth for grip, a stable ladder, and enough lighting make the process smoother from the start. Little preparation steps may sound minor, but honestly, they prevent most of the common mishaps people deal with.
Ceiling fan maintenance doesn't need to feel like a wrestling match. Once the clip style becomes clear, the entire process feels far less intimidating. A calm approach, a bit of patience, and the right hand placement usually solve the problem without damaging the fixture or your nerves. How to remove ceiling fan light cover with clips becomes much easier once those hidden clip mechanics finally make sense.
How To Remove Ceiling Fan Light Cover With Clips
A stuck glass shade can turn a quick bulb swap into an awkward ceiling-side standoff. Arms get tired, dust falls in your face, and the cover still acts like it’s welded to the fan. That’s why how to remove ceiling fan light cover with clips needs a careful, hands-on approach instead of a hard yank and crossed fingers. The real win is protecting the glass, keeping the clips straight, and getting the job done without turning a small fix into a bigger repair.
Ceiling Fan Clip Covers
Clip-held light covers usually stay in place through spring tension, side pressure, or small metal tabs that grip the rim. That tight grip is useful because it keeps the shade from rattling while the fan runs. Still, the same tension can make removal feel weirdly stubborn after years of heat, dust, and vibration. A calm approach beats muscle here, especially with thin glass shades.
Many ceiling fan covers use three or four clips spaced around the edge of the glass. One clip may be fixed while the others flex, or all of them may spring outward slightly. This small design difference changes how the cover comes loose. Spotting the clip layout before pulling helps prevent bent tabs and chipped edges.
Older fixtures often hide the clips under grime or paint buildup. That’s where people get into trouble because the cover feels stuck, so they twist harder. A better move is to wipe around the rim first and look for tiny gaps where the clips meet the glass. For nearby lighting choices after maintenance, compare best wattage for desk lamp so task lighting feels comfortable without glare.
A common rule from old-school repair work says, “Force tells you something is still holding.” That line fits ceiling fan covers perfectly. If the shade won’t move, one clip is likely still engaged, or dust has sealed the rim slightly. Pause, shift your hand position, and work the cover loose with steady pressure instead of sudden movement.
Safety Setup Before Removal
Power safety comes first because light kits can still surprise you, especially in older homes with mixed wiring. Turn off the wall switch, then use the breaker if the fixture feels unreliable or if you’ll be touching metal parts near the socket. Let bulbs cool before reaching up because trapped heat inside a glass cover can linger. A cool fixture gives you better grip and less stress.
A sturdy ladder matters more than people like to admit. Standing on a chair or bed may feel quicker, but it leaves your hands doing two jobs at once: balancing your body and holding glass. Set the ladder so your chest lines up below the fan, not off to the side. That position gives better control and keeps the shade from slipping unexpectedly.
Use a towel, microfiber cloth, or thin work gloves to grip the cover. Smooth glass can feel secure for one second, then slide once dust breaks loose. The cloth also protects decorative glass from scratches while you press near the clips. Small prep like this makes ceiling fan light cover removal feel much less sketchy.
Clear the floor underneath before you start. Move plant stands, laundry baskets, pet bowls, or anything that could trip you while climbing down with the glass in hand. This sounds basic, but it prevents the classic “I got it loose and now I have nowhere to put it” problem. A nearby table with a soft towel gives the cover a safe landing spot.
Find The Clip Release Points
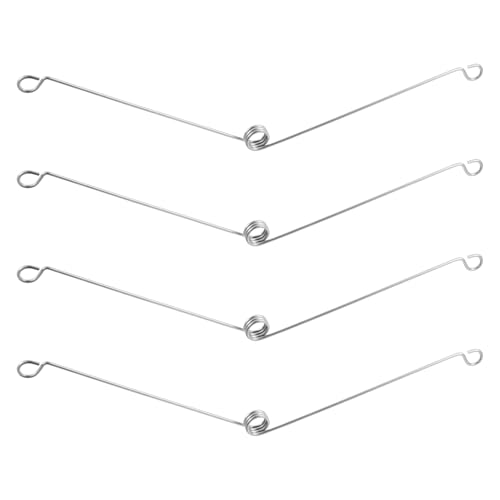
Release points are usually visible once you look at the rim instead of the center of the cover. Search for small metal pieces pressing against the glass edge or decorative ring. Some clips look like little fingers, while others sit flatter and blend into the trim. Good lighting helps because shadows can hide the exact spot where pressure needs to go.
Use one hand to support the glass from below and the other to press the clip outward. The cover may drop slightly as soon as one clip releases, so don’t let your supporting hand drift away. This is the moment where most breaks happen. Keep steady upward support until at least two clips are free.
Some covers need a push-up-and-tilt motion. Lift the glass gently toward the fan, press one spring clip away, then lower that side just a bit. Once one edge clears, rotate the cover slightly to free the next clip. The movement should feel controlled, not dramatic, because clip tension can snap back quickly.
Other covers release by squeezing two opposite clips at once. That style can be annoying because it feels like you need three hands. A helper can hold the glass while you press the tabs, but working alone is still possible if the cover is light. For a ceiling fan upgrade that may reduce fixture noise later, compare best quiet ceiling fans for bedroom before replacing an older rattling unit.
Loosen A Stuck Glass Cover
Stuck glass covers usually come from dust, heat, kitchen grease, bathroom humidity, or old paint near the trim. Don’t start by twisting hard because clip covers aren’t always designed to rotate. Instead, press gently around the rim with your fingers to break the dust seal. A soft wiggle can free the edge without stressing the glass.
A damp microfiber cloth can help if the rim feels grimy. Wipe the seam where the glass meets the metal ring, then wait a moment before trying again. Avoid soaking the fixture because water near electrical parts is never worth the risk. The goal is loosening residue, not washing the whole fan overhead.
Plastic pry tools can help, but metal screwdrivers are risky around glass. If you must use a tool, choose something thin, flat, and non-marring. Slide it near the clip area only, then apply gentle pressure while supporting the cover underneath. This protects the glass rim from chips and keeps the clip from bending too far.
Painted-over clips need extra patience. Score the edge lightly with a utility knife only where paint has bridged the seam, keeping the blade away from the glass face. Then press the clip again and check whether the cover moves. For another fan style to weigh during replacement planning, compare are retractable ceiling fans good before swapping a fixture just for easier cleaning.
Remove The Cover Without Damage
Even pressure is the secret once the clips start letting go. Don’t let one side hang while the other side stays trapped, because that twists the glass against the rim. Keep your palm under the center and use your fingertips to guide the released edge. Slow movement keeps the clips from scraping or popping loose too aggressively.
After the first clip releases, hold the cover slightly tilted but still supported. Press the next clip outward and lower that edge just enough to clear it. Repeat the same motion around the rim until the cover is free. This step-by-step rhythm protects spring clips and makes reinstallation easier later.
Set the glass on a towel with the open side facing up. That position reduces rolling and protects decorative edges from hard surfaces. Take a quick look at the clips before replacing bulbs or cleaning the inside of the shade. Bent clips can cause future rattling, so straighten them gently by hand if they look slightly off.
Clean the cover while it’s down, but don’t overdo it with harsh chemicals. Warm water and mild dish soap usually handle dust and light grime. Dry the rim fully before reinstalling because moisture can make the cover slippery and attract more dust. A clean rim gives the clips better contact without needing extra force.
Removing Ceiling Fan Glass Cover Clips Safely
Glass shades always seem heavier once they start slipping in your hands. A lot of people loosen the first clip correctly, then panic because the cover suddenly tilts sideways without warning. That awkward shift creates most of the chips, cracked rims, and bent clip brackets people deal with later. Removing ceiling fan glass cover clips safely depends more on hand control and patience than strength.
Hold The Glass The Right Way
Hand placement changes everything during ceiling fan maintenance. One palm should stay centered underneath the cover while your fingers stabilize the outer edge. Holding only one side creates uneven pressure, especially with wider dome-shaped shades. Balanced support keeps the glass from wobbling while clips release.
Heavy frosted covers can feel surprisingly slippery after years of dust buildup. A microfiber cloth adds grip without scratching the finish. Thin rubber-coated gloves also help if your hands get sweaty while reaching overhead. That extra traction gives better control during the trickiest moments.
People sometimes rush because their shoulders start getting tired. That’s usually when the glass slips slightly and catches against a clip. Pause for a second if your arms feel strained. Repositioning your grip protects the clip alignment and keeps the cover from scraping decorative trim.
Lighting matters more than expected here. Shadows near the clip edge make it harder to tell whether the glass has fully cleared the bracket. A small flashlight or nearby lamp helps reveal the release point clearly. For cooling upgrades in warmer rooms, explore best cooling outdoor ceiling fans before replacing an older fan that traps heat and moisture near the ceiling.
Clip Styles That Cause Trouble
Spring-loaded clips usually create the biggest headaches because they push back while you’re trying to lower the cover. The clip flexes outward for a second, then snaps right back into place if the glass shifts too early. Slow pressure works far better than quick movements. Keeping one edge slightly tilted helps maintain clearance.
Decorative trim rings can also hide the actual release mechanism. Some covers look threaded even though they’re held by tension clips underneath. Twisting too aggressively may crack older glass or warp thin metal trim. Spotting the difference between clip-mounted and twist-lock styles saves a lot of frustration.
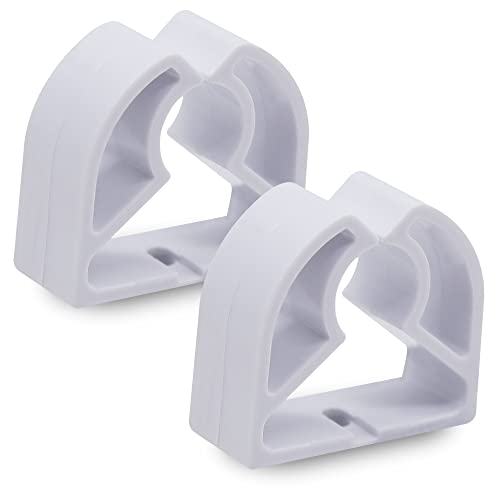
Plastic clips become brittle over time, especially near kitchens where heat and grease build up. Those clips may flex less than expected, so forcing them outward can snap the mounting point. Gentle movement and steady pressure reduce stress on aging hardware. Small cracks around the clip base usually signal the fixture needs extra care.
Fan vibration creates another issue people rarely notice. Years of wobbling can shift the glass slightly off-center, making one clip grip tighter than the others. That uneven tension explains why one side feels stuck while another loosens immediately. Correcting the angle slowly prevents uneven strain on the glass edge.
Cleaning Before Reinstalling
Dust buildup inside the light cover tends to spread farther than expected. Once the shade comes down, most people notice dirt rings near the rim and dead bugs trapped around the socket area. Cleaning those spots now prevents the fixture from looking cloudy again a week later. A damp cloth usually handles basic grime without damaging the finish.
Glass cleaner works fine on smooth shades, but avoid soaking the clip channels or socket area. Excess liquid can collect around metal parts and attract more dust later. Warm water mixed with mild dish soap handles most buildup safely. Drying the rim completely helps the clips grip evenly during reinstallation.
Check the clips while the cover is off. Bent brackets often cause rattling sounds or crooked installation later. Small adjustments with your fingers can restore the original shape without stressing the metal. Keeping the clips aligned reduces future removal headaches and protects the glass seating position.
Bulb heat sometimes leaves yellow residue near the top of enclosed shades. That sticky film traps dust quickly and dulls the light output. Replacing old bulbs with cooler-running LEDs can reduce future buildup inside the fixture. For energy-saving control options around the house, compare best wifi immersion heater timer setups that simplify appliance scheduling without constant manual adjustments.
Reinstall The Cover Without Stress
Reinstalling the glass usually feels easier than removal, but rushing here still causes chipped edges and crooked covers. Start by lining up the glass evenly beneath the fixture before touching the clips. Tilting the shade too early can knock one bracket sideways. Keeping the cover level prevents awkward pressure points.
Press one side upward gently while guiding the first clip over the rim. Then rotate slightly toward the next clip instead of forcing the entire cover straight upward all at once. That gradual motion keeps tension balanced across the fixture. You’ll feel the cover settle naturally once the clip pressure evens out.
A properly seated cover shouldn’t wobble or rattle during fan operation. Give the glass a light tap after installation to confirm it feels stable. If one edge looks lower than the others, remove the cover and check the clip spacing again. Uneven clips often create small vibrations that become annoying later.
Overtightening nearby screws can also affect the cover alignment. Some fan owners accidentally distort the light kit housing while replacing bulbs or cleaning trim. Gentle adjustments usually work better than cranking hardware down harder. The goal is secure placement, not maximum pressure.
Common Mistakes That Crack Covers
Twisting the wrong style of cover ranks near the top of the mistake list. People assume every ceiling fan light works like a screw-on globe, then apply force in the wrong direction. Clip-mounted shades rarely need heavy rotation. That confusion alone causes plenty of cracked glass edges.
Ignoring dust buildup creates another problem. Dirt packed around the rim can make the cover feel permanently stuck. Pulling harder only increases stress against the clip edge. Cleaning around the seam first gives the cover room to move naturally.
Using metal tools carelessly also damages decorative finishes fast. Screwdrivers may slip against the glass or scratch painted trim around the light kit. Plastic pry tools or a folded microfiber cloth provide safer leverage if extra help is needed. Protecting the trim surface keeps the fixture looking clean after maintenance.
Trying to remove the cover one-handed is probably the biggest gamble. Even lightweight shades become awkward overhead, especially while pressing clips at the same time. Supporting the glass fully reduces sudden slips and protects both the fixture and your floor below. A few extra seconds of caution preserve the entire light assembly.
Signs The Fixture Needs Replacement
Damaged clips eventually stop holding the cover securely. If the shade rattles constantly or slips downward after reinstallation, the brackets may have weakened over time. Small bends can sometimes be corrected carefully, but cracked mounting points usually signal deeper wear. Ignoring loose hardware increases the risk of falling glass later.
Rust near the clip base is another warning sign. Moisture from bathrooms, humid rooms, or outdoor-adjacent spaces slowly corrodes the metal. Corrosion weakens the tension needed to keep the cover stable during fan movement. Repeated removal also becomes harder because rough rust spots catch against the glass rim.
Warped plastic around the light kit housing often develops after years of heat exposure. That distortion throws the cover slightly off-center and changes how the clips align. Even if the shade still fits, the pressure may no longer distribute evenly. Uneven tension creates stress points that increase crack risk.
Persistent flickering, buzzing sounds, or excessive heat inside enclosed covers can point toward aging electrical parts as well. Replacing only the glass won’t solve those deeper issues. Sometimes the smarter move is replacing the entire fan or light kit instead of fighting repeated maintenance problems. A stable fixture with secure clip hardware makes future cleaning and bulb changes far less frustrating.


Best Small Flush Mount Ceiling Fans 2026 Ultimate Picks

Best Smart Ceiling Fan India 2026 For Effortless Comfort

Best Smart Ceiling Fans with Lights for 2026: Top Picks

Best Smart Home Non Ceiling Fans 2026 For Ultimate Comfort

Best Outdoor Misting Ceiling Fan 2026 For Ultimate Comfort

Best Ceiling Fans With Lights For Vaulted Ceilings 2026 Top Picks

Best Outdoor Ceiling Fans For Porch 2026 With Style And Breeze

Best WiFi Enabled Ceiling Fan 2026 For Effortless Comfort





