
How to Remove Flush Mount Ceiling Light Easily and Safely
Removing a flush mount ceiling light can feel like a daunting task, especially if you’re new to DIY home projects or worried about electrical safety. Whether you’re upgrading your lighting, replacing a broken fixture, or just want a change, knowing how to properly remove this type of ceiling light is crucial. This guide breaks down the process into clear, manageable steps to help you avoid common pitfalls, protect your ceiling, and work with confidence. You’ll also pick up essential safety tips to keep electrical mishaps at bay. By the end, you’ll see that with a little know-how and the right tools, removing a flush mount ceiling light is totally doable for anyone looking to refresh their space without calling a pro. Say goodbye to uncertainty and hello to a brighter, better-lit room.
Tackling a home improvement project can be nerve-wracking, especially when electricity’s involved. But removing a flush mount ceiling light doesn’t have to be a headache. Many homeowners hesitate because they’re unsure about the steps or worried about damaging their ceilings or risking a shock. Fear not — with some basic tools and a bit of patience, you can safely take down your fixture without breaking a sweat. This guide will walk you through everything, from turning off the power to carefully detaching the light, giving you the confidence to handle the task smoothly. So, roll up your sleeves and get ready to take charge of your lighting upgrade!
When it comes to removing a flush mount ceiling light, safety is the absolute priority. Before you even think about reaching up, make sure you switch off the circuit breaker that powers the light fixture. This simple step eliminates the risk of electric shock—something that many DIYers overlook in their enthusiasm. Testing with a voltage tester after shutting off the power ensures the electricity is really off and gives you peace of mind.
Gathering the right tools beforehand is another crucial move. You'll want a sturdy ladder, a screwdriver (usually a Phillips or flathead), a pair of needle-nose pliers, and possibly a voltage tester. Having everything at arm’s reach means you won’t be scrambling mid-task and risking accidents. Additionally, wearing safety glasses and gloves can protect you from falling debris or sharp edges around the fixture.
Many homeowners get tripped up by the awkward positioning and ceiling texture around the light. To avoid damage, cover the floor and any nearby furniture with a drop cloth or old sheets. This protects your space from dust, small screws, or bits of plaster that may fall during removal. Being well-prepared and cautious right from the start makes the whole process smoother and reduces unexpected headaches.
It's worth noting that some flush mount fixtures are heavier or secured differently depending on the brand or model. If you’re working with an older light or something that looks stubborn, don’t rush. Taking your time to carefully examine how the fixture is attached will pay off and keep your ceiling intact.
The actual removal of the flush mount light starts by locating and loosening the screws or clips that hold the fixture in place. Most flush mounts have screws on the sides or underneath the decorative plate. Carefully unscrew these while supporting the fixture to prevent it from falling abruptly. This steady grip is a key factor in preventing damage to both the light and the ceiling.
Once the screws are removed, gently pull the fixture away from the ceiling. You may notice wires connected to the base — don’t yank or force anything. Instead, carefully inspect how the wiring is connected. Often, you'll see wire nuts securing the fixture wires to your home’s electrical wiring. These nuts need to be unscrewed counterclockwise to release the connections.
If you’re unfamiliar with electrical wiring, this part might feel intimidating, but remember this is the moment where patience and attention to detail count the most. If possible, take a photo of the wiring before disconnecting — it’s a handy reference for reinstalling a new fixture or if you decide to call an electrician later.
Some fixtures have mounting brackets or plates attached to the ceiling box. After disconnecting the wires, unscrew these brackets to clear the way for the new fixture or just to finish the removal process. The strength and condition of these brackets can indicate whether your ceiling box is ready for a replacement or might need reinforcement.
Handling the wiring is often where DIYers feel the most unsure, but it doesn’t have to be complicated. Once the fixture is detached, making sure the wires are properly capped is essential to avoid accidental contact. Use wire nuts to cover exposed wire ends if you’re not immediately installing a new light.
Never mix up the wires. Typically, black or red wires are the “hot” wires, white wires are neutral, and green or bare copper are ground wires. If the colors don’t match or if you see more than one of each type, labeling the wires before disconnecting can save a headache later on.
If you discover frayed wires, corrosion, or damaged insulation, it’s a clear sign to consult a professional before proceeding. Electrical safety is not a place for shortcuts — cutting corners here can cause serious hazards.
After disconnecting and securing wires, you might want to use electrical tape around wire nuts for an extra layer of security. This simple tip keeps wire nuts in place and reduces the risk of wires loosening over time.
You might hit a few bumps when removing a flush mount ceiling light, especially if it’s been in place for years. One frequent problem is stripped or painted-over screws that refuse to budge. Using a screwdriver with a good grip, or applying a bit of penetrating oil, can help loosen stubborn screws. If the screws snap, a screw extractor tool might be your best friend.
Another tricky issue is dealing with fixtures stuck due to old paint or ceiling texture. Gently wiggling the fixture back and forth while pulling can sometimes free it. Avoid prying too hard with tools, as this risks damaging the ceiling surface.
If the fixture is particularly heavy or awkward to hold, get someone to help you. Teamwork not only makes the task easier but also safer, preventing accidental drops or injuries. Remember, knowing your limits and asking for help is a strength, not a weakness.
Lastly, be prepared for a bit of ceiling repair after removal. Small holes or chipped paint are normal, and having spackle or lightweight drywall compound on hand will speed up cleanup. This extra effort ensures your ceiling looks pristine and ready for the next lighting upgrade.

Not every flush mount light removal is a DIY job, and it’s important to recognize when it’s time to call in the pros. If your wiring looks outdated, damaged, or confusing, an electrician’s expertise can save you from costly mistakes or safety hazards.
Also, if your ceiling box feels loose, or the fixture seems to be attached to drywall alone without proper support, professional help is recommended. They can reinforce the mounting system and ensure the new fixture will be secure for years to come.
Complex lighting setups, like those involving dimmers, smart switches, or multiple circuits, may require specialized knowledge beyond basic fixture removal. In these cases, hiring a licensed electrician guarantees the job will be done correctly and up to code.
Finally, if you’re simply uncomfortable dealing with electrical components, don’t hesitate to seek help. There’s no shame in prioritizing safety and peace of mind over DIY pride. Sometimes, investing in a pro is the best way to protect your home and loved ones.
After removing your flush mount ceiling light, preparing the ceiling surface for the next step is vital. Check the ceiling box and surrounding area for any damage that might need patching or sanding. A smooth, even surface will make installing the new fixture a breeze and improve the final look.
If the mounting bracket was removed, replace or repair it to ensure a secure hold for the replacement light. Using a sturdy bracket designed for your fixture weight is a key factor in preventing future sagging or accidents.
Consider cleaning the area to remove dust and debris that could interfere with the new light’s installation. A fresh coat of paint or touch-up can also refresh the look, making the new fixture pop.
Finally, double-check that the electrical wiring is in good condition and ready for reconnection. This preparation step can save you from surprises and extra work when it’s time to install your new flush mount ceiling light.
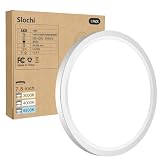
After safely removing your flush mount ceiling light, the next big step is selecting the perfect replacement. This choice isn’t just about looks — it’s about matching your room’s size, ceiling height, and lighting needs. A key factor is ensuring the new fixture complements your space without overwhelming it or leaving it underlit.
Think about energy efficiency too. LED flush mount lights are increasingly popular thanks to their long lifespan and low power consumption, helping you save on electricity bills while enjoying bright, consistent lighting. Plus, they often come in sleek designs that suit modern and traditional décors alike.
Don’t overlook the ease of installation as a major feature. Choosing a fixture with a straightforward mounting system saves you time and stress during setup. If you’re upgrading to a smart ceiling light, check compatibility with your home automation system to get the most out of your investment.
Remember, this is your chance to make a bold or subtle change that elevates your entire room’s atmosphere. Whether you want something minimalist, elegant, or eye-catching, the right replacement can completely transform your space.
Installing a new flush mount light might feel like a whole new challenge, but with the right approach, it can be surprisingly smooth. Start by turning off the power at the circuit breaker—this is an essential safety step that must never be skipped.
Next, carefully connect the fixture wires to the house wiring, matching black to black, white to white, and ground wires properly. If you snapped photos during removal, use them as a handy wiring map to avoid confusion. Secure all connections tightly with wire nuts and wrap them with electrical tape for extra protection.
Attach the mounting bracket or plate firmly to the ceiling box, ensuring it’s flush and stable. Then, secure the new fixture in place, tightening screws evenly to avoid uneven gaps or strain on the fixture. Taking your time here ensures the light sits perfectly flat and won’t loosen over time.
Once installed, restore power and test the light. If it flickers or doesn’t turn on, double-check your wiring connections and make sure the bulb is properly seated. Installation success boils down to attention to detail and patience.
Keeping your flush mount ceiling light clean and well-maintained not only improves its appearance but also extends its life. Dust buildup and grime can dull light output, making your room feel dimmer and less inviting.
A simple yet effective routine involves dusting the fixture every couple of weeks with a microfiber cloth or a feather duster. For deeper cleaning, gently remove the glass or plastic cover and wash it with warm soapy water. Make sure it’s completely dry before reattaching to prevent any electrical issues.
Inspect the fixture periodically for loose screws or signs of wear, tightening or replacing parts as needed. Using the correct wattage bulbs and replacing them promptly also contributes to a longer-lasting light fixture.
By incorporating these maintenance habits, you keep your flush mount ceiling light looking fresh and performing at its best, saving money on replacements and upgrades in the long run.
In today’s world, energy efficiency and environmental impact are major factors when choosing lighting solutions. Fortunately, flush mount ceiling lights offer plenty of eco-friendly options that combine style and sustainability.
LED bulbs dominate this space thanks to their impressive energy-saving features, using up to 85% less power than traditional incandescent bulbs. They produce less heat, last tens of thousands of hours, and reduce carbon footprint—benefits that are hard to ignore.
Some modern flush mount lights even come with built-in LEDs and dimmable settings, allowing you to tailor brightness while further conserving energy. Smart controls add convenience and optimize usage, turning off lights automatically when rooms are empty.
Switching to eco-friendly flush mount lights is not just a smart financial move but a meaningful step towards a greener home. It’s a win-win that brightens your space while caring for the planet.

Even with the best preparation, sometimes problems pop up after removing or installing a flush mount ceiling light. Common hiccups include flickering lights, buzzing noises, or a fixture that feels loose.
Flickering often points to loose wiring or incompatible dimmer switches. Double-check your connections and confirm that your dimmer supports the bulb type. Buzzing can be a sign of electrical interference or poor quality bulbs, so swapping them out might fix the problem.
If the fixture doesn’t sit flush against the ceiling or wobbles, it’s crucial to tighten mounting screws or adjust the bracket. Avoid forcing it into place as this could damage the ceiling or the fixture.
For more complex or persistent issues, consulting a licensed electrician is the safest choice. They can diagnose hidden problems and ensure your lighting system is both safe and fully functional.
Removing and replacing your flush mount ceiling light is a golden opportunity to upgrade your room’s vibe. Opting for fixtures with clean lines, minimalist shapes, or metallic finishes instantly brings a modern edge.
Mixing materials like glass and brushed metal adds texture and sophistication, while integrated LEDs offer sleek designs without bulky bulbs. Consider warm color temperatures to create cozy atmospheres or cooler whites for vibrant, focused lighting.
Layering lighting—combining flush mounts with floor lamps or wall sconces—enhances depth and flexibility in your space. Don’t forget to experiment with smart lighting systems that let you customize colors and brightness with a tap or voice command.
Embracing these modern lighting trends elevates your home’s style and functionality, making your living space truly shine.


Best Boat Black Lights 2026 For Nighttime Adventure

Best Black 30 Inch Light Bar Reviews – Top Picks of 2026

Best Black Light For Aquarium 2026 For Vibrant Glow

Best Black Light for Authenticating Glass 2026 Top Picks

Best Waterproof Spotlight 2026 That Outshines Expectations

Best Solar Spotlight For Yard 2026 Brighten Outdoor Spaces With Ease
Best Led Spotlight Rechargeable 2026 Bright Picks

Best Rechargeable Spotlight For Boat 2026 That Cuts Through Darkness





