
How to Remove Hunter Ceiling Fan Trim Ring Easily
How to remove hunter ceiling fan trim ring sounds simple right up until the ring refuses to budge, dust starts falling everywhere, and suddenly the whole thing feels way more delicate than expected. Plenty of people start twisting random parts out of frustration, only to hear that awful little cracking noise nobody wants to hear near a ceiling fixture. A stuck trim ring can hide screws, lock tabs, or pressure clips, so forcing it usually creates more trouble than the original problem. Small details matter here, especially if the fan has been hanging in place for years collecting grime and humidity.
Older ceiling fans often develop tight seals around the trim ring because of paint buildup, trapped dust, or slight warping from temperature changes. That’s why patience beats brute force every single time. Gentle pressure, steady support, and understanding how the ring actually connects can save a ton of unnecessary hassle. Some trim rings twist loose, while others pop downward with hidden clips tucked underneath the canopy edge.
Hunter ceiling fan components tend to fit snugly for a cleaner appearance, which looks great until maintenance day rolls around. Still, the cleaner finish also means fewer exposed screws and less visible hardware cluttering the room. A careful approach prevents scratches on the ceiling canopy and keeps decorative finishes intact. Nobody wants a simple cleaning project turning into chipped paint or bent metal.
Dust buildup around ceiling fans creates another headache people rarely expect. Once the trim ring comes off, layers of compacted dust and debris usually appear around the mounting area. That hidden buildup can affect airflow, create rattling noises, or even trap moisture in humid rooms. Cleaning these sections properly often makes the fan quieter and helps it look noticeably fresher afterward.
Lighting kits add another layer of confusion because wires and glass fixtures can block access around the trim ring area. Some designs include decorative locking rings that sit tighter than expected, especially after years without maintenance. A calm step-by-step process keeps delicate parts from slipping out of place. Slow movements matter more than strength here.
Safe ceiling fan maintenance also means paying attention to balance and support while handling overhead parts. Loose trim pieces can fall faster than expected, particularly with lightweight plastic designs. Supporting the ring with one hand while loosening clips with the other helps avoid sudden drops. Little precautions like that save both the fixture and your nerves.
Rooms with textured ceilings or older paint jobs create extra friction around canopy trim rings too. Paint sometimes seals the edge so tightly that the ring feels permanently attached. A thin plastic tool or gentle fingertip pressure around the perimeter usually works better than metal prying tools. Scratches near the ceiling line stand out more than most people realize.
How to remove hunter ceiling fan trim ring becomes much less stressful once the hidden attachment style is identified. Some fans rely on quarter-turn locking systems, while others use tension clips designed to snap firmly into place. Spotting that difference early prevents unnecessary force and protects the finish around the housing. Honestly, a few extra minutes of inspection can save a whole afternoon of regret.
How To Remove Hunter Ceiling Fan Trim Ring Safely
A stubborn ceiling fan trim ring can turn a small cleaning or repair job into a forehead-scratching mess. The ladder feels wobbly, the ring refuses to move, and one wrong twist could scratch the canopy or snap a plastic tab. That’s where how to remove hunter ceiling fan trim ring becomes less about muscle and more about patience, safe handling, and spotting how the ring is actually held in place.
Trim Ring Basics
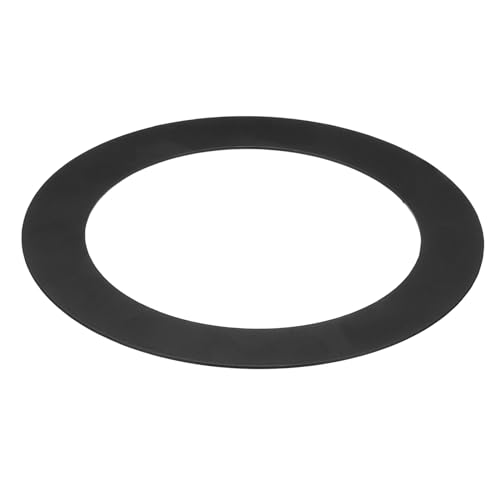
A Hunter ceiling fan trim ring usually sits around the canopy to hide screws, mounting hardware, and small gaps near the ceiling. That clean look is nice, but it also means hidden clips, tight seams, or twist-lock edges can be hard to see from below. The ring may look like one solid piece with the canopy, especially if dust or paint has sealed the edge. Slow inspection saves headaches here.
Most trim rings release in one of three ways: a gentle twist, a downward pull, or pressure on small tabs. The tricky part is that different Hunter fan styles don’t always behave the same. A ring that twists on one model might snap down on another, so forcing the wrong motion can cause cracked plastic or bent metal trim. A flashlight helps more than guesswork.
Paint is a sneaky troublemaker too. Ceiling paint can dry along the trim ring edge and make the part feel glued in place. A careful finger check around the seam can reveal whether the ring is truly locked or just stuck by old paint. Use gentle pressure, not a screwdriver jammed into the edge, because ceiling marks are annoying to fix.
Dust can also pack into the seam and make the ring drag against the canopy. That buildup is common in kitchens, bedrooms with ceiling vents, and rooms where windows stay open often. Before pulling harder, wipe the ring edge with a dry microfiber cloth to reduce grit. Cleaner contact points make ceiling fan trim removal smoother and less risky.
Safety First Steps
Power should be off before your hands go near the fan housing. Use the wall switch and, for extra caution, shut off the breaker if you’ll be near wiring or removing the canopy afterward. A trim ring itself may not be wired, but the parts behind it can be. Electrical safety isn’t dramatic; it’s just smart.
A steady ladder matters more than people want to admit. Standing on a chair or stretching from the side makes both hands less useful, and that’s when trim rings drop or get twisted unevenly. Place the ladder so your chest faces the fan directly. That position gives better control over pressure, balance, and overhead reach.
Remove fragile pieces nearby before working above your head. Glass shades, bulbs, and pull chains can get bumped while you’re focused on the trim ring. If a bulb is already jammed in place, pause the fan job and use a safer method first; for stuck lamp issues, solve the grip problem with remove stuck light bulb before working around the fixture. Small detours can prevent broken glass and a bad afternoon.
Gloves can help, but bulky gloves may make small tabs harder to feel. A thin pair with decent grip is usually better than thick work gloves. Keep a small container nearby for screws if the ring reveals fasteners underneath. Losing one screw inside carpet turns a simple job into a scavenger hunt.
Release Methods That Work
Start with the lightest method first. Place both hands on opposite sides of the trim ring and try a small counterclockwise turn. Keep the movement short, almost like testing a jar lid before committing. If it shifts even a little, you’ve likely found a twist-lock trim ring.
If twisting does nothing, try a gentle downward pull from two sides at once. Some Hunter trim rings use tension clips that release with even pressure. Pulling from only one side can tilt the ring and jam the opposite clip harder. Balanced pressure protects the clip points and keeps the ring from warping.
A stuck ring may need the seam loosened before it moves. Run a plastic putty knife or old plastic card around the edge, staying shallow and slow. Avoid metal tools unless there’s no other choice because they can gouge paint or scratch the canopy finish. The goal is to break paint adhesion and dust buildup, not pry the fan apart.
Listen for the release. A light pop usually means a clip let go, while a grinding sound may mean the ring is scraping old paint or debris. Stop if the trim flexes too much. Flexing is a warning sign, especially on older plastic rings that have become brittle from heat near the ceiling.
Common Mistakes To Avoid
The biggest mistake is assuming every trim ring unscrews. Many people twist harder and harder, then wonder why the plastic tabs snap. Hunter designs can vary by model, age, and canopy style. Check for visible tabs, small notches, or hidden screw access before adding force.
Another mistake is working with the fan blades still moving or recently used. Let the fan stop fully and give the motor housing a moment to settle. Warm parts can feel slightly expanded, which may make tight trim rings even more stubborn. Cool, still parts are easier to handle with control.
Don’t yank the ring downward like a pull-chain switch. That fast movement can snap clips, knock dust into your eyes, or loosen nearby canopy parts. If the ring drops suddenly, it can also scratch the downrod or light kit. Slow pressure keeps decorative trim and mounting hardware in better shape.
Lighting choices can make the job easier after everything is back together. Bright, low-profile room lighting helps reveal dust rings, uneven ceiling paint, and small hardware gaps during future maintenance. For rooms where ceiling fixtures feel cramped or dim, compare led lights for dorm room to improve visibility without relying only on the fan light.
Cleaning After Removal
Once the trim ring is off, don’t rush to snap it back on. The exposed area often holds sticky dust, paint flakes, and fine lint from years of airflow. Wipe the ring with a damp cloth, then dry it fully before reinstalling. Moisture trapped near the canopy can attract more grime later.
Check the inside edge for cracked tabs or worn clip marks. A small crack may still hold for now, but it can fail during the next removal. If the ring feels loose after cleaning, inspect how each clip seats against the canopy. A secure fit should feel firm without needing harsh force.
Clean the canopy edge too. A smooth contact surface helps the ring twist or snap back into place without grinding. Avoid spraying cleaner directly overhead because liquid can run toward the fan housing. Apply cleaner to the cloth first for controlled cleaning and safer maintenance.
Some rooms are better suited to simpler ceiling fan designs, especially where maintenance access is tight. Low ceilings, rentals, and small bedrooms can benefit from cleaner profiles with fewer decorative parts to remove. For a simpler setup in those spaces, compare flush mount ceiling fans without lights before choosing another fan with extra trim pieces.
Best Way To Remove Hunter Fan Canopy Trim Ring
That moment after the trim ring finally loosens can feel oddly satisfying, but the job usually isn’t finished yet. Dust hides inside the canopy, clips may look slightly bent, and the ring might not snap back as smoothly as expected. The best way to remove hunter fan canopy trim ring without damaging anything depends on careful reassembly, checking hidden wear, and spotting small issues before they turn into rattles or wobbling later.
Inspecting The Ring Carefully
Set the trim ring on a flat surface after removal and look closely around the inner edge. Small stress marks near clip points can signal weakening plastic, especially on older fans exposed to heat for years. Those marks may seem harmless now, but repeated removal can widen tiny fractures over time. Catching wear spots early helps avoid surprise breakage later.
Metal trim rings deserve attention too. Thin decorative rings sometimes bend slightly during removal if pressure was uneven. A bent edge can stop the ring from sitting flush against the canopy, which creates visible gaps near the ceiling. Gentle reshaping by hand usually works better than using pliers or hard tools.
Check the clip tension before reinstalling the ring. Loose clips can cause subtle rattling sounds whenever the fan speed changes. Those little noises tend to get more irritating at night when the room is quiet. A stable fit keeps fan vibration, noise control, and appearance much more consistent.
Dust buildup often hides scratches and paint damage until bright light hits the surface. Wipe the ring completely clean before reinstalling it. Soft microfiber cloths work best because rough towels can leave faint swirl marks on glossy finishes. Tiny cosmetic details become surprisingly noticeable once the ceiling fan light is switched back on.
Handling Tight Ceiling Spaces
Low ceilings make trim ring removal more frustrating because hand angles become awkward fast. Knuckles scrape the ceiling, fingers lose leverage, and one uneven pull can jam the ring harder into place. A shorter ladder setup often provides better control than stretching upward from below. Comfortable positioning helps maintain steady pressure and safe movement.
Flush mount ceiling fans create another challenge because the canopy sits closer to the ceiling surface. There’s less room to grip the trim ring edge, especially if the fan design uses decorative contours instead of a flat lip. Sliding fingertips along the perimeter usually reveals the best release point. Tiny changes in grip angle can make a stubborn ring suddenly loosen.
Rooms with textured ceilings add friction around the trim edge too. Popcorn ceilings and layered paint textures can catch against rotating trim rings during removal. Moving slowly helps prevent paint peeling near the canopy line. Once that paint tears, repairs become more annoying than the original fan project.
Outdoor lighting nearby can make ceiling fan maintenance easier during evening repairs. Strong directional lighting helps reveal clip seams and small screw openings without harsh overhead glare. For brighter visibility around garages, patios, or covered porches, compare solar motion sensor light outdoor waterproof setups that illuminate tight work areas more evenly.
Reinstalling Without Damage
Reinstallation should feel smooth, not forced. If the trim ring fights back during alignment, stop and check the clip position again instead of pressing harder. Misaligned clips can bend inward and weaken permanently after one bad installation attempt. Gentle alignment protects locking tabs, decorative edges, and canopy stability.
Twist-lock trim rings usually need only a short rotational movement before locking into place. Over-tightening can create stress on plastic edges, especially near the locking channels. The ring should sit snugly without grinding against the ceiling. A properly seated ring looks balanced from every angle underneath the fan.
Some homeowners accidentally pinch wires between the canopy and trim ring during reassembly. That mistake can create strange buzzing sounds or pressure points near the motor housing. Keep wiring tucked neatly before snapping anything back into position. Organized wiring supports safer operation and cleaner airflow around the fan body.
Fan accessories can simplify maintenance later too. Remote systems reduce the need for repeated pull-chain handling, which lowers vibration near canopy connections over time. For smoother control upgrades after maintenance, explore ceiling fan remote control kit options that help reduce unnecessary strain on older fan hardware.

Signs The Trim Ring Needs Replacement
Not every trim ring survives years of removal, cleaning, humidity, and heat exposure gracefully. Brittle plastic becomes more common in older homes where attic temperatures climb during summer. If the ring flexes too easily or feels chalky, replacement may be the smarter move. Weak trim pieces tend to fail suddenly during the next cleaning session.
Cracked clips are another warning sign people often ignore. A trim ring with one broken clip may still stay attached for a while, but uneven tension creates wobbling or rattling later. Those noises usually get worse as fan speeds increase. Replacing worn trim pieces restores secure mounting and cleaner canopy alignment.
Paint damage around the ring edge can also make older trim look rough even after cleaning. Repainting around the canopy sometimes helps, though mismatched ceiling textures may still stand out slightly. In some cases, replacing the trim ring creates a cleaner finish than repeated touch-up work. Cosmetic details matter more in rooms with bright overhead lighting.
Warped trim rings can interfere with smooth locking too. A ring that no longer sits evenly may pop loose unexpectedly after installation. Heat exposure from attic spaces and nearby light kits can slowly distort thin materials over time. Stable trim fit helps preserve both visual balance and fan reliability.
Reducing Future Maintenance Problems
Regular cleaning keeps trim rings from sticking so aggressively later. Dust mixed with moisture creates a gritty layer that behaves almost like glue near the canopy seam. Wiping the edge every few months makes future removal much easier. Small maintenance habits prevent stubborn buildup and reduce unnecessary force during repairs.
Humidity control inside the room matters more than people expect. Bathrooms, kitchens, and laundry spaces expose ceiling fans to moisture that can tighten seams and encourage grime accumulation. Better ventilation slows down those problems over time. Cleaner air conditions support smoother trim ring movement and less corrosion.
Overtightening nearby screws can also affect trim ring alignment. Some homeowners crank mounting screws too tightly after fan repairs, which slightly shifts the canopy position against the ceiling. That extra pressure can pinch decorative trim sections unevenly. Balanced hardware tension helps maintain proper spacing, stable canopy fit, and easier future maintenance.
Quick visual inspections after seasonal cleaning make a huge difference too. Look for dust trails, uneven gaps, or tiny movements around the ring while the fan operates. Small clues usually appear before larger issues develop. Spotting those early signs keeps maintenance simpler and avoids frustrating repairs later.


Best Small Flush Mount Ceiling Fans 2026 Ultimate Picks

Best Smart Ceiling Fan India 2026 For Effortless Comfort

Best Smart Ceiling Fans with Lights for 2026: Top Picks

Best Smart Home Non Ceiling Fans 2026 For Ultimate Comfort

Best Outdoor Misting Ceiling Fan 2026 For Ultimate Comfort

Best Ceiling Fans With Lights For Vaulted Ceilings 2026 Top Picks

Best Outdoor Ceiling Fans For Porch 2026 With Style And Breeze

Best WiFi Enabled Ceiling Fan 2026 For Effortless Comfort





