
How to Remove Recessed Light Housing Easily and Safely
Tackling the task of how to remove recessed light housing can seem daunting if you're not a seasoned DIYer, but it's more manageable than you might think. Whether you're upgrading your fixtures, fixing electrical issues, or just swapping out old units, knowing the right steps will save you time, frustration, and possibly a costly call to an electrician. Many homeowners face common challenges like tight spaces, tricky clips, or unfamiliar wiring—issues that can stall progress and lead to mistakes. This guide offers clear, practical tips to navigate those hurdles with confidence. From identifying different housing types to the safest way to detach them, you’ll find the key insights that make this project approachable. Plus, it highlights important safety considerations to keep you protected throughout the process. With this knowledge, you'll be able to streamline your lighting project and bring fresh style or functionality to your space without sweating the small stuff.
If you've ever stared up at a recessed light wondering, "How the heck do I get this thing out?" you're not alone. Removing recessed light housing can be a real head-scratcher, especially when hidden clips and wiring come into play. But don't let that intimidate you! With a little know-how and the right approach, you can handle this task smoothly and safely. This guide is packed with important pointers that strip away the confusion and help you tackle the removal without breaking a sweat. Whether you're aiming to replace outdated fixtures or simply perform maintenance, knowing the correct steps makes all the difference. Ready to get your hands a bit dirty and brighten up your space with ease? Let’s break down this DIY challenge into simple, manageable chunks that even beginners can nail.
Recessed light housings come in a variety of styles, each with its own quirks when it comes to removal. The first key factor to a smooth removal process is to know exactly which type you’re dealing with. For instance, new construction housings are usually nailed or screwed into ceiling joists, making removal a bit more involved, while remodel housings are designed to clip into drywall and are often easier to take out. Getting a handle on the kind of housing you have can save hours of frustration and help you prepare the right tools before you start.
Many remodel housings use spring clips or locking tabs that snap into place, so applying gentle pressure at the correct points can loosen them. In contrast, new construction housings might require unscrewing or even cutting drywall to access. Some newer models even have quick-release mechanisms, which is a huge benefit for DIY enthusiasts wanting a hassle-free process. Identifying these variations early on is a major advantage that helps prevent damage to your ceiling or fixture.
Knowing whether your recessed light housing is IC-rated (for insulation contact) or non-IC also affects removal, especially if your ceiling is insulated. If insulation surrounds the housing, it’s critical to carefully handle and avoid disturbing the insulation material while removing the fixture to maintain energy efficiency and safety. In short, the first step in the process is to pull out your flashlight and examine your ceiling to identify these critical housing details.
Lastly, if your recessed light has a trim or cover, removing that first is often the main key to accessing the housing beneath. Some trims twist off, others pull straight down, so test carefully. This small but important step can make the housing removal easier and prevent you from damaging the trim or ceiling paint.
Before diving into removing recessed light housing, gearing up with the right tools is a vital factor. Typically, you'll need a screwdriver set (both flat and Phillips heads), a flashlight, needle-nose pliers, wire cutters, and possibly a voltage tester. Each of these tools plays an important role in making sure you can safely and efficiently tackle the job without hitting snags. Missing even one can lead to frustrating pauses or worse—damage to your fixtures or injury.
One of the most important points to highlight is safety. Electricity and recessed lighting go hand in hand, so cutting power at the breaker box before you touch any fixture is a non-negotiable step. Use a voltage tester to confirm the power is off—never assume. This precaution protects you from shocks and allows you to work with peace of mind, focusing on removal without risk.
Gloves and safety goggles should also be on your checklist, especially if you suspect old wiring or fragile glass bulbs. These help guard against cuts or electrical sparks during the process. Working in a well-lit area and having a sturdy ladder or step stool are additional safety basics that should never be overlooked.
Lastly, if you're unfamiliar with electrical wiring or encounter unexpected wiring connections, calling a licensed electrician is the smartest move. Knowing your limits is a strength, not a weakness. This helps avoid costly mistakes and keeps your home safe. Always remember, preparation and safety go hand in hand for a successful project.
Starting off, after cutting the power and removing the light bulb and trim, the main goal is to free the housing from the ceiling. For remodel housings, gently pressing or squeezing the spring clips inward while pulling down usually works. These clips are designed to grip the drywall, so applying even pressure is the main key to avoid damage. Take your time to avoid tearing the ceiling, which can lead to costly repairs.
For new construction housings, you'll often find screws or nails securing the housing to ceiling joists. Use a screwdriver or pry bar to loosen these fasteners carefully. Sometimes the housing is attached to a frame or bracket, so watch out for hidden screws or clips. Removing these correctly means you won't damage the framing or ceiling structure, which is essential for keeping the ceiling intact.
When the housing is loose, the next big hurdle is wiring. Disconnecting electrical wires requires identifying the connectors, usually wire nuts or push-in connectors. Carefully unscrew or pull these apart, but keep track of which wires connect where, especially if you plan to reinstall or replace the fixture. Taking photos before disconnecting is a simple yet powerful tip that saves headaches later.
At this point, the housing should come out fully, leaving a clean hole for your next step. If the housing resists, double-check for missed screws or clips—sometimes manufacturers use extra fasteners for security. A little patience here goes a long way in avoiding ceiling damage. Remember, gentle persistence beats brute force every time.

One frequent pain point homeowners face is stubborn or stuck recessed light housing. Over time, clips can rust, screws can seize, or paint can glue fixtures in place. These scenarios can test your patience but don’t panic. Using a bit of penetrating oil on screws or clips can help loosen rusted parts. Let the oil sit for a while before trying removal again, which often makes the difference between success and frustration.
Another tricky situation is dealing with tight or cramped ceiling spaces where maneuvering tools and hands is difficult. In these cases, using specialized tools like long-nose pliers or flexible screwdrivers can give you the reach and control you need. Removing trim first to gain extra clearance can also make the process smoother. The key is to avoid forcing anything that might crack drywall or damage wiring.
Electrical wiring can also cause concern, especially if previous work was done improperly or wiring is tangled. Here, it’s crucial to take your time identifying wires, following color codes, and ensuring you have a solid grip on connections before disconnecting. Labeling wires or snapping photos before unplugging is a major benefit for troubleshooting and future installation.
Lastly, if your ceiling is textured or painted heavily, the housing might be painted over or stuck with debris. Using a putty knife or flat pry bar carefully around edges can help break the seal without tearing drywall. Being mindful and working slowly can save your ceiling’s appearance and keep your project looking sharp.
Once the recessed light housing is out, the next step is to prep the area for new installation or repairs. One key factor here is inspecting the electrical box and wiring for wear or damage. Look for frayed wires, corrosion, or loose connections—these are red flags that might need professional attention before proceeding.
You’ll also want to patch or smooth any ceiling damage from removal, especially if clips or screws caused minor holes or tears. Using lightweight spackle or drywall repair kits can get your ceiling back in shape fast. This prep work makes your new installation look clean and professional, and it avoids future headaches with cracking or peeling.
If you’re upgrading to newer, more energy-efficient recessed lights, sizing the hole properly is critical. The hole should match the new housing dimensions exactly for a snug, secure fit. Measuring twice and cutting once applies here—careless sizing is one of the most common mistakes that leads to installation problems.
Finally, double-check your electrical connections and ensure all components meet local codes and safety standards. This step might sound tedious but is an essential strength in your project’s success. Getting it right now prevents costly repairs and keeps your home safe and efficient for years to come.
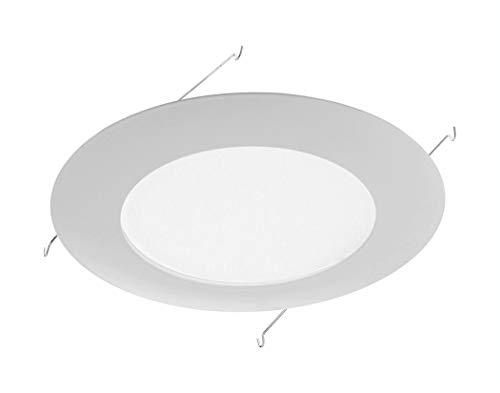
After removing your old recessed light housing, selecting the perfect replacement becomes the next important point. It’s not just about picking any fixture but choosing one that fits your ceiling type, lighting goals, and budget. For example, IC-rated housings are essential if your ceiling has insulation, as they prevent fire hazards by managing heat properly. On the flip side, non-IC housings might work if your ceiling has no insulation nearby, but installing them incorrectly can lead to serious problems.
Another key factor is deciding between new construction and remodel housings again, as this affects installation ease and fixture stability. Remodel housings are often simpler to install in existing ceilings, while new construction housings offer more robust options during renovations. Also, consider the housing size and trim style that suits your room’s aesthetics and functionality. Picking the right one can dramatically improve light distribution and energy efficiency, making your space feel brighter and more inviting.
Moreover, the type of bulb compatibility matters. Many newer housings support LED technology, which is a major benefit for energy savings and longevity. Choosing LED-compatible housings means you’ll enjoy lower electricity bills and less frequent replacements—definitely a win for both your wallet and the environment. Being selective here turns your lighting upgrade into a smart, long-term investment.
Lastly, look out for features like damp or wet location ratings if you’re installing recessed lights in bathrooms or outdoor-covered areas. These ratings ensure your fixtures can withstand moisture and extend their lifespan. In summary, knowing your specific needs and matching them with the housing features is the main key to a successful lighting setup.
Once you've got your new recessed light housing ready, proper installation is the next crucial step that ensures your hard work pays off. One important point is to double-check that the power is off before you begin—never skip this for safety. Securely fastening the housing to joists or ceiling frames according to manufacturer instructions prevents wobbling or falling later on.
Correct wiring is a major strength in installation. Always connect wires using wire nuts or push-in connectors designed for lighting fixtures, and make sure no bare wires are exposed. Loose or improper wiring not only risks malfunction but can cause electrical fires, so taking your time here is worth every minute. Labeling wires during removal earlier will pay off now by making reconnection smooth.
Additionally, proper insulation clearance is vital for IC-rated housings. Ensure insulation doesn’t touch non-IC housings to avoid overheating. Using protective barriers or shields helps maintain this safety margin. Also, test the fixture before closing up any ceiling gaps to confirm everything works correctly—this prevents having to reopen ceilings later.
Finally, installing trim correctly seals the housing and completes the look. Choosing trims that complement your décor while fitting snugly avoids light leaks or shadows, enhancing overall lighting quality. All these careful steps contribute to a durable, safe, and beautiful lighting system that will serve your home well.
Upgrading recessed lighting isn’t just about style—it’s a smart move for energy savings and better light quality. With the rise of LED technology, many new housings are built specifically to optimize these bulbs. LEDs offer dramatically lower power consumption, sometimes using up to 75% less energy than traditional incandescent bulbs, which translates to real savings on your electricity bill.
Beyond cost, LEDs also last much longer, often upwards of 25,000 hours, meaning you spend less time and money on replacements. This longevity is a huge benefit for recessed lighting since accessing ceiling fixtures can be a hassle. Plus, LEDs generate less heat, which enhances safety and reduces strain on your HVAC system.
There’s also a growing trend towards smart lighting controls compatible with recessed lights. Features like dimming, color temperature adjustment, and scheduling bring flexibility and convenience to your lighting environment. Imagine setting your recessed lights to warmer tones in the evening for cozy vibes or bright whites during work hours, all controlled from your phone or voice assistant.
Incorporating these modern options with proper housing selection elevates your lighting setup from merely functional to an energy-efficient, smart home upgrade that pays dividends in comfort and savings.

Even seasoned DIYers stumble over a few common pitfalls when removing or installing recessed light housing. One of the biggest mistakes is rushing through the process without cutting power properly. This oversight not only endangers you but can damage electrical components, leading to costly repairs. Always verify with a voltage tester before proceeding.
Another key weakness is neglecting to label or photograph wiring before disconnecting. Without clear references, reconnecting wires can become a confusing mess that wastes time and risks incorrect setups. Taking a few moments upfront to document connections is a simple step that avoids headaches later.
Using the wrong tools or forcing housing removal can also cause ceiling damage. Applying excessive force might crack drywall or dislodge insulation, increasing repair work beyond the light fixture itself. Patience and proper tools, like spring-clip pliers or flexible screwdrivers, make a huge difference in keeping everything intact.
Finally, skipping code compliance checks or ignoring insulation clearance can lead to safety hazards or failed inspections. Ensuring your fixtures and installation methods meet local regulations isn’t just red tape—it’s a critical factor in maintaining a safe, efficient home environment. Being mindful of these common mistakes makes your lighting project smoother and more successful.
While many homeowners can handle removing and replacing recessed light housing with confidence, some situations call for professional expertise. Encountering complex wiring systems, outdated or damaged electrical boxes, or signs of faulty wiring should immediately raise a red flag. Attempting DIY fixes in these cases can be risky and lead to bigger issues.
If your ceiling is textured, or if removal causes significant drywall damage, professionals can ensure proper repairs and flawless installation. Their experience helps avoid patch jobs that look amateurish or create future maintenance problems. When working in multi-story buildings or commercial spaces, code requirements can be especially strict, making a licensed electrician’s input the main key to compliance.
Additionally, if you want to upgrade your lighting to include dimmers, smart controls, or integrate with home automation, pros can install the necessary components seamlessly. This saves time, guarantees safety, and often comes with warranties for peace of mind.
Recognizing when a job is beyond your comfort zone is a strength that protects your home and wallet. Don’t hesitate to call in the pros for complex or high-risk tasks.



Best Boat Black Lights 2026 For Nighttime Adventure

Best Black 30 Inch Light Bar Reviews – Top Picks of 2026

Best Black Light For Aquarium 2026 For Vibrant Glow

Best Black Light for Authenticating Glass 2026 Top Picks

Best Waterproof Spotlight 2026 That Outshines Expectations

Best Solar Spotlight For Yard 2026 Brighten Outdoor Spaces With Ease
Best Led Spotlight Rechargeable 2026 Bright Picks

Best Rechargeable Spotlight For Boat 2026 That Cuts Through Darkness





