How to Replace a Blinker Bulb in 15 Minutes

Replacing a blinker bulb simply means twisting the plastic socket (the plug holding the bulb and wires) counterclockwise, pulling out the old bulb, and inserting a fresh one. The exact path to that socket changes depending on which corner of the vehicle went dark. A dead turn signal usually makes the dashboard blinker flash frantically to signal that a bulb is out. Swapping it in the driveway takes only minutes and keeps the car street-legal.
Front lights are usually reached from under the hood or behind a wheel liner, while rear signals hide behind a fabric flap inside the trunk. Some vehicles offer enough clearance to reach the socket by hand, but others require loosening a couple of screws to ease the light housing (the outer plastic shell) forward. Sticking with matching standard bulbs also prevents rapid-flashing troubles. A gentle touch avoids snapping any brittle plastic clips along the way.
Preparing Your Vehicle and Finding the Right Bulb Size
Park your car on level ground, turn off the engine, set the parking brake, and remove the key from the ignition. Removing the key ensures no electrical current reaches the turn signal circuit while you touch the wiring. If you were just driving, wait fifteen minutes before opening access covers. Engine parts and light fixtures stay hot enough to burn bare skin for several minutes after parking.
Finding the right bulb size takes a minute. Check your vehicle owner manual under the maintenance or lighting specifications. You can also pull the old bulb first to read the part number printed on the base. Common automotive blinker sizes include 3157, 7440, and 1157. Auto parts stores also provide lookups based on your car year, make, and model.
Before you begin, run through this quick preparation checklist:
- Turn off all switches: Make sure the blinker lever, hazard flasher button, and headlight dial are turned off.
- Gather basic tools: Most vehicles require no tools, but a small flathead screwdriver, work gloves, and a flashlight help.
- Keep clean gloves ready: Handling bulbs with gloves keeps skin oils off the glass. As outlined in our guide on how to change a halogen light bulb safely at home, oils create hot spots that weaken glass under heat.
- Check lens color: Look at your light cover to see if it is amber or clear, which tells you whether to buy an amber or clear bulb.
Reaching the Socket from Under the Hood, Wheel Well, or Trunk
Access to your blinker bulb depends on whether the dead light is in the front or rear. You need to reach the socket (the plastic holder that grips the bulb and connects the wires) mounted inside the housing (the outer plastic shell holding the car lights).
For front turn signals, under-hood access is the standard route. Open the hood, secure the support rod, and look directly behind the headlight housing. You will spot wire bundles leading into round plastic connectors. Find the connector directly behind the amber turn lens. If the engine bay is crowded with fluid tanks or air boxes, car makers often provide a path through the wheel well instead.
To reach the light through the wheel well, turn the steering wheel all the way toward the middle of the vehicle to create work space. Locate the plastic splash shield inside the wheel arch ahead of the tire. Use a flathead screwdriver to pop loose two or three plastic push clips, then peel the flexible liner back. Shine a flashlight inside to see the rear of the headlight housing.
For rear turn signals, access starts inside the trunk or cargo area. Look for a carpeted access flap directly behind the taillight. Pop the flap open with your fingers, or remove a couple of trim clips to pull the trunk carpet back. On pickup trucks and certain SUVs, the taillight unbolts from the outside. Open the tailgate, remove two screws along the inner jamb, and pull the housing straight back. Never pry sideways, which can snap plastic guide pins.
How to Replace Your Blinker Bulb Step by Step
Follow these steps to safely swap out the old bulb and seat the new one:
-
Locate the blinker socket and disconnect the wire plug if needed.
Press down on the small locking tab on the electrical connector and slide the wiring plug free from the socket.
Why this step matters: Unplugging the wires keeps you from pulling or straining thin automotive wires while turning the socket.
-
Twist the plastic socket one quarter turn counterclockwise.
Grip the socket wings with your fingers and rotate it counterclockwise until you feel it click loose. If it feels stubborn, rock it gently by hand to loosen dried road dirt.
Why this step matters: Turn signal sockets use locking tabs that only release when turned to one specific exit notch in the housing.
-
Slide the socket straight out of the housing.
Pull the socket straight toward you so the glass bulb clears the opening cleanly without hitting the sides.
Why this step matters: Scraping the bulb against the hole can scratch the mirrored reflector inside or snap the glass.
-
Remove the dead bulb from the socket.
Pull flat wedge-base bulbs straight out of the socket. For round metal-base bulbs, press the bulb inward slightly, twist it a quarter turn counterclockwise, and lift it out.
Why this step matters: Using the wrong motion can crack the glass or bend the delicate metal electrical contacts inside the socket.
-
Push the new bulb firmly into the socket.
Hold the replacement bulb with clean gloves or a cloth. Push it straight into the socket until it seats completely, or push and twist clockwise for metal-base types.
Why this step matters: A bulb that is not fully seated can shake loose on rough roads, and bare finger oils create hot spots that shorten bulb life.
-
Inspect the rubber sealing ring on the socket.
Check the rubber O-ring around the socket base to make sure it sits flat without tears or grit.
Why this step matters: This seal keeps rainwater and road spray out of the light housing, preventing lens fogging and rusty contacts.
-
Seat the socket into the housing and twist clockwise to lock.
Align the socket tabs with the housing slots, push flush, and twist one quarter turn clockwise until it stops. Plug the wire harness back in.
Why this step matters: Locking the socket tightly keeps the light watertight and holds the bulb at the correct angle to reflect light outward.
Checking the Signal Before Closing Up the Panels
Never snap plastic trim clips or trunk liners back in place before confirming that the new bulb illuminates. Checking your work now takes thirty seconds and saves you from repeating the removal steps if a connection is loose.
Use these quick checks to verify proper operation:
- Turn on your hazard flashers: Press the hazard button on your dash. The hazard circuit operates without running the engine. Walk around the car to confirm the replacement bulb flashes brightly.
- Check the turn signal lever inside: Turn your key to the accessory position without starting the engine. Push the blinker lever up and down to make sure both sides flash at a normal, steady pace.
- Verify parking light brightness: Turn on your running lights. If your car uses dual-function bulbs, verify that the bulb glows dimly with the parking lights and blinks much brighter when you signal.
- Check for a secure fit: Wiggle the socket gently while the light blinks to confirm the wire connection stays steady.
Why New Blinker Bulbs Flash Rapidly and How to Fix It
If your turn signal blinks at double speed after installing a new bulb, your car is experiencing hyper-flash (frantic, rapid blinking caused by low electrical resistance). This fast blinking is a built-in safety alert. Standard vehicle flasher relays expect a specific amount of electrical resistance from intact bulbs. When resistance drops, the relay cycles rapidly to warn the driver that a bulb has failed.
If hyper-flash occurs with a brand-new bulb, check these three common causes:
The first cause is using a single-filament bulb in a dual-filament socket. A single-filament bulb has one wire loop inside for basic on-off blinking. A dual-filament bulb has two separate wire coils. In the same way what is a three way light bulb uses multiple contact points on its base to offer different light settings in a living room lamp, a dual-filament car bulb uses separate contacts to handle both dim parking lights and bright turn signals. Putting a single-circuit bulb into a dual-circuit socket disrupts the electrical load and causes hyper-flash.
The second cause is a burned-out bulb on the same side of the vehicle. If you replaced the front bulb but the rear bulb on that same side is dead, system resistance remains low. Walk around your car to verify that both front and rear turn lights flash together.
The third cause is installing an LED bulb in place of an incandescent bulb. LEDs draw very little power, which tricks the flasher relay into thinking a bulb is burned out. You can resolve this by wiring in an inline load resistor or by sticking with standard miniature incandescent bulbs.
Choosing the Right Replacement Blinker Bulb
Finding the right replacement turn signal bulb requires matching the base shape, the filament design, and the lens color. Miniature automotive bulbs use push-in wedge bases or twist-lock metal bases. Look at your old bulb base closely and never force a replacement that does not slide easily into the socket.
Lens color dictates whether you buy clear or amber glass. Turn signals must shine amber or amber-red. If your vehicle has clear outer lenses over the blinker area, you must install an amber-coated bulb. If your car has amber plastic lenses molded into the housing, buy a clear glass bulb. Placing an amber bulb behind an amber lens reduces light output and makes your signals harder for other drivers to spot.
You should also decide between standard and long-life miniature bulbs. Long-life versions use sturdier filaments that handle road vibration and engine shake. Because reaching certain blinker sockets requires peeling back wheel arch liners or trunk trim, long-life bulbs reduce how often you repeat the job. Always replace blinker bulbs in pairs when practical, because both bulbs have logged the same operating hours and the second one often fails soon after.
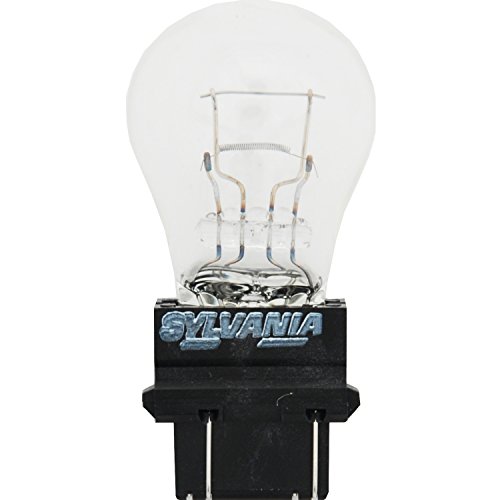
- LFR Score9.6
LFR Score is a ranking system developed by lightfansreviews.com. LFR Score has no relationship or impact from any manufacturers or sales agent websites. Learn more
- BrandSYLVANIA

- LFR Score9.4
LFR Score is a ranking system developed by lightfansreviews.com. LFR Score has no relationship or impact from any manufacturers or sales agent websites. Learn more
- BrandSYLVANIA

- LFR Score9.2
LFR Score is a ranking system developed by lightfansreviews.com. LFR Score has no relationship or impact from any manufacturers or sales agent websites. Learn more
- BrandKadiby
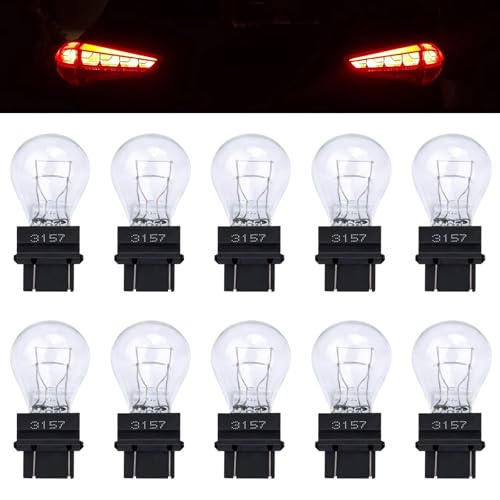
- LFR Score9.0
LFR Score is a ranking system developed by lightfansreviews.com. LFR Score has no relationship or impact from any manufacturers or sales agent websites. Learn more
- Brandecocstm

- LFR Score8.8
LFR Score is a ranking system developed by lightfansreviews.com. LFR Score has no relationship or impact from any manufacturers or sales agent websites. Learn more
- BrandiBrightstar

- LFR Score8.4
LFR Score is a ranking system developed by lightfansreviews.com. LFR Score has no relationship or impact from any manufacturers or sales agent websites. Learn more
- BrandHHZL
Last update on 2026-10-02 / Affiliate links / Images, Product Titles, and Product Highlights from Amazon Product Advertising API
FAQs
Do I have to remove the entire light assembly to change a blinker bulb?
Most cars do not require removing the entire light housing. Vehicle makers provide access through the engine bay, the wheel well liner, or the trunk carpet. You only need to remove the outer housing on select vehicles where the body frame completely covers the back of the socket.
Can I touch the glass of a turn signal bulb with bare hands?
You should avoid touching the glass directly with bare skin. Natural oils from your fingers leave residue on the glass that creates hot spots when the filament heats up, causing the bulb to fail early. Wear clean gloves or hold the bulb with a clean cloth or paper towel.
How do I know if my turn signal bulb is single filament or dual filament?
Look through the glass of the old bulb at the tiny wire coils inside. A single-filament bulb has one wire coil, while a dual-filament bulb has two separate coils. You can also inspect the base, where a dual-filament bulb features two electrical contact points instead of one.
What should I do if the blinker socket is stuck and will not turn?
Do not force the socket with heavy pliers, because heat-aged plastic can crack easily. Push the socket gently inward toward the housing to compress the rubber seal, then twist it counterclockwise. If dirt is jamming the tabs, wiggle the socket gently back and forth by hand until it frees up.

Best Bulb For Exposed Light 2026 That Shines Bright

Best Industrial Light Bulb Reviews: Top Picks for 2026
Best Outdoor Light Bulb Reviews: Top-Rated Picks for 2026
Best LED Reading Light Bulb Reviews - Top Picks for 2026

Best Vintage Light Bulb 2026 With Style And Glow
Best Yellow Fog Light Bulb 2026 For Clearer Night Drives

Best Z Wave Light Bulb 2026 Top Picks For Smart Control
Best Light Bulb For Vanity Mirror 2026 Brightness Boost