
How to Replace a Light Socket Safely and Easily
Replacing a light socket might sound daunting, but it’s a straightforward fix that can save you money and hassle down the road. Whether your light socket is worn out, loose, or simply not working, learning how to replace a light socket empowers you to take charge of your home’s lighting issues. This guide walks you through the essential tools, safety tips, and step-by-step process to get the job done right without calling in a professional. You’ll gain confidence handling electrical components safely, spot common problems that cause socket failures, and know when it’s time to upgrade to a better fixture. Plus, the stepwise approach means you won’t feel overwhelmed, even if you’re not a seasoned DIYer. Stick with it, and soon you’ll enjoy the bright benefits of a perfectly working light socket again.
Imagine flicking a switch and... nothing happens. The culprit? A faulty light socket. Instead of stressing over costly electrician visits, learning how to replace a light socket can turn you into your own home hero. This isn’t rocket science—it's about knowing the right tools, handling wiring safely, and following a clear, practical process that anyone can master. With a bit of patience and care, you’ll bring your lighting back to life, boosting your home’s comfort and safety in the process. So, roll up your sleeves, because fixing that socket might just be easier—and more satisfying—than you think. Ready to shed some light on the subject? Let’s dive in!
It’s important to remember that many socket issues stem from wear and tear or corrosion inside the socket itself. Over time, metal contacts degrade, resulting in poor electrical connections. This not only causes flickering but can also lead to power surges, risking damage to your light bulbs and other fixtures. Additionally, sockets exposed to moisture or extreme temperature swings deteriorate faster, making replacement a smart preventative measure.
For homeowners and DIY enthusiasts, identifying a faulty socket early means you can avoid paying for costly electrician visits or even prevent fire hazards caused by electrical shorts. If your socket shows any signs of damage, such as cracks, blackening, or burning smells, these are urgent red flags that demand immediate attention. Don’t wait for the light to go out completely—act fast to keep your home safe.
Finally, consider the age of your fixtures. Older homes often have sockets that don’t meet modern safety standards. Upgrading to newer, safer sockets can improve energy efficiency and reduce risks. When you know how to replace a light socket, you gain control over your home’s electrical safety and comfort.
Safety gear like insulated gloves and safety goggles shouldn’t be overlooked. Electrical shocks can be nasty, and a simple pair of insulated gloves acts as your first line of defense. Meanwhile, goggles protect your eyes from any sparks or debris. These protective measures might seem basic, but they’re crucial for peace of mind and accident prevention.
A voltage tester is your best friend when working on light sockets. Before touching any wires, testing the socket ensures that no live current is running through it. This step dramatically reduces the risk of shock, so never skip it. Even if you think the power is off, double-checking is smart.
If you don’t have all the tools yet, many hardware stores offer affordable kits designed specifically for electrical repairs. Investing in quality tools not only makes the job easier but ensures durability for future projects. Being well-prepared sets the tone for a successful socket replacement with minimal fuss.
Once the breaker is off, double-check that the power is truly cut by using your voltage tester on the socket. This extra verification prevents nasty surprises and keeps you out of harm’s way. Working with live wires isn’t just risky; it’s downright dangerous. Safety isn’t optional—it’s your responsibility.
If you’re unsure which breaker controls your light socket, label them as you go for future reference. This small step saves time and reduces confusion during future maintenance. Electrical panels aren’t exactly user-friendly, so getting familiar now makes you more confident and efficient.
Lastly, keep the work area dry and uncluttered. Water and electricity are a hazardous combo, so clear out anything damp or wet. Keeping your workspace tidy also prevents accidents like tripping over tools or wires. This simple housekeeping elevates safety and smoothness while replacing your socket.
Once exposed, inspect the wiring carefully. Take note of how the wires connect to the socket terminals; snapping a quick photo can be a lifesaver when it’s time to reconnect. Wires typically attach via screws or push-in connectors, and handling them gently prevents frays or breaks.
Next, loosen the screws or clips holding the socket in place and carefully pull it out. At this stage, if the wires are stuck or corroded, apply a bit of gentle wiggling or use your pliers with care. Ripping wires can mean extra headaches, so patience here is a big plus.
Finally, disconnect the wires from the old socket. Make sure to remember which wire goes where, as mixing them up could cause your light not to work or, worse, create a safety hazard. The precision of this step ensures a smooth replacement process.
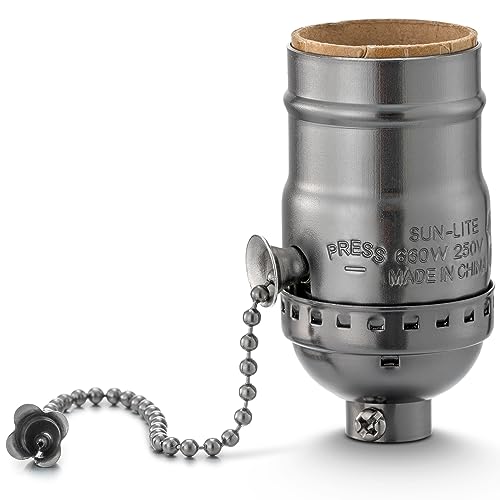
Material matters, too. Ceramic sockets, for example, handle heat better than plastic ones and are recommended for high-wattage bulbs. If your old socket showed signs of overheating, upgrading to ceramic or a higher-rated socket is a wise investment.
Additionally, consider sockets with built-in safety features like thermal cutoffs or tamper-resistant designs, especially if you have kids at home. These modern enhancements can prevent accidents and prolong the lifespan of your lighting system.
When buying, ask for help at the store or read product reviews online to ensure you’re getting a reliable brand. Cheaper sockets might save a few bucks but often don’t last, leading to repeated replacements and frustration. A quality socket is worth every penny for peace of mind and lasting performance.
Pay close attention to the wire colors—typically black or red is live, white is neutral, and green or bare copper is ground. Matching these wires correctly to the new socket terminals is a non-negotiable safety step. The live wire usually connects to the brass terminal, while the neutral goes to the silver terminal. The ground wire attaches to the green screw if your socket has one.
Tighten the terminal screws firmly, but don’t overdo it to avoid breaking the wire or stripping the screw. Loose connections cause arcing, which leads to socket failure or fire risks. A good, snug fit is the sweet spot for reliable performance. Take your time to double-check all connections before moving on.
If your new socket uses push-in wire connectors instead of screws, make sure wires are fully inserted and secure. Some models also have spring-loaded terminals that require precise placement. Following the manufacturer’s instructions guarantees your replacement will be up to code and work flawlessly.
Check that no wires are pinched or strained during this step. Pinched wiring can damage insulation and cause shorts over time, so keep cables neat and with enough slack to avoid tension. Using electrical tape to bundle wires can help keep everything tidy and prevent accidental pulls.
Don’t forget to reattach any covers or decorative fixtures you removed earlier. These aren’t just for looks—they can help protect the socket from dust, moisture, and accidental contact, enhancing the longevity and safety of your lighting setup.
Finally, once everything is secure, give the socket a gentle wiggle to test for firmness. A well-installed socket should feel solid, without any wiggle room or rattling sounds. This final check helps avoid future headaches and keeps your lights shining bright.
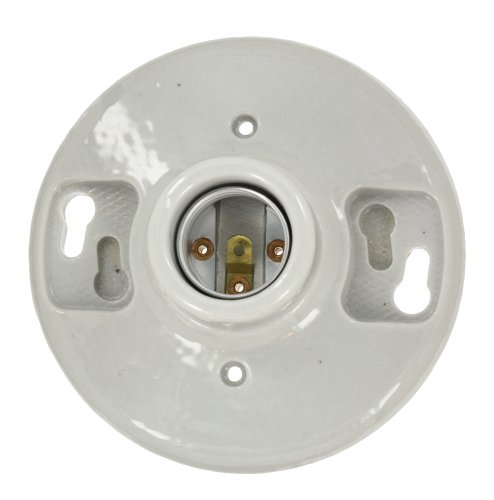
Once satisfied, restore power at the circuit breaker, then turn on your light switch. If the bulb lights up without flickering or unusual noises, you’ve nailed it! If not, don’t panic—turn off the breaker again and carefully re-check your wiring connections. Many issues come down to simple wiring swaps or loose terminals.
Using a voltage tester on the socket after powering up can confirm that the socket is delivering the correct current. This test provides extra assurance that your replacement is functioning as expected and there are no hidden faults.
If you notice any sparks, burning smells, or the breaker trips immediately, shut off power and consult a professional electrician. Some situations call for expertise beyond DIY, and knowing when to ask for help is an important part of being a responsible homeowner.
Keep the socket clean and dry. Dust accumulation and moisture are common culprits that degrade sockets over time. Wiping sockets gently with a dry cloth during routine cleaning helps maintain good contact and prevents corrosion. Avoid spraying liquids near the socket, as water is a silent enemy of electrical components.
Upgrading to LED bulbs can also reduce heat stress on sockets. LEDs generate far less heat compared to incandescent bulbs, which means less wear and tear on your socket’s materials. This energy-efficient upgrade not only saves power but prolongs your socket’s life, keeping your lighting system smooth and cost-effective.
Finally, if you ever move or renovate, take the opportunity to inspect and replace older sockets proactively. Staying ahead of wear-and-tear by scheduling regular checks boosts home safety and comfort. A little maintenance goes a long way in preventing emergency repairs down the road.
Another common blunder is mismatching wires or confusing live and neutral terminals. Mixing these up can cause flickering, socket damage, or electrical hazards. Taking time to label wires or snap reference photos before disconnecting is a simple but effective precaution.
Over-tightening screws can also damage wires or socket terminals, leading to poor connections. Conversely, loose screws increase the risk of arcing and socket failure. Striking a balance with firm but gentle tightening is a key skill to develop for lasting repairs.
Lastly, using the wrong replacement socket model wastes effort and money. Always confirm size, type, and rating compatibility before purchase. Choosing quality sockets from trusted brands prevents repeat problems and boosts peace of mind.

Complex wiring setups, like those with multiple switches or dimmers, might confuse even experienced DIYers. Professionals have the tools and knowledge to navigate these safely, ensuring code compliance and long-term reliability.
If you notice frequent breaker trips or burning smells near sockets, these are serious warnings that need immediate expert attention. Your safety and home’s electrical integrity should never be compromised for the sake of a DIY job.
Hiring an electrician might cost more upfront, but it prevents costly damages and safety risks later. Knowing when to DIY and when to call in pros is a smart homeowner’s balance between empowerment and caution.


Best Boat Black Lights 2026 For Nighttime Adventure

Best Black 30 Inch Light Bar Reviews – Top Picks of 2026

Best Black Light For Aquarium 2026 For Vibrant Glow

Best Black Light for Authenticating Glass 2026 Top Picks

Best Waterproof Spotlight 2026 That Outshines Expectations

Best Solar Spotlight For Yard 2026 Brighten Outdoor Spaces With Ease
Best Led Spotlight Rechargeable 2026 Bright Picks

Best Rechargeable Spotlight For Boat 2026 That Cuts Through Darkness





