
How to Replace Ceiling Fan Wall Switch Safely
How to replace ceiling fan wall switch sounds simple right up until the old switch won’t budge, the wires look nothing alike, and the fan suddenly stops responding altogether. Plenty of people hit that wall halfway through the job. One loose wire or mismatched connection can leave the room dark, the fan noisy, or the breaker constantly tripping. That’s exactly why a little preparation and a calm approach matter more than fancy tools.
Wall switches wear out slowly, and honestly, most people don’t notice the signs at first. Flickering lights, delayed fan response, buzzing sounds, or a switch that feels oddly warm usually point toward a failing component hiding behind the plate. Ignoring those warnings tends to snowball into bigger headaches later. A damaged switch can strain the fan motor, interrupt power flow, and create frustrating reliability issues that seem to appear out of nowhere.
Electrical safety becomes the real priority once the cover plate comes off. Shutting off the breaker sounds obvious, yet plenty of rushed repairs start with people trusting the wall switch alone. That shortcut can backfire fast. Stable power isolation, wire labeling, and careful handling reduce the risk of sparks, damaged terminals, or accidental shocks that turn a small repair into an expensive service call.
Old homes add another layer of frustration because wiring colors don’t always match modern expectations. Some switches may contain extra traveler wires, outdated grounding setups, or cramped electrical boxes that barely leave room to work. Those little surprises throw people off balance quickly. Still, understanding the purpose behind each wire helps remove the panic and keeps the replacement process manageable.
How to replace ceiling fan wall switch also depends heavily on the switch type already installed. Standard single-pole switches behave differently from dual fan-and-light controls or dimmer combinations. Installing the wrong replacement can create humming noises, unstable fan speeds, or lighting problems that feel impossible to diagnose afterward. Matching compatibility before installation saves time and prevents unnecessary rewiring later.
Comfort matters too, oddly enough. A stiff switch, inconsistent fan speed control, or unreliable lighting can quietly make a room irritating to use every day. Replacing the switch properly restores smoother operation and eliminates those tiny annoyances that slowly wear people down. Small electrical fixes often create a surprisingly noticeable difference in how comfortable and dependable a space feels.
Then there’s the cosmetic side of things. Yellowed switch plates, cracked toggles, and outdated controls can make an otherwise clean room look neglected. Fresh hardware instantly sharpens the appearance of the wall without requiring a major renovation. That quick visual upgrade often feels satisfying because the improvement is both functional and noticeable.
Reliable wiring connections, careful switch selection, and patience during installation all work together to prevent future issues. Rushing through electrical work rarely ends well. Slow, methodical repairs usually lead to quieter fan operation, steadier lighting, and fewer frustrating callbacks to fix something that should’ve been handled correctly the first time.
How To Replace Ceiling Fan Wall Switch
A fan that only works after a few stubborn flips can make a room feel older than it really is. The switch clicks, the light flickers, the blades hesitate, and suddenly a small wall control feels like the boss of the whole space. That is where how to replace ceiling fan wall switch becomes less about curiosity and more about getting back safe control, steady airflow, and reliable lighting. The job can be manageable, but only if the wiring is treated with respect instead of guesswork.
Wall Switch Basics
A ceiling fan wall switch looks simple from the outside, but the box behind it can hold more surprises than expected. A basic toggle may control only the fan, while another setup may handle both fan power and light control. Some rooms also use a fan speed wall control, which is not the same as a regular on-off switch. Mixing those up can cause humming, weak speeds, flickering lights, or a switch that fails early.
The first smart move is figuring out what the existing switch actually does. Flip the switch and note whether it controls the fan, the light kit, or both together. Then check whether the ceiling fan also has pull chains or a remote receiver tucked inside the canopy. That small check helps prevent buying the wrong replacement and turning a clean repair into a head-scratcher.
Single-pole switches are common in basic rooms because they control power from one wall location. A three-way switch, on the other hand, allows control from two locations, such as both ends of a hallway or large room. Fan speed controls and dimmer-style controls need extra attention because not every dimmer is safe for fan motors. The wrong control can make the motor buzz like an angry bee.
Old switch boxes can also hide wiring that does not match modern color expectations. White wires may be used as hot conductors in certain switch loops, and older homes may lack a bare copper ground in the box. That does not mean the job is impossible. It does mean wire identification matters more than wire color alone.
Safety Steps Before Touching Wires
Electrical safety starts before the screwdriver touches the wall plate. The wall switch itself is not enough protection because power may still be present inside the box. Shut off the correct breaker at the electrical panel, then test the switch and fan to confirm the power is off. A non-contact voltage tester adds another layer of confidence, especially in older homes with confusing circuits.
Many people rush this step because the repair looks small. Bad idea. A switch box can carry live voltage even if the fan is not moving, and a loose connection can still bite hard. As electricians like to say, “Trust the tester, not the switch.” That little line is worth remembering because safe verification beats lucky guessing every single time.
Remove the wall plate slowly and keep the screws in a small bowl or magnetic tray. Painted-over plates may stick to the wall, so score the edge lightly with a utility knife before pulling. This prevents peeling paint and avoids cracking the plate into pieces. Small patience here saves a messy wall patch later.
Once the switch is exposed, test again near the wires and terminal screws. Power should read dead before any wire is loosened. If the tester chirps, lights up, or acts inconsistent, stop and recheck the breaker. Unclear power status is a hard stop, not a “maybe it’s fine” moment.
Tools And Parts That Make The Job Cleaner
A clean switch replacement does not require a truck full of gear. A flathead screwdriver, Phillips screwdriver, voltage tester, wire stripper, needle-nose pliers, electrical tape, and the correct replacement switch cover most basic jobs. A flashlight helps too because wall boxes seem to swallow light at the worst time. Having everything nearby keeps the repair from turning into a garage scavenger hunt.
The replacement switch should match the fan setup, not just the wall plate style. A regular ceiling fan controlled by one wall switch usually needs a single-pole switch rated for the circuit. A fan speed control needs a control specifically made for ceiling fans, not a standard light dimmer. That distinction matters because fan motors and light bulbs do not behave the same way electrically.
Lighting behavior can also point toward the right part. If the fan light has been flickering, the issue may not always be the wall switch, especially with LEDs. To reduce bulb-related troubleshooting mistakes, compare symptoms with flickering led bulb guidance before blaming every blink on the switch. A weak connection, incompatible bulb, or failing socket can look similar from the room side.
Wire connectors matter more than they get credit for. Reusing old, cracked wire nuts is a cheap shortcut that can create loose connections later. Fresh connectors grip better, especially in boxes where wires have been bent and tucked many times. Tight mechanical contact keeps heat down and helps the switch last longer.
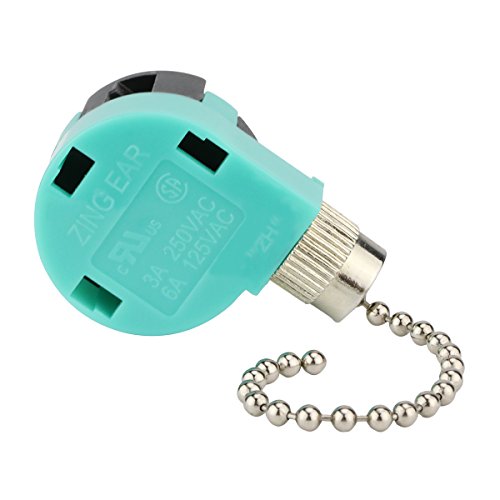
Remove The Old Switch Without Losing Track
Pull the old switch out gently after removing the mounting screws. Do not yank it forward like a stuck drawer, because old wires can be brittle. Let the switch hang out far enough to see the terminal layout clearly. Then take a quick phone photo before removing anything, because that picture can save the day if the wires start looking alike.
Labeling wires may feel fussy, but it is a smart habit. Use small pieces of tape to mark line, load, traveler, or ground if you can identify them. In a basic single-pole setup, one hot wire brings power in and the other sends power to the fan. The ground wire connects to the green screw, helping provide a safer fault path.
Backstabbed wires deserve special care. Some switches hold wires in small push-in holes on the back instead of wrapping them around side screws. These can be released with a tiny screwdriver in the slot, but older backstab connections may fight back. Side terminal screws usually create a more secure connection for a replacement, especially after years of heat and vibration.
Inspect the stripped wire ends after removal. Blackened copper, melted insulation, or a burnt smell points to heat damage or loose contact. Do not simply hide damaged wire behind a new switch and hope for the best. Trim and restrip clean copper if there is enough length, and call a licensed electrician if the damage extends into the cable jacket.
Connect The Replacement Switch Correctly
The new switch should be wired to match the old switch function. For a standard single-pole switch, the two hot conductors connect to the brass terminals, while the bare or green ground connects to the green screw. The screw direction matters more than most people think. Hook the wire clockwise around the screw so tightening pulls the loop snug instead of pushing it loose.
Loose terminals cause many switch problems after replacement. A wire that looks attached but wiggles under the screw can arc, heat up, and create that faint buzzing sound nobody wants to hear. Give each connected wire a gentle tug after tightening. If it slips, redo it before placing the switch back in the wall.
Fan speed controls may include labeled wires instead of simple screws. In that case, follow the manufacturer’s diagram and match the control type to the fan motor rating. Do not install a light dimmer to slow down a ceiling fan, even if the shape fits the box. That mismatch can strain the motor and create noise, heat, and poor speed response.
LED-related wiring issues can muddy the waters, especially in homes with mixed lighting upgrades. Some LED headlight guides explain resistor behavior in a different setting, but the core idea of electrical compatibility still matters. For a separate lighting project, compare load behavior with install resistors for led headlights before assuming all flicker problems share the same fix. Ceiling fan wall controls should still use parts designed for household fan circuits.
Fit Everything Back Without Crowding The Box
Folding wires back into the box takes a little finesse. Push them in gently like an accordion, not like stuffing laundry into a drawer. Keep the ground wire away from the hot terminals as much as possible. A crowded box can place pressure on the switch and loosen a connection over time.
The switch should sit straight without needing force. If it rocks, tilts, or refuses to line up with the screw holes, the wires behind it may be packed badly. Pull it back out and refold the wires instead of cranking down the screws. Forced installation can damage insulation or bend terminals into places they should not touch.
Install the wall plate after the switch is secured. Tighten the plate screws just enough to sit flat, because overtightening can crack plastic plates or chip decorative covers. A clean wall plate gives the repair a finished look, but the real win is behind it. Stable wiring and proper fit keep the switch from feeling loose during daily use.
Restore power at the breaker and test the fan from the wall switch. Listen for buzzing, watch for flickering, and check whether the fan starts smoothly. If the switch controls both fan and light, test every function separately. A good replacement should feel crisp, quiet, and predictable.
Common Mistakes That Cause Repeat Repairs
The most common mistake is replacing the switch before diagnosing the symptom. A fan that will not run may have a bad capacitor, loose canopy wiring, failed receiver, or motor issue instead of a wall switch problem. The switch is one piece of the chain. Treating it as the only possible culprit can waste time and money.
Another problem is buying a switch based only on color and style. A white rocker switch may look right, but it still needs the correct electrical rating and function. Fan speed controls especially need proper compatibility. Cheap mismatches often announce themselves with buzzing, flicker, or a fan that acts moody from day one.
People also forget that ceiling fan lighting can depend on the fan design itself. A small bedroom fan with an integrated light kit may need different controls than a larger model with separate fan and light wiring. For rooms needing a full fixture update, explore 42 ceiling fans with lights before spending too much energy saving an outdated setup. Sometimes a switch repair reveals that the whole fan no longer fits the room’s needs.
Skipping the ground connection is another bad habit. The fan may appear to work without it, but that does not make it safe. Grounding supports safer fault handling and should be connected wherever the system provides it. Working function and safe function are not always the same thing.
Signs The Job Needs An Electrician
Some switch replacements are straightforward, and some are better handed off. Aluminum wiring, burned insulation, no identifiable ground, repeated breaker trips, or a switch box packed with mystery splices all deserve professional attention. Those issues move beyond a simple weekend repair. Paying for a proper fix is cheaper than guessing your way through hidden electrical damage.
A breaker that trips after the new switch is installed should not be ignored. That usually means a short, overload, wrong connection, or damaged component somewhere in the circuit. Resetting the breaker over and over is not troubleshooting. It is warning-sign roulette, and electrical faults do not reward stubbornness.
Multi-location switch setups can also get tricky fast. Three-way and four-way circuits depend on traveler wires that must land correctly. One wrong move can leave the fan controlled backward, stuck on, or dead from every location. If the wiring no longer matches the photo you took, pause before making random combinations.
Smart switches add another wrinkle because many require a neutral wire in the box. Older switch loops often do not have one. Forcing a smart control into the wrong wiring setup can create unreliable operation or unsafe workarounds. Compatibility checks save frustration before the wall plate ever comes off.
How To Install A Ceiling Fan Wall Control
A noisy fan, shaky airflow, or lights that blink at random can slowly drive people nuts without them even realizing why. The room feels off, sleep gets interrupted, and the switch on the wall starts feeling unreliable every single day. That lingering irritation usually pushes people toward how to install a ceiling fan wall control because a stable switch setup restores comfort, smoother operation, and safer electrical performance. Small electrical upgrades tend to feel surprisingly big once daily frustration disappears.
Fan Speed Controls Change Daily Comfort
A regular toggle switch only delivers full power or no power at all. That setup works, but it does not always feel practical in bedrooms, garages, or living rooms where airflow needs shift throughout the day. A dedicated fan wall control gives better flexibility because it allows multiple speed adjustments without pulling chains every few hours. That simple convenience adds up fast during hot weather.
Fan speed controls also reduce the annoying habit of leaving the fan blasting at maximum speed all night long. Lower settings can keep air moving gently without making the room feel windy or noisy. Many people notice they sleep better once the fan hum settles into a softer background sound. The difference is subtle at first, but eventually the old setup feels clumsy by comparison.
Garage spaces especially benefit from better airflow control. Large enclosed spaces trap heat quickly, especially during summer afternoons or DIY projects involving power tools. For larger utility areas, compare airflow layouts with ceiling fan for large garage options before upgrading the switch alone. A stronger fan paired with proper wall controls creates far more balanced air circulation.
Fan motor strain also matters more than many realize. Cheap dimmer-style controls can create uneven electrical flow that makes motors buzz or overheat. Proper fan-rated controls regulate power more smoothly and help maintain steadier performance over time. That reduces wear while keeping operation quieter and more predictable.
Light Flicker And Weak Connections
A flickering ceiling fan light can feel like a haunted house cliché after a while. Sometimes the bulb is loose, but loose wall switch connections create the same symptom more often than expected. Tiny gaps in electrical contact interrupt power flow for split seconds at a time. Those interruptions show up as flickering, dimming, or delayed response from the light kit.
Heat buildup inside a loose connection creates another problem. The switch may feel warm, the wall plate may discolor slightly, or the fan may randomly lose power during operation. Those warning signs deserve attention instead of wishful thinking. Electrical heat rarely fixes itself.
Rooms with older wiring often experience inconsistent lighting behavior after modern LED bulbs are installed. LEDs respond quickly to unstable current, which makes bad connections more noticeable than old incandescent bulbs ever did. That is one reason people suddenly notice flickering after upgrading bulbs. The wiring issue may have existed for years before the LEDs exposed it.
Secure terminal connections help stabilize the entire system. Tight wire loops, clean copper contact, and correctly sized connectors all support smoother electrical flow. The fan starts faster, lights stay steadier, and switch operation feels more responsive instead of delayed or unpredictable.
Wall Box Size Can Create Problems
Older switch boxes were not designed with modern controls in mind. Smart switches, fan speed controls, and combination fan-light controls often take up more space than a simple toggle switch. Suddenly the wall box feels packed tighter than an overstuffed junk drawer. Crowded wiring can make installation frustrating and raise the risk of loose connections.
Pushing everything into a cramped box without care creates pressure against the terminals. Over time that pressure may loosen wires or damage insulation around the conductors. That is why careful wire folding matters just as much as the actual wiring itself. Mechanical stress inside the box quietly causes many repeat repairs.
Some older metal boxes also lack proper grounding support. Ground wires may be loose, clipped short, or missing altogether depending on the age of the home. That does not automatically mean the house is unsafe, but it does mean the switch replacement deserves extra attention. A licensed electrician may be worth calling if the grounding setup looks questionable.
Lighting in older rooms can also expose weak switch box layouts because shadows make wire identification harder. Better task lighting helps avoid mistakes while working inside tight electrical spaces. For focused room lighting during repairs or evening reading, explore quality floor reading lamp setups that improve visibility without relying only on overhead fixtures. Clear visibility reduces wiring confusion fast.

Remote Controls And Wall Switch Conflicts
Ceiling fans with remote receivers sometimes behave strangely after a wall switch replacement. The fan may lose memory settings, reset itself, or stop responding correctly after power interruptions. That usually happens because the wall switch is cutting power entirely instead of allowing the receiver to stay active. Remote-equipped fans often prefer steady power from the wall.
Some homeowners try installing dimmers or speed controls alongside remote systems. That combination can create inconsistent signals, noisy operation, or fans that refuse to maintain stable speeds. The remote receiver already handles speed adjustments internally in many designs. Adding another speed controller into the mix may confuse the entire system.
Compatibility between controls matters more than appearance. Two switches may look nearly identical on the shelf while behaving completely differently electrically. Reading the fan manufacturer’s instructions helps prevent accidental mismatches that create long-term annoyance. That small step saves a surprising amount of troubleshooting later.
Wall controls still play an important role even with modern remote systems. A stable on-off switch allows the receiver to operate properly while protecting the wiring circuit behind it. Reliable power delivery supports smoother startup, steadier lighting, and fewer random disconnects during operation.
Noise Problems After Installation
A newly installed switch should not sound like a tiny insect trapped in the wall. Buzzing, crackling, or humming usually points toward loose terminals, incompatible controls, or stressed electrical components. Some noise may seem harmless at first, but repeated electrical buzzing deserves attention quickly. Sound changes often reveal hidden electrical strain before visible damage appears.
Fan dimmers are one of the biggest offenders. Light dimmers regulate power differently from fan speed controls, so using the wrong device can create constant motor hum. That sound becomes especially noticeable at medium speeds late at night. Correct electrical matching keeps operation smoother and much quieter.
Loose wall plates can create fake noise symptoms too. Slight vibration from the fan may cause the plate to rattle against the wall or electrical box. Tightening the mounting screws gently often solves that issue immediately. Small fixes sometimes create surprisingly dramatic improvements.
Ceiling fan blades also deserve inspection before blaming the switch for every sound. Unbalanced blades, loose canopy screws, or worn mounting brackets can mimic electrical noise from the wall. A full inspection prevents wasted time replacing perfectly healthy switches while the real issue spins overhead.
Older Homes Need Extra Patience
Electrical repairs inside older homes rarely follow textbook expectations. Paint-covered screws, brittle insulation, shallow wall boxes, and confusing wire colors tend to appear together like an unwanted bundle deal. Rushing through those setups usually makes things worse. Slow, methodical work protects both the wiring and the wall itself.
Fabric-insulated wiring requires special care because movement alone can crack aging insulation. Once exposed copper appears outside the intended connection point, the repair becomes riskier. That does not mean panic is necessary. It simply means older electrical systems demand more caution than newer installations.
Some homes also use switch loops that place white wires on active terminals instead of neutral connections. That setup surprises many people during switch replacement because the colors seem backward. Electrical function matters more than color assumptions in those situations. Labeling wires before removal becomes incredibly helpful.
Patience pays off heavily in older rooms because damaged drywall, broken plates, and stripped screws can quickly turn a quick repair into a weekend project. Gentle handling, proper tools, and careful wire management reduce the chance of creating extra cosmetic repairs while fixing the switch itself.
Testing The Switch The Right Way
Flipping the switch once after installation is not enough testing. A proper check involves cycling through every function several times while listening closely for unusual behavior. The fan should start smoothly, the light should remain steady, and the switch should feel firm without sticking. Small inconsistencies usually point toward loose wiring or compatibility problems.
Heat testing matters too. After running the fan for a while, touch the wall plate lightly near the switch. Slight warmth can happen with some controls, but noticeable heat deserves investigation. Overheating switches should never be ignored because heat buildup often signals excessive electrical resistance.
Test the fan at every speed setting if the wall control supports variable speeds. Weak startup, random speed jumps, or delayed response may indicate the wrong control type or internal fan issues. Stable speed transitions usually indicate healthy electrical communication between the switch and motor.
Lighting performance should remain consistent while the fan changes speeds. If the light dims unexpectedly or flickers only at certain fan settings, compatibility problems may still exist somewhere in the system. Careful testing helps catch those small problems before they grow into larger electrical frustrations.


Best Small Flush Mount Ceiling Fans 2026 Ultimate Picks

Best Smart Ceiling Fan India 2026 For Effortless Comfort

Best Smart Ceiling Fans with Lights for 2026: Top Picks

Best Smart Home Non Ceiling Fans 2026 For Ultimate Comfort

Best Outdoor Misting Ceiling Fan 2026 For Ultimate Comfort

Best Ceiling Fans With Lights For Vaulted Ceilings 2026 Top Picks

Best Outdoor Ceiling Fans For Porch 2026 With Style And Breeze

Best WiFi Enabled Ceiling Fan 2026 For Effortless Comfort





