How To Replace a Fog Light Bulb Without Removing the Bumper?

A burned-out fog light is a simple driveway fix that rarely calls for a mechanic or an expensive repair bill. Most vehicles let you swap the bulb from behind the bumper by unplugging the wiring connector and giving the socket a quarter turn counterclockwise to slide it out. The whole job takes less than twenty minutes once you reach the back of the housing.
The exact approach depends on how the vehicle builder closed off the engine bay. Some models give clear access right behind the splash shield (the plastic panel bolted under the front bumper), while others require loosening a few clips on the wheel well liner (the plastic shield curving inside the fender above the tire). Bulb bases also differ between twist-and-lock styles and squeeze tabs. Here is how to find the proper access path, free the socket gently, and lock the fresh light into place.
Locate Your Access Path Behind the Lower Bumper
Taking off a front bumper cover takes hours, requires removing dozens of fasteners, and risks snapping painted plastic tabs. You do not need to pull the bumper off to replace a burned-out fog light. Automakers place fog light housings in the lower corners of the front bumper, leaving open space directly behind the shell. You can reach this space from behind the front tire or underneath the front lip.
Most vehicles offer two main access paths. The first path runs through the wheel arch by peeling back the wheel well liner (the plastic shield curving inside the fender above the tire). The second path runs from beneath the vehicle by loosening an edge of the splash shield (the protective plastic panel bolted under the front bumper).
To find which route works best, check your ground clearance. Pickup trucks and tall SUVs usually have plenty of open space underneath, letting you reach straight up behind the bumper to touch the housing. Passenger sedans and compact cars sit much lower to the ground. For those vehicles, working through the plastic shield curving inside the fender above the tire offers the cleanest angle.
Gather a Few Basic Hand Tools and Protective Gear
Having your tools ready prevents scrambling around while holding back flexible plastic trim. You only need a few basic items to complete the job safely.
- Clean protective gloves: Wear nitrile or clean cotton work gloves. Halogen fog bulbs run under intense heat. Leaving skin oils on the quartz envelope causes it to heat unevenly and fail prematurely.
- A flathead screwdriver or trim pry tool: This lifts the center locking pins on round plastic body clips without gouging the surrounding bumper edges.
- A small socket wrench or screwdriver: Many splash shields secure to the frame using small 7mm, 8mm, or 10mm hex screws or Phillips-head fasteners along the bottom edge.
- A bright flashlight or headlamp: The cavity behind the front bumper receives no daylight. A headlamp leaves both hands free while illuminating the locking tabs.
- Safety glasses: Road dirt, sand, and salt collect on inner fender liners. Eye protection keeps falling debris away while you look upward inside the bumper.
Follow These Steps to Swap the Bulb Safely
- Park safely and switch off electrical power. Park on level ground, set the parking brake, and remove the key from the ignition. Turn off all lights. If your fog lights ran recently, wait ten minutes for the housing and bulb to cool down completely.
- Turn the front wheel to clear working space. If working on the driver side, turn the steering wheel all the way to the right. If working on the passenger side, steer all the way to the left. Angling the tire inward opens up ample clearance behind the wheel well liner.
- Pry out the plastic retaining clips along the wheel arch. Locate the three or four plastic push-pins holding the outer edge of the liner to the bumper lip. Slide your flathead screwdriver under the center pin and lift it up about a quarter inch. Once the center pin pops up, the fastener slides out freely. Place the pins in a small cup so they do not roll away.
- Peel back the flexible protective liner. Grasp the loosened edge of the plastic shield curving inside the fender above the tire and fold it back toward the tire tread. Tuck the flexible plastic behind the rubber tire to keep the opening propped open. You now have a clear view directly into the cavity behind the bumper shell.
- Unplug the electrical wiring harness. Find the wiring harness (the plastic electrical plug that snaps onto the bulb base). Press the side release tab firmly with your thumb while pulling the connector straight down away from the bulb. Pull only on the hard plastic connector body, never on the wires.
- Unlock the old bulb from the housing. Most vehicles use twist-and-lock sockets like H11 or H8 designs. Grip the plastic bulb base and give it a quarter turn (a short twist like opening a childproof medicine cap) counterclockwise until it clicks out of the notches. Pull the bulb straight back. For push-tab sockets like a 5202 style, squeeze the two side tabs inward and pull the bulb straight out.
- Seat the replacement bulb into the opening. Pick up your replacement bulb wearing clean gloves without touching the glass capsule. Match the three tabs on the bulb collar to the cutouts in the housing hole, aligning the widest tab with the widest notch. Push the bulb flat against the rubber seal ring and twist it a quarter turn clockwise until it stops firmly.
- Snap the electrical wiring harness back in place. Line up the plastic electrical plug with the pins on the new bulb base. Push the plug upward until you hear a sharp click. That click confirms the moisture seal is compressed and the locking tab is fully engaged.
Avoid Touching the Glass and Forcing Brittle Clips
The most common mistake during bulb replacement is touching the replacement bulb glass with bare fingers. Halogen bulbs rely on quartz glass to withstand intense internal heat. Human skin leaves natural oils on whatever it touches. When the bulb turns on, those oils bake into the quartz glass, trapping heat in one spot. That thermal imbalance leads to early filament failure or causes the glass capsule to blister and crack. You can review safe handling practices in our guide on how to change a halogen light bulb safely at home. If your bare skin accidentally touches the capsule, wipe the glass thoroughly with rubbing alcohol on a clean cloth before inserting it.
Another frequent pitfall is snapping fragile plastic clips. Trim clips spend years exposed to road grit, moisture, and temperature swings, making the plastic brittle. In cold weather, forcing a stubborn push-pin with a screwdriver snaps the locking head off. If a pin resists moving, spray warm soapy water around the collar to dissolve trapped grit, or warm the area gently with your hands before prying.
Pay close attention to how the bulb sits inside the housing before applying turning pressure. Forcing a twist when the tabs do not line up with the housing notches snaps off a mounting ear. Once an ear breaks, the bulb cannot create an airtight seal, allowing rainwater and road spray to flood the housing reflector.
Confirm the Beam Works Before Snapping Trim Back in Place
Do not rush to push your plastic clips back in the moment the bulb clicks. Reassembling the fender liner only to discover that the bulb did not turn on means repeating the entire removal process. Verify the electrical and physical connection while the access flap remains open.
- Switch on the fog lights from the dashboard: Turn your ignition key to accessory or start the car, then switch on the fog lights. Step out to the front of the bumper and confirm the new bulb lights up steadily without flickering.
- Check the beam angle against a nearby surface: Park your car about ten feet away from a garage door or flat wall. The cut-off line of the new fog light beam should sit low and level, matching the height of the opposite beam.
- Inspect the rubber weather seal from the front: Look straight through the clear outer lens of the fog lamp housing. Verify that the bulb sits vertical and centered inside the chrome reflector cone. If tilted, the rear locking tabs are seated unevenly, which lets road mist seep inside.
- Fasten the splash shield and wheel well liner: Pull the plastic liner back into place against the bumper sheet metal. Align each mounting hole, push the outer clip sleeve in first, and press the center locking pin flat until flush.
Choose the Right Replacement Bulb Type for Your Vehicle
Selecting the correct bulb style is essential for a smooth installation. Vehicle manufacturers use distinct base types for their fog lamps, such as twist-and-lock sockets or push-tab styles. Check your vehicle owner manual or remove your burned-out bulb first to read the identification code stamped into the base before ordering a replacement.
You can replace a factory fog bulb with standard halogen bulbs or upgrade to modern LED replacement bulbs. Halogen replacements produce a warm, familiar light beam that matches original factory specifications. LED units draw less electrical power and offer a brighter, cleaner white beam that helps you spot roadside hazards through heavy rain and fog. When selecting an LED replacement, confirm that it features a compact, true factory-sized housing. Fog light cavities often have limited clearance, and an oversized cooling fan or bulky base can bump against internal metal bumper brackets.
Also, check your vehicle's factory wiring connector while the old bulb is out. If you notice signs of heat discoloration, warped plastic, or corroded electrical pins inside the socket, the connection has suffered from moisture intrusion or excessive resistance. In that situation, buying a direct replacement pigtail wiring harness adapter along with your new bulbs lets you replace the damaged plug and restore solid electrical contact.

- LFR Score9.2
LFR Score is a ranking system developed by lightfansreviews.com. LFR Score has no relationship or impact from any manufacturers or sales agent websites. Learn more
- BrandGLSOWEE

- LFR Score9.2
LFR Score is a ranking system developed by lightfansreviews.com. LFR Score has no relationship or impact from any manufacturers or sales agent websites. Learn more
- BrandMarsauto

- LFR Score9.0
LFR Score is a ranking system developed by lightfansreviews.com. LFR Score has no relationship or impact from any manufacturers or sales agent websites. Learn more
- BrandSEALIGHT

- LFR Score8.8
LFR Score is a ranking system developed by lightfansreviews.com. LFR Score has no relationship or impact from any manufacturers or sales agent websites. Learn more
- BrandTorchbeam

- LFR Score8.8
LFR Score is a ranking system developed by lightfansreviews.com. LFR Score has no relationship or impact from any manufacturers or sales agent websites. Learn more
- BrandAUXITO
- LFR Score8.8
LFR Score is a ranking system developed by lightfansreviews.com. LFR Score has no relationship or impact from any manufacturers or sales agent websites. Learn more
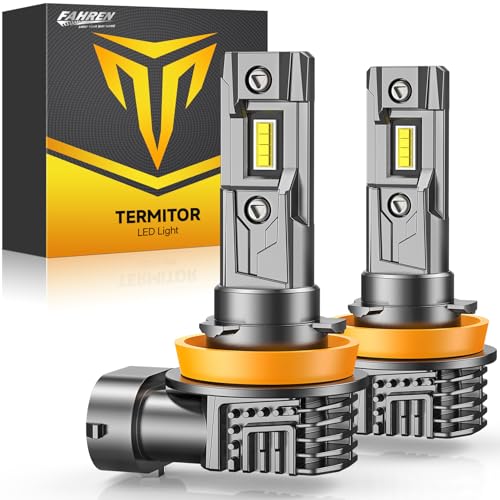
- BrandFAHREN

- LFR Score8.8
LFR Score is a ranking system developed by lightfansreviews.com. LFR Score has no relationship or impact from any manufacturers or sales agent websites. Learn more
- BrandAUXITO

- LFR Score8.0
LFR Score is a ranking system developed by lightfansreviews.com. LFR Score has no relationship or impact from any manufacturers or sales agent websites. Learn more
- Brandgunhunt

- LFR Score7.6
LFR Score is a ranking system developed by lightfansreviews.com. LFR Score has no relationship or impact from any manufacturers or sales agent websites. Learn more
- BrandFlygun
Last update on 2026-10-02 / Affiliate links / Images, Product Titles, and Product Highlights from Amazon Product Advertising API
FAQs
Do I need to disconnect my car battery before changing a fog light bulb?
You do not need to disconnect the car battery for a simple bulb swap. Turning the headlight switch off, taking the key out of the ignition, and setting the parking brake cuts power to the fog light circuit safely. Only disconnect the negative battery terminal if you plan to cut and splice wires to replace a damaged electrical plug.
Which way do I turn the fog light bulb to unlock it?
Most automotive twist-and-lock fog light bulbs unlock by turning them a quarter turn counterclockwise when looking directly at the rear of the socket. Once the tabs clear the notches, pull the bulb straight out. To lock the new bulb in place, push it flush into the housing and twist it a quarter turn clockwise until it stops.
Can I touch a replacement halogen bulb with bare hands?
Never touch the clear glass of a halogen bulb with bare hands. Skin leaves tiny deposits of natural oil on the quartz envelope that create intense localized hot spots when the light turns on. These hot spots weaken the glass structure and cause the bulb to burn out early. Wear clean gloves or hold the bulb strictly by its plastic base.
Why is my new fog light bulb loose after twisting it in?
A loose bulb usually means the rubber sealing gasket failed to compress against the housing opening, or one of the locking tabs missed its alignment slot. Remove the bulb and check that the rubber O-ring sits flat around the collar. Reinsert the bulb, ensuring the widest tab aligns with the widest slot, push firmly inward against the rubber ring, and twist until the tabs lock securely.

Best Bulb For Exposed Light 2026 That Shines Bright

Best Industrial Light Bulb Reviews: Top Picks for 2026
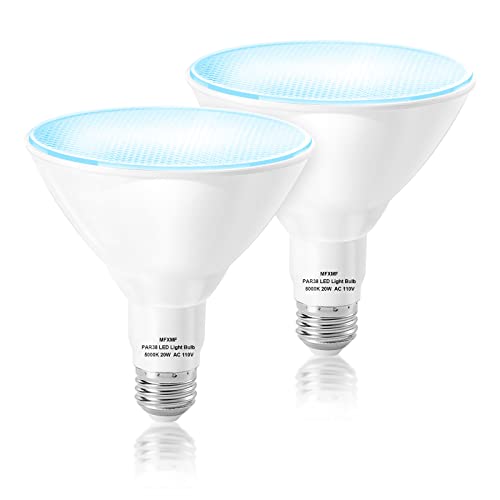
Best Outdoor Light Bulb Reviews: Top-Rated Picks for 2026
Best LED Reading Light Bulb Reviews - Top Picks for 2026

Best Vintage Light Bulb 2026 With Style And Glow
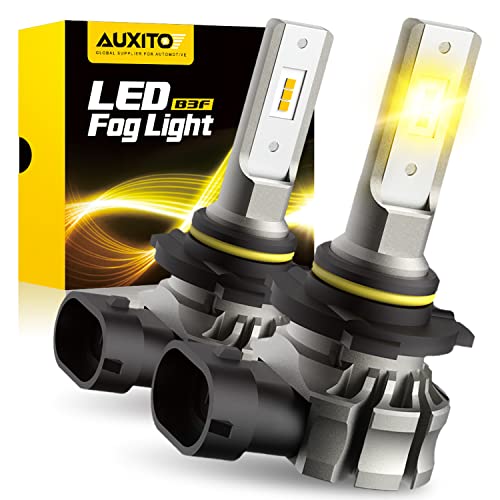
Best Yellow Fog Light Bulb 2026 For Clearer Night Drives

Best Z Wave Light Bulb 2026 Top Picks For Smart Control
Best Light Bulb For Vanity Mirror 2026 Brightness Boost