
How to Replace a Front Turn Signal Bulb Yourself

Fixing a dead blinker simply involves reaching behind the light assembly, twisting the plastic bulb holder a quarter-turn, and popping in a new bulb. The exact physical path to that socket changes depending on how crowded your engine bay is. In roomy trucks and sedans, the holder sits right in plain sight under the hood, so the whole swap happens without any tools.
Other vehicles require peeling back the plastic splash guard inside the wheel opening to reach the housing from underneath. The bulb design also changes your next step, since flat glass bases pull straight out while round metal bases need a slight push and twist to release. Upgrading to modern lights can also make the signal flash too quickly without the right resistor. Here is how to find your access point, remove the old glass safely, and get your blinker working normally again.
Reach the bulb through the hood or wheel splash guard
Getting your hands into the space behind your vehicle headlight is usually the hardest part of replacing a front blinker. Modern engine bays pack cooling hoses, air filter boxes, and electrical fuse boxes into every square inch. You have two common ways to reach the light assembly, depending on what vehicle you drive.
The first route is working directly under the hood. Pop the hood open, prop it up securely, and look down directly behind the front corner of the headlight housing. If you see open space behind the turn signal lens, you can reach straight down with your hand. Trucks, older sedans, and large SUVs often have enough clearance to let your forearm slide behind the metal frame without removing anything.
The second route goes through the fender well. When the engine bay is too tight to squeeze your fingers past the battery or fluid reservoirs, working from underneath is much easier. You gain access by moving the plastic splash guard inside the fender, also known as the wheel well liner. This thin plastic shield blocks road debris from hitting your engine, but peeling it back gives you a straight, level shot right at the back of the light fixture.
Follow this quick access checklist to decide which route works best for your car:
- Check top clearance first: Look behind the corner marker light from inside the engine bay. If you can touch the plastic bulb holder plug with your fingertips without scraping your knuckles against sharp metal brackets, you can complete the swap from above.
- Turn the front wheels outward: If you must go through the wheel well, start the car and turn the steering wheel all the way in the opposite direction of the dead bulb. If your passenger blinker is out, turn the wheels all the way to the left to open up huge working room inside the right wheel well.
- Remove plastic splash guard fasteners: Locate the two or three plastic retaining clips or small screws along the outer edge of the wheel arch. Use a flathead screwdriver to gently pry up the center pin of each plastic clip, then pull the entire fastener out.
- Peel back the plastic liner: Pull the flexible edge of the plastic splash guard toward the tire. Shine a flashlight inside, and you will see the rear of the headlight housing and turn signal wiring right in front of you.
- Let the engine cool completely: Metal radiator lines, transmission cooler pipes, and air conditioning tubes run close to headlight assemblies. Wait at least thirty minutes after driving so you do not burn your arms while reaching into tight spots.
Twist the socket counterclockwise to unlock and remove it
Once you can lay your hand on the back of the turn signal housing, removing the bulb holder requires only a simple turn. Vehicle light housings use twist-lock tabs and rubber weather seals to keep moisture out of the lens. You do not need heavy tools for this step.
- Turn off the vehicle and pull the key: Switch off the headlights and make sure the emergency hazard flasher switch is off. Removing a bulb while electrical current flows through the socket can blow an interior fuse.
- Find the correct socket: Look at the front of your car to confirm which section of the lens lights up for the turn signal. Headlight housings hold separate sockets for high beams, low beams, side markers, and blinkers. Trace your line of sight from the front lens to the exact socket directly behind that amber reflector.
- Grip the plastic bulb holder plug: Reach in and grasp the plastic base where the colored wires enter the assembly. Some vehicles use a socket with a raised plastic fin or wing that gives your thumb and forefinger leverage.
- Rotate counterclockwise one quarter turn: Turn the plastic bulb holder plug counterclockwise, which is roughly a quarter turn to the left. You will feel a slight mechanical click as the locking tabs slide out of their molded slots in the light housing.
- Slide the socket straight backward: Pull the socket gently away from the light housing. Move slowly so you do not knock the glass bulb against the sharp edges of the opening, which could crack the glass or drop loose pieces inside the sealed lens.
- Swap out the dead bulb: Remove the old bulb from the socket and firmly insert the fresh one until it seats all the way down. Make sure to wear clean gloves or hold the glass with a clean paper towel, much like you would practice how to change a halogen light bulb safely at home, because skin oils create hot spots that shorten bulb life.
- Inspect the rubber sealing ring: Check the rubber o-ring seated around the base of the plastic socket. This small ring keeps rainwater from fogging up your headlight lens. If it slipped out of its groove while twisting, push it back flat against the socket shoulder.
- Reinstall and lock the socket: Guide the new bulb back into the light housing opening. Line up the uneven plastic locking tabs with the matching notches in the housing, push inward against the rubber seal, and turn the socket clockwise one quarter turn until it stops firmly.
- Verify the light before reassembling the fender: Turn on your hazard lights or flip the turn signal stalk to verify that the new bulb blinks properly. Once you confirm it lights up, push your plastic splash guard back into place and pop the retaining clips into their holes.
Pull flat wedge bases straight out and twist round pins
Automotive blinker bulbs connect to their sockets using two very different base designs. Trying to remove a bulb the wrong way can snap the glass in your fingers or destroy the internal electrical clips. Look closely at the connection point where the glass meets the plastic socket before applying force.
The most common style in modern cars is a flat glass slide-in base, commonly called a flat wedge base. These bulbs do not have any metal collars around their bottom. Instead, the glass bulb simply flattens out into a thick, clear tab with thin wire leads folded over each side. To remove a wedge base bulb, hold the plastic socket firmly in one hand, grasp the glass bulb with your other hand, and pull it straight out of the socket. Do not twist a wedge bulb. Twisting forces the flat glass edges against the narrow metal spring clips inside the socket, which can bend the contacts out of shape or crack the bulb base.
If a wedge bulb feels stuck, road grit or heat expansion may have seized it against the socket walls. Wrap a strip of painter tape or a small piece of rubber shelf liner around the bulb to get a better grip with your fingertips, then pull straight out with steady pressure. You can rock the glass slightly forward and back, but never twist it side to side.
The second common design is a round metal base with side pins, known as a bayonet base. These classic bulbs feature a round metal cylinder at the bottom with two small metal pins sticking out from opposite sides. You cannot pull a bayonet base bulb straight out. If you pull straight on a metal base, you will rip the glass globe off the metal collar and leave the live contacts stuck in the socket.
To release a round metal bayonet base, press the bulb gently inward toward the socket against its internal coil spring. While holding the bulb pushed inward, twist it counterclockwise about twenty degrees until the side pins clear the locking channels in the socket sleeve. Once the pins line up with the release tracks, let the spring push the bulb up and lift it away. Pay attention to the side pins on your replacement bulb. Some use pins placed directly opposite each other, while others use offset pins where one pin sits higher up the metal barrel than the other to prevent installing a dual-circuit bulb backward.
Check the plastic plug for melted plastic or corroded pins
If your turn signal bulb stops working, the bulb filament might not be the actual problem. Front turn signal sockets handle significant electrical heat. Many vehicles use dual-function front bulbs that stay lit continuously at low brightness as daytime running lights or parking lights, then flash at high brightness when you hit the blinker. Running that low-beam filament for hours during long highway trips builds up intense heat inside the small plastic socket.
When you pull the old bulb out, take a bright flashlight and look straight down into the hollow cavity of the plastic bulb holder plug. Look for these clear warning signs of electrical heat damage:
- Charred or distorted plastic: If the plastic walls around the metal terminals look dark brown, black, or melted out of shape, the socket has overheated. Warped plastic prevents the internal metal clips from putting firm pressure on the bulb contacts.
- Green or white powdery crust: Road salt, rain, and car wash spray can sneak past dried rubber seals. Moisture creates corrosion, visible as green copper oxidation or white powder on the brass pins. This build-up blocks electrical current from reaching the new bulb.
- Burnt, acrid odor: A socket that smells like burnt wiring or scorched plastic indicates an electrical short circuit or loose connection that generated excessive resistance heat.
- Loose bulb fitment: When you slide your new bulb into the socket, it should snap in snugly. If the bulb wobbles loosely or falls out under its own weight, the internal metal contact fingers have lost their spring tension or melted into the surrounding plastic casing.
If the socket shows only light surface corrosion, spray a small blast of electrical contact cleaner into the plug and gently wipe the metal contacts with a clean wooden toothpick or nylon brush. Never scrape inside a live socket with metal screwdrivers or steel picks, which can short out the lighting circuit.
If the plastic bulb holder plug is visibly melted or cracked, putting a fresh bulb in will not solve the issue for long. The bulb will either flicker intermittently or fail to light entirely. You can easily fix this by buying a replacement automotive wire socket harness. These replacement sockets come with a few inches of new wire pigtails attached. You simply snip the old melted socket off the vehicle harness one wire at a time, strip back the insulation, and crimp the new socket into place using water-resistant heat-shrink butt connectors.
Add a resistor if your new turn signals blink rapidly
A common surprise after installing a new turn signal bulb is finding that the blinker flashes twice as fast as it used to. This condition is called rapid blinking, or hyper-flash. Drivers often worry they bought a defective bulb or hooked up their wiring backward, but rapid blinking is actually a built-in safety alert programmed into your vehicle flasher module.
Your vehicle turn signal circuit is tuned for traditional incandescent bulbs that draw a specific amount of electrical power (wattage). When an old-school bulb burns out, the filament snaps, cutting the power draw on that circuit to near zero. The flasher relay detects this sudden drop in electrical resistance and deliberately doubles its blinking speed to warn you from inside the cabin that an exterior bulb has died.
If you recently upgraded your standard amber bulbs to modern LED replacements, this same warning system gets triggered by mistake. LED chips draw only a tiny fraction of the electrical power that an incandescent filament consumes. Because the LED uses so little power, your vehicle computer thinks the bulb is missing or burnt out, causing the blinker to cycle wildly fast on that side of the car.
Use this short checklist to address rapid blinking and restore a normal signal pace:
- Confirm polarity on the bulb: Many LED replacement bulbs are polarity sensitive, meaning electrical current must flow through them in one specific direction. If the LED does not light up at all after installation, remove it from the socket, spin it 180 degrees, and push it back in to match positive and negative contacts.
- Install an inline load resistor: A load resistor is a small metal-cased component that absorbs extra electrical power and turns it into safe heat, mimicking the power draw of an original factory bulb. Wire the resistor across the positive blinker wire and the ground wire just behind the bulb socket. This tricks the vehicle flasher module into sensing normal resistance.
- Mount resistors to bare metal: Load resistors get hot during operation because they bleed off excess electrical power. Always screw or mount the resistor housing against the bare metal frame of the vehicle chassis, never against plastic inner fenders, wiring looms, or rubber hoses.
- Check your rear turn signal bulbs: If you installed a standard incandescent bulb in the front and it still blinks too fast, check the back of your car. A burned-out rear turn signal bulb causes the front turn signal on the same side to flash rapidly. Replacing the bad rear bulb will instantly fix the front flashing speed.
Choose matching amber bulbs and replace them in pairs
When shopping for a replacement front turn signal bulb, matching the exact size code and base shape is essential. Pulling your old bulb first or checking your vehicle owner manual will show you an industry standard number stamped directly on the base. Common front turn signal sizes include numbers like 3157, 1156, 7443, or 3057. While two bulbs might look similar across a store counter, tiny differences in side pin height, locking tabs, or wire contacts will prevent the bulb from fitting into your plastic socket.
Pay close attention to lens color when selecting your replacement. Road safety laws require front turn signals to flash amber. If your car has a clear headlight lens over the turn signal pocket, you must buy an amber-tinted bulb (often designated with an "A" or "NA" in the part number). If your headlight housing has a built-in amber plastic lens molded into the outer shell, you can use a clear glass bulb because the colored plastic creates the amber glow for you.
Always replace your front turn signal bulbs in pairs. Turn signal filaments and parking light circuits experience the exact same hours of vibration, road bumps, and electrical current on both sides of your vehicle. When the driver side bulb burns out from normal filament wear, the passenger side bulb is operating on borrowed time. Swapping both bulbs on the same afternoon ensures balanced light output and saves you from tearing back into your wheel well a few weeks later.
If your visual inspection uncovered heat damage or loose pins inside the plug, pick up a matching vehicle-specific bulb socket alongside your new bulbs. Quality replacement sockets built from heat-resistant nylon handle everyday electrical warmth much better than brittle, aged plastic, keeping your new turn signals flashing brightly and safely in 2026.

- LFR Score10.0
LFR Score is a ranking system developed by lightfansreviews.com. LFR Score has no relationship or impact from any manufacturers or sales agent websites. Learn more
- BrandLskioer
- LFR Score9.4
LFR Score is a ranking system developed by lightfansreviews.com. LFR Score has no relationship or impact from any manufacturers or sales agent websites. Learn more
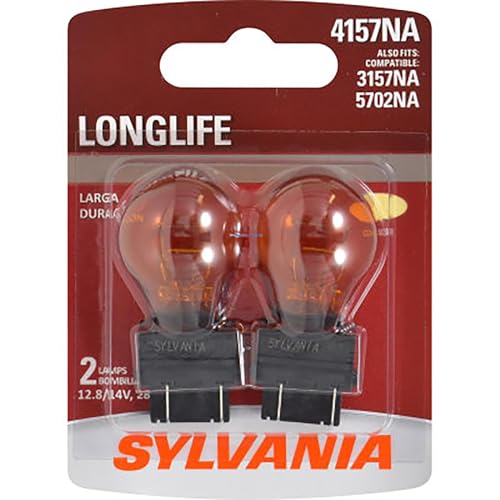
- BrandSYLVANIA

- LFR Score9.2
LFR Score is a ranking system developed by lightfansreviews.com. LFR Score has no relationship or impact from any manufacturers or sales agent websites. Learn more
- BrandYwdiml

- LFR Score9.0
LFR Score is a ranking system developed by lightfansreviews.com. LFR Score has no relationship or impact from any manufacturers or sales agent websites. Learn more
- BrandRED WOLF

- LFR Score9.0
LFR Score is a ranking system developed by lightfansreviews.com. LFR Score has no relationship or impact from any manufacturers or sales agent websites. Learn more
- BrandSEALIGHT
- LFR Score8.8
LFR Score is a ranking system developed by lightfansreviews.com. LFR Score has no relationship or impact from any manufacturers or sales agent websites. Learn more
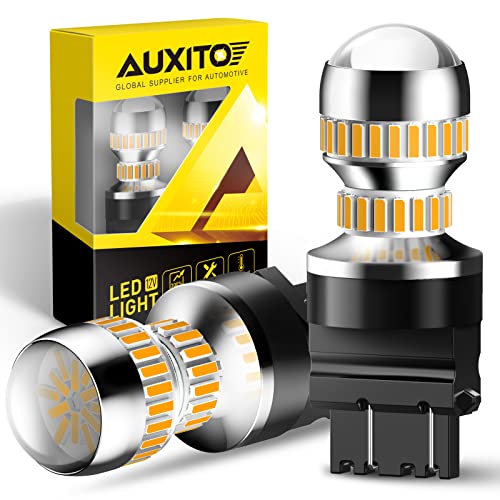
- BrandAUXITO

- LFR Score8.8
LFR Score is a ranking system developed by lightfansreviews.com. LFR Score has no relationship or impact from any manufacturers or sales agent websites. Learn more
- BrandAUXITO

- LFR Score8.6
LFR Score is a ranking system developed by lightfansreviews.com. LFR Score has no relationship or impact from any manufacturers or sales agent websites. Learn more
- BrandAuxbeam
Last update on 2026-10-02 / Affiliate links / Images, Product Titles, and Product Highlights from Amazon Product Advertising API


Best Bulb For Exposed Light 2026 That Shines Bright

Best Industrial Light Bulb Reviews: Top Picks for 2026

Best Outdoor Light Bulb Reviews: Top-Rated Picks for 2026

Best LED Reading Light Bulb Reviews - Top Picks for 2026

Best Vintage Light Bulb 2026 With Style And Glow

Best Yellow Fog Light Bulb 2026 For Clearer Night Drives

Best Z Wave Light Bulb 2026 Top Picks For Smart Control

Best Light Bulb For Vanity Mirror 2026 Brightness Boost






