
How to Replace Inground Pool Light: A Simple DIY Guide
Replacing an inground pool light might sound like a tough job, but with the right know-how, it’s totally doable even if you’re not a seasoned handyman. Whether your pool light flickers, goes dark, or you simply want to upgrade to a brighter, more energy-efficient bulb, knowing how to handle this task can save you big bucks and keep your pool sparkling all night long. Many pool owners dread the thought of diving into electrical repairs, but with proper safety tips and step-by-step guidance, you can tackle this with confidence. This guide covers essential tools, safety checks, and practical tips that make the process smoother than you’d expect. Don’t let the dark waters keep you from enjoying your pool’s full glow learning how to replace an inground pool light is easier than you think and worth every effort for the warm ambiance it brings.
A glowing pool light is more than just a pretty sight it sets the mood, enhances safety, and turns your backyard into an inviting oasis after sunset. But what happens when that trusty inground pool light suddenly dies or dims? Instead of calling a pro right away, you might be surprised at how straightforward replacing it can be. From unplugging the power safely to swapping out the bulb and resealing the fixture, each step is manageable with some basic tools and a pinch of patience. This guide cuts through the confusion and gives you clear, no-nonsense advice on how to replace your pool light without breaking a sweat or the bank. Let’s dive into the bright world of pool lighting fixes and get your waters shining brilliantly again!
Besides safety, the cost factor is huge. Hiring a professional electrician or pool technician can run into hundreds of dollars, whereas doing it yourself with proper guidance slashes costs dramatically. Plus, upgrading to LED or energy-saving bulbs can reduce electricity bills while providing stronger illumination. So, the benefit of DIY replacement goes beyond convenience it’s about saving money and gaining control over your pool maintenance schedule.
Another important point many overlook is the environmental impact. Old bulbs can be inefficient and waste energy, while newer models offer greener alternatives. By replacing your pool light yourself, you get the chance to pick more eco-friendly options, supporting sustainable living without sacrificing quality or style. The time invested pays off in multiple ways: safety, savings, and sustainability all wrapped in one project.
In summary, tackling your inground pool light replacement is a win-win. It enhances your pool’s look and safety, saves money, and lets you choose better tech for the long haul. The upcoming sections break down the process clearly, so you’re armed with confidence and know exactly what tools and steps are involved before you dive in.
Choosing the correct replacement bulb is crucial. Pools vary in voltage and size, so picking a bulb designed specifically for your fixture ensures optimal brightness and longevity. Many modern pool lights use LED technology, which shines brighter and lasts longer than old halogen or incandescent bulbs. Consider upgrading while you’re at it to enjoy these energy-efficient benefits.
Don’t forget the sealant or gasket. The waterproof seal is your pool’s defense against leaks and electrical hazards. Even a tiny gap can lead to water damage and safety risks, so always use a fresh gasket compatible with your fixture. Also, having a wet/dry vacuum or pump nearby can help manage any water that might seep during the replacement process.
Lastly, a voltage tester is an indispensable safety tool. It confirms that the power to the pool light circuit is fully off before you start working. This little device prevents shocks and gives you peace of mind while you handle electrical components. With the right toolkit, you’re not just ready you’re set to work safely and effectively on your inground pool light replacement.
Some pools have a dedicated timer or switch for lights make sure these are off too. The trick is not to assume the light is off just because it’s dark. Electrical wiring can remain energized, posing hidden dangers. Use the voltage tester on the fixture wires or the light niche to verify no current flows.
If you’re unsure which breaker controls the pool light, switch off the main breaker as a precaution. Though this means temporarily losing power to other parts of your home, it’s better than taking chances with electricity near water. Safety always tops the priority list when it comes to inground pool light maintenance.
Once power is confirmed off, give yourself a few moments to double-check surroundings. Avoid wet areas or standing water near the electrical box and light niche. Wear rubber gloves and use insulated tools if possible. These simple but crucial actions prevent accidents and let you work with full confidence on replacing your pool light.
Next, unscrew the fixture faceplate carefully using your screwdriver. Old screws might be corroded, so patience and the right screwdriver size are key to avoiding stripping them. After removing screws, gently pull the fixture out of the niche, keeping an eye on the electrical cord. It’s normal for some water to drip, so prepare towels or a bucket.
Disconnect the fixture from the wiring harness or junction box by unplugging connectors or loosening wire nuts. Avoid tugging on wires directly to prevent damage. Once detached, inspect the niche for debris or corrosion. Clean it if needed before installing the new fixture. This step is crucial because a clean, intact niche ensures a proper seal and prevents leaks.
Finally, remove the old gasket and discard it. Never reuse old seals they lose elasticity and compromise waterproofing. Now your pool is prepped for the fresh new light to shine bright and safe.
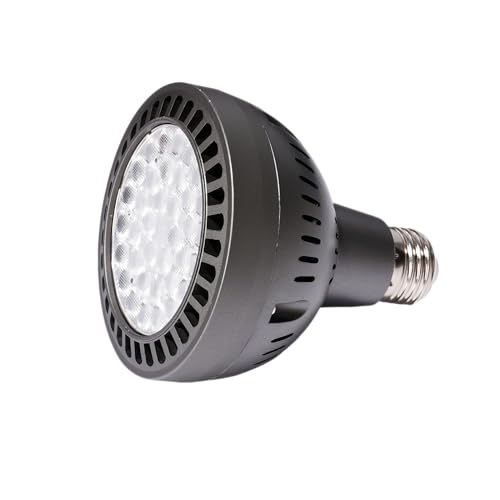
Halogen bulbs still exist but tend to burn hotter and have shorter lifespans. If your pool setup supports LEDs, this is the moment to upgrade and enjoy vivid colors and crisp lighting that won’t fade quickly. Plus, many LED kits offer multi-color options, allowing you to customize your pool’s vibe with just a remote control.
Voltage and size compatibility are other big factors. Most inground pool lights run on low voltage, typically 12V or 120V. Check your old bulb or fixture specs to avoid mismatched parts that won’t work or might cause damage. The manufacturer’s instructions provide vital guidance on what fits best.
Besides bulb type, consider energy efficiency certifications like ENERGY STAR to ensure your new pool light is as green as it gets. Choosing the right bulb is not just about illumination; it’s a smart investment in your pool’s future enjoyment and cost savings.
Before sealing, clean the niche and fixture surface thoroughly, removing old sealant residues and debris. Any dirt or corrosion can weaken the seal, so a clean surface guarantees the gasket sticks properly. Applying a silicone-based marine sealant around the gasket edges adds an extra layer of protection.
Once the new gasket is in place, carefully insert the fixture back into the niche. Tighten screws evenly and firmly but avoid over-tightening, which could deform the gasket or crack the fixture. After assembly, inspect the seal visually to ensure no gaps or bulges appear.
If your pool light fixture comes with a clear lens, check it for cracks or cloudiness. Replacing or polishing it can improve light output and keep water out. Proper sealing not only maintains the beauty of your inground pool light but safeguards your electrical system from costly damage.

If the light flickers or won’t turn on, wiring could be loose or corroded. Double-check all connections inside the niche and junction box. Corrosion often causes poor contact, which interrupts power flow. Cleaning terminals with a contact cleaner or replacing damaged wiring might be necessary to restore full brightness.
Another frequent hiccup is water leakage inside the fixture. This points to an imperfect seal or damaged gasket. Inspect the gasket and reseal if you spot any cracks or gaps. Also, check that screws are snug but not overly tight to avoid distorting the seal. Addressing these issues promptly prevents bigger electrical hazards and costly repairs.
Don’t forget to test the voltage with a tester at the light’s wiring after replacement. It can pinpoint whether power is reaching the bulb or if the problem lies elsewhere. Armed with these troubleshooting tips, you’re ready to handle common post-replacement glitches and keep your pool glowing safely.
Use tools with insulated handles, and never attempt to replace pool lights during a storm or when rain is imminent. Moisture increases the risk of electrical accidents exponentially. Planning your replacement on a dry, calm day adds an important safety layer.
If you feel uneasy about any step especially handling wiring or sealing don’t hesitate to consult a professional electrician. Knowing when to call for help is a smart move, not a sign of failure. Remember, pool lighting isn’t just about looks; it’s a safety system, so shortcuts or carelessness can have serious consequences.
Lastly, regularly inspect your pool light and its wiring yearly to catch early signs of wear or corrosion. Proactive maintenance keeps surprises at bay and prolongs the life of your lighting system. Your pool deserves the best care, and safety always leads the way.
Consider installing a timer or smart controller for your pool lights. These devices ensure your pool glows only when needed say, during evening swims or parties and shuts off automatically otherwise. It’s a simple tweak that slashes wasted energy without sacrificing convenience or ambiance.
Dimming options and color-changing LEDs let you customize brightness levels based on mood or occasion. Lower light settings use less energy and create relaxing atmospheres, while full brightness is ready when you need it. This versatility is a big plus for eco-conscious pool owners.
Also, regularly clean the pool light lens and fixture housing. Dirt and algae buildup can block light output, causing you to crank up brightness unnecessarily. Keeping the fixture clean ensures every watt counts toward lighting up your water beautifully and efficiently.

Complex setups with multiple light fixtures, especially those integrated into larger pool automation systems, often require specialized knowledge. Incorrect replacement can disrupt other electrical components or void warranties. Professionals ensure that replacements are compliant with local electrical codes and pool safety standards.
If you suspect the pool light transformer or control system is malfunctioning, an expert diagnosis saves time and money. DIY fixes on these components can lead to bigger headaches. Also, if you’re uncomfortable working underwater or handling sealed niche fixtures, it’s best to let trained technicians take over.
Recognizing your limits and knowing when to hire help is a vital part of pool maintenance responsibility. It protects your investment and keeps everyone safe while still enjoying the charm of a beautifully lit pool.
Keep the lens clean of algae and mineral deposits using non-abrasive cleaners. A clear lens ensures maximum light output and prevents overheating. Also, inspect wiring insulation and connections during your annual pool maintenance to spot wear before it becomes a hazard.
Avoid running your pool light continuously use timers or smart controls to limit usage to necessary hours. This practice significantly extends bulb life and reduces energy bills. Plus, it gives your pool that magical glow exactly when you want it.
By treating your pool light with a bit of TLC, you’re investing in safety, beauty, and peace of mind. A well-maintained lighting system becomes a lasting highlight of your backyard haven, reflecting your care and attention.


Best Boat Black Lights 2026 For Nighttime Adventure

Best Black 30 Inch Light Bar Reviews – Top Picks of 2026

Best Black Light For Aquarium 2026 For Vibrant Glow

Best Black Light for Authenticating Glass 2026 Top Picks

Best Waterproof Spotlight 2026 That Outshines Expectations

Best Solar Spotlight For Yard 2026 Brighten Outdoor Spaces With Ease
Best Led Spotlight Rechargeable 2026 Bright Picks

Best Rechargeable Spotlight For Boat 2026 That Cuts Through Darkness





