
How to Replace LED Ceiling Light: Simple Steps for Any Home
If you’re looking to give your home a fresh glow or just fix a flickering light, how to replace LED ceiling light is a skill worth having. Many homeowners hesitate because it sounds technical, but the truth is, with the right guidance, anyone can tackle this upgrade without calling in a pro. From choosing the perfect LED fixture to safely removing the old one, this guide breaks it down so you’re never left in the dark. You’ll find handy tips on tools you’ll need, safety tricks to avoid shocks, and ways to ensure your new LED light shines bright and lasts long. Not only will you save money by doing it yourself, but you’ll also gain confidence in handling basic electrical fixes around the house. Whether it’s for your kitchen, hallway, or living room, knowing how to replace your LED ceiling light means better control over your home’s vibe and lighting efficiency. Let’s brighten up your space step by step and get that ceiling light shining just right!
Getting into how to replace LED ceiling light might sound daunting, but it’s actually a breeze once you know the ropes. Many folks imagine complicated wiring or expensive tools, but the reality is, most LED ceiling light replacements can be done with simple tools and a little patience. Plus, it’s a fantastic way to freshen up any room’s atmosphere, save on energy bills, and even add a modern touch to your home. This guide walks you through each step—from switching off power safely to picking out the right LED fixture and installing it like a pro. So, if you’re ready to roll up your sleeves and transform your space, stick around. We’ll show you how to swap out that old light for a bright, efficient LED, all while keeping things safe and straightforward. No fuss, no frills—just clear, practical advice to light up your home with confidence!
Before diving into the task of how to replace LED ceiling light, the crucial first step is preparation. Many homeowners hesitate because they feel unprepared or lack the right tools, but this process starts with gathering the essentials and planning. Start by turning off the power at the breaker box to eliminate any chance of electric shock—safety is non-negotiable here. Next, equip yourself with a sturdy ladder, a screwdriver, wire strippers, voltage tester, and your new LED fixture. Having everything at hand before you climb up means less fumbling and fewer chances for mistakes.
Choosing the right LED ceiling light also matters. The market is flooded with options that vary in brightness, color temperature, size, and energy efficiency. Consider the room’s size and purpose to pick a fixture that delivers the perfect glow without overdoing energy use. For example, kitchens and workspaces benefit from bright, cool white LEDs, while bedrooms often call for warmer tones to foster relaxation. Keep the fixture’s dimensions and mounting style compatible with your existing setup to avoid additional hassles.
Once you’ve got the tools and the right fixture, take a moment to inspect the current ceiling light assembly. Is the wiring old or damaged? Are the mounting brackets secure? These small checks can save you headaches later on. If you spot any frayed wires or loose connections, it’s best to replace or fix them before proceeding. This prep phase sets the foundation for a smooth, worry-free installation and keeps your home safe.
In addition to tools and fixture choices, ensure your workspace is well-lit and free from distractions. A focused environment reduces errors and helps you complete the replacement efficiently. Gather a helper if possible—someone to steady the ladder or pass tools can make the job safer and more enjoyable. Preparation isn’t just about equipment; it’s about mindset too. Confidence grows with readiness.
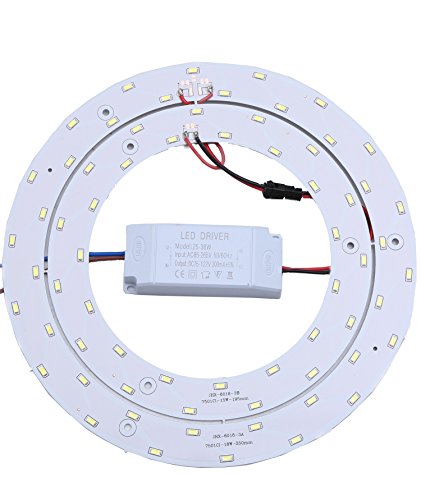
Here’s where the rubber meets the road. Turning off the power is an absolute must—no exceptions. Even if you’re a seasoned DIYer, skipping this step could lead to nasty shocks or worse. Use a voltage tester on the wires to double-check that the electricity is indeed off. This simple precaution is your best friend. Then, carefully remove the existing ceiling light fixture. This usually involves unscrewing the fixture cover and disconnecting the wiring harness.
Older fixtures can be stubborn, sometimes stuck due to age or paint, so patience is key. Avoid forcing parts, as damaged components can complicate replacement or create hazards. If screws won’t budge, a little penetrating oil or a gentle tap with a screwdriver handle often helps. Be sure to keep all screws and mounting hardware handy if you plan to reuse any parts. If not, toss them out to avoid clutter.
As you remove the fixture, note how the wiring is connected—taking a picture with your phone can be a lifesaver for reference. Most setups involve a black (live), white (neutral), and green or copper (ground) wire, but configurations may vary. Properly identifying these wires ensures your new LED ceiling light will be hooked up correctly. Mistakes here can lead to flickering lights or worse, electrical faults.
Finally, check the electrical box mounted in the ceiling. It should be securely attached to a joist or support beam. If it’s loose or damaged, replace it before proceeding. A secure mounting box is essential for holding the new fixture safely over time, preventing sagging or dangerous falls. This removal stage can be quick or require a bit of finesse, but taking your time pays off.
Picking your new LED ceiling light isn’t just about looks—it’s a blend of style, function, and performance. Think about the brightness level, measured in lumens, to match the room’s purpose. For instance, a bright 3,000-lumen fixture might be perfect for a kitchen or bathroom, while 1,000 to 2,000 lumens work great in bedrooms or living rooms. LED technology offers a fantastic energy-saving edge, often using 75% less energy than traditional bulbs, which means your electric bills take a nice dip too.
Color temperature plays a huge role in the vibe of your room. LEDs come in warm white (around 2700K), cool white (4000K), or daylight (5000K+). Warmer tones create cozy, inviting spaces, while cooler tones boost alertness and are great for work areas. Many modern fixtures even come with adjustable color temperatures and dimming options, letting you tailor the lighting to your mood or task.
Don’t forget to measure the ceiling height and fixture size to ensure proper scale. A massive light in a small room looks awkward, while a tiny fixture in a large room won’t provide enough illumination. Also, consider whether you want a flush mount (sitting close to the ceiling) or semi-flush mount for a bit more style. Some LEDs have sleek designs that blend seamlessly into the ceiling, ideal for minimalist aesthetics.
Lastly, think about installation ease. Some LED fixtures are designed with quick-connect wiring and easy mounting brackets that save time and frustration. Choosing a fixture with these features can make your DIY project smoother, especially if you’re replacing an old fixture with a different style. Smart planning here makes all the difference.
Now comes the heart of the job: connecting the wires. This is where many get nervous, but with clear steps and safety measures, you can nail it without fuss. Begin by matching the wires from your ceiling to the wires on the new LED fixture—black to black (live), white to white (neutral), and green or bare copper to ground. Twist the exposed wire ends together, then secure them with wire nuts. Make sure connections are tight but not over-twisted to avoid damaging the wires.
If your new fixture has a different wiring setup or uses connectors instead of wire nuts, consult the installation manual carefully. LED fixtures sometimes have drivers or adapters integrated, so extra caution is needed. If you’re unsure about any connection, it never hurts to call an electrician or ask a knowledgeable friend for a quick look.
Wrap each wire nut connection with electrical tape for added security, and tuck the wires neatly into the ceiling box. This prevents accidental disconnections and keeps everything tidy. A messy wiring job can cause shorts or buzzing sounds, so neatness is key. Remember, the goal is not just to get the light working, but to ensure it stays safe and reliable for years.
After wiring, double-check every connection before mounting the fixture. Use your voltage tester one more time to confirm there’s no stray current, especially if you flipped the breaker back on for a test. Better safe than sorry when dealing with electricity.
With wiring done, it’s time to secure your new LED ceiling light to the ceiling box. Most fixtures come with mounting brackets and screws that align with standard electrical boxes. Attach the bracket first, then carefully lift the fixture and connect it according to the manufacturer’s instructions. Take your time here—dropping or forcing parts can damage delicate LEDs or wiring.
Ensure the fixture is level and flush with the ceiling for that clean, polished look. Some LEDs have adjustable arms or clips to help with this. After mounting, turn the breaker back on and flip the switch to test your handiwork. If the light flickers or doesn’t turn on, immediately switch off power and recheck wiring connections. Troubleshooting early saves headaches later.
If all is well, replace any diffuser covers or lenses and clean the fixture surface from fingerprints or dust. Your new LED ceiling light should now be shining bright and efficient, ready to enhance your space with better light quality and lower energy use. Remember, this upgrade not only improves your home’s atmosphere but also cuts down your carbon footprint.
Replacing an LED ceiling light may seem tricky at first glance, but breaking it down step-by-step with a focus on safety, preparation, and choosing the right product makes it entirely doable. You’ll save on electrician fees, feel proud of your accomplishment, and enjoy that crisp, beautiful lighting every day.

Even with the best preparation, you might hit a few bumps when figuring out how to replace LED ceiling light. One common hiccup is the light flickering after installation. This usually points to a loose connection or incompatible dimmer switches. LED lights require specific dimmers designed for low wattage—using an old incandescent dimmer often causes flickering or buzzing. So, double-check your dimmer compatibility or consider swapping it for an LED-compatible model.
Another issue is the light not turning on at all. This could be due to a power supply problem, a faulty LED driver, or incorrect wiring. Before freaking out, make sure the breaker is on and test the fixture with a multimeter. If the wiring looks fine but the light stays dead, the LED driver inside the fixture might be defective. Most LEDs have sealed drivers, meaning you’ll need to replace the entire fixture or consult a pro for repair.
Sometimes, the fixture doesn’t sit flush against the ceiling, leaving gaps or causing it to hang unevenly. This usually means the mounting bracket or electrical box isn’t properly secured or the fixture’s design doesn’t match your ceiling type. You can fix this by tightening the screws, adjusting brackets, or swapping to a fixture better suited for your ceiling profile. Getting this right isn’t just about aesthetics—it affects the fixture’s safety and longevity.
Lastly, buzzing or humming noises from the light are signs of electrical interference or poor wiring. This problem can be tricky, but often tightening wire nuts or replacing the LED driver with a higher-quality one solves it. Remember, a quiet, steady glow is the hallmark of a well-installed LED ceiling light. Don’t settle for anything less.
Switching out old bulbs for LED ceiling lights isn’t just a style upgrade—it’s a smart move for your wallet and the planet. LEDs use up to 75% less energy than incandescent or fluorescent bulbs, which means noticeable savings on your electric bill. For households running multiple fixtures, this can add up to hundreds of dollars saved annually. Plus, with energy prices always fluctuating, efficient lighting offers some financial peace of mind.
Beyond saving money, LEDs contribute to reducing carbon footprints. Because they consume less electricity, they lower greenhouse gas emissions from power plants. Some studies estimate that widespread adoption of LED lighting could cut global energy consumption for lighting by nearly 50%. That’s a huge environmental impact for a small switch in your ceiling.
LEDs also last far longer—often 25,000 to 50,000 hours—compared to around 1,000 hours for incandescent bulbs. This longevity means less frequent replacements and less waste filling up landfills. And unlike fluorescent bulbs, LEDs contain no harmful mercury, making disposal safer and greener. Choosing LEDs is an easy, effective way to make your home more sustainable without sacrificing comfort.
Finally, many modern LEDs are designed with recyclable materials and minimal packaging, pushing the eco-friendly advantage even further. When replacing your ceiling light, opting for an energy-efficient, long-lasting LED is a no-brainer for anyone wanting to combine savings with environmental responsibility.
One of the coolest perks of LED ceiling lights is how customizable they are compared to traditional bulbs. With features like adjustable brightness, color temperature, and even smart home integration, you can fine-tune your room’s vibe effortlessly. Imagine setting a bright, energizing white light for work hours and switching to a warm, mellow glow for relaxing evenings—all from a handy remote or smartphone app.
Dimmable LEDs let you control intensity without changing fixtures. This not only saves energy but also sets the perfect mood for any occasion, whether it’s movie night or a dinner party. Many LED ceiling lights come with presets or color-changing capabilities, allowing you to experiment with hues that complement your décor or reflect your mood.
Smart LED fixtures can sync with voice assistants like Alexa or Google Home, meaning hands-free lighting control. You can schedule lights to turn on or off, change brightness based on the time of day, or even mimic sunrise and sunset to support your body’s natural rhythms. These tech-savvy features bring a whole new level of convenience and personalization to your home environment.
Beyond ambiance, customizable LEDs can also enhance safety by providing motion-activated lighting in hallways or staircases. This means no more fumbling in the dark or wasting electricity lighting empty spaces. The flexibility of LEDs makes them a top choice for homeowners who want more than just basic illumination.

Once you’ve tackled how to replace LED ceiling light and got it installed, keeping it in top shape is key to enjoying years of crisp illumination. Unlike traditional bulbs that need frequent swapping, LEDs require minimal upkeep, but a little care goes a long way. Dust buildup is the biggest enemy of LEDs; it dims the light and can cause overheating. Regularly dust your fixture with a soft cloth or a gentle brush to maintain brightness.
If your LED fixture has a diffuser or cover, clean it occasionally with a mild soap solution and dry thoroughly. Avoid harsh chemicals or abrasive materials that could scratch or damage the surface. Keeping the diffuser clean ensures your light stays evenly dispersed and pleasing to the eyes.
Check the fixture’s mounting and wiring annually to catch any loosening or wear early. Vibrations or temperature changes over time can affect screws and connectors. Tightening them when needed prevents flickering and prolongs the fixture’s lifespan. Also, monitor for any unusual sounds or dimming, which can signal electrical issues needing professional attention.
Finally, if you have dimmers or smart controls, update firmware regularly if applicable, and test functionality to avoid glitches. Proper maintenance of your LED ceiling light not only keeps your space bright but also protects your investment over the long haul.
While many can confidently manage how to replace LED ceiling light on their own, sometimes the job calls for a pro. If you encounter complicated wiring setups, outdated electrical boxes, or signs of damage like sparks or burning smells, it’s safer to bring in an electrician. Electrical work has its risks, and professionals can handle tricky issues quickly and safely.
If your home has knob-and-tube wiring or lacks grounded outlets, installing modern LED fixtures might require upgrading your electrical system. This isn’t a simple DIY fix and involves permits and inspections. Professionals have the knowledge and equipment to ensure everything meets safety codes and functions properly.
Sometimes, special fixtures with integrated smart features or complex drivers need expert installation to avoid voiding warranties or damaging components. Professionals can also assist in troubleshooting persistent issues like flickering or dimmer incompatibility that stump DIYers.
Don’t hesitate to call a licensed electrician if you feel uncertain or encounter any red flags. Investing in professional help guarantees your LED ceiling light replacement is safe, durable, and stress-free. Remember, your home’s electrical safety is worth every penny.



Best LED Track Strip Lighting 2026: Bright Ideas for Every Space

Top Rated Best LED Dimmable Track Lights of 2026: Enlighten Your Space!

Best Plug In Track Lighting LED 2026 For Bright Spaces
Best Integrated LED Track Lighting: Top Picks for 2026

Best Round LED Ceiling Light Reviews - Top Picks 2026

Best Modern Track Lighting LED 2026: Sleek Illumination Upgrade

Best Mini LED Track Lighting: Top Picks for 2026

Best Oiled Bronze Track Lighting 2026 Stylish Illumination Picks






