
How to Replace a Rear Turn Signal Bulb Without Breaking Clips

Changing a dead rear blinker requires reaching behind the light unit, twisting the bulb socket counterclockwise, and swapping in a fresh bulb. How you reach that socket depends entirely on how your vehicle is built. Some cars let you reach straight in through a small felt panel inside the trunk, while others require loosening two screws and gently sliding the outer plastic light housing forward.
The physical bulb design also differs across models. Many vehicles use a flat glass wedge that pulls straight out, while others feature a round metal base that you push down and turn to release. Lens color matters too, since clear outer lenses need an amber-tinted bulb to stay road-legal, while colored lenses use clear glass. Checking these simple details before you start makes the whole repair quick, safe, and free of broken clips.
Check your bulb number and grab simple hand tools
Replacing a burnt-out blinker bulb does not require a trip to a repair shop. Most drivers already own every tool needed for this job in a standard home toolbox. The main secret is gathering the right parts before loosening a single bolt.
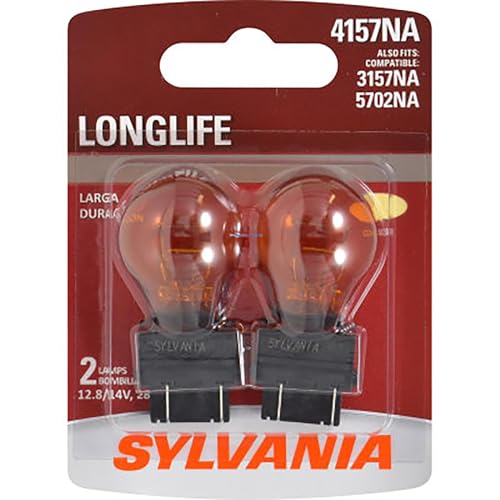
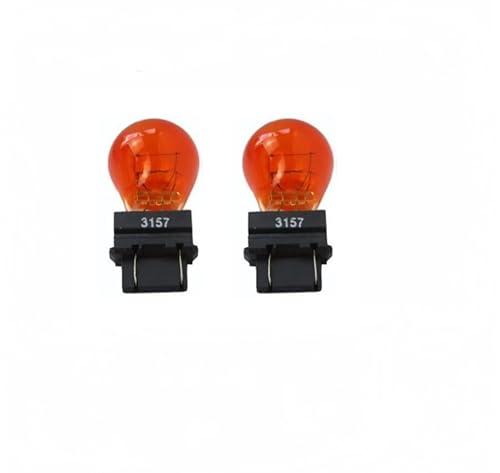
Start by confirming your replacement bulb number. Car makers list this code in your vehicle owner's manual under lighting specifications. You can also pull your dead bulb out first and read the numbers stamped into its base. Common automotive miniature bulb types include 3157, 1156, or 7440.
Pay close attention to base shape and glass color before buying anything. A wedge base has a flat glass end that pushes straight in, while a bayonet base has a round metal base that pushes and twists into place. Also check your glass color. If your outer plastic rear light unit (taillight assembly) has a clear turn signal window, your bulb must have amber glass to glow legal yellow. If the outer lens is already colored amber or red, a standard clear bulb works fine.
Keep these simple items nearby before starting:
- A flathead screwdriver with painter's tape wrapped around the tip to protect paint.
- A standard Phillips screwdriver.
- A small socket wrench (usually 8-millimeter or 10-millimeter) for housing bolts.
- Clean gloves or a paper towel to keep skin oils off new glass.
- A flashlight to see inside dark trunk corners.
Most cars open from inside the trunk or cargo area
Automakers use two main designs to let you reach the turn signal socket (the plastic twist-in bulb holder). The first design allows access directly from inside your trunk or cargo area. The second design requires unbolting the outer plastic rear light unit from the vehicle frame.
To check for interior access, open your trunk and look at the carpet lining behind the taillight. Many cars feature a small plastic access door or a hinged flap cut into the felt lining. Pop this flap open with your fingers or a flat tool. If you see the back of the bulb holders and wiring plugs, you can change the bulb without removing the light unit from the car.
Some vehicles use plastic trim clips to hold the trunk lining against the frame. Pry these retainer clips out gently with a flat tool. Never yank the felt liner hard, or you risk tearing the fabric around clip holes.
If your trunk has solid metal or molded trim with no interior flap, the outer plastic rear light unit must come off. Open your trunk lid or liftgate and look along the inner jamb next to the light for two holding screws.
Back these screws out and set them in a safe tray. Once the screws are out, hidden plastic alignment pins still hold the light unit in place. Do not pry outward against the car body with a metal screwdriver, or you will crack the lens and scrape the paint.
Instead, grip the housing with both hands and pull it straight backward along the side of the vehicle. A firm, straight backward pull pops the alignment pins loose from their body grommets without snapping the fragile plastic tabs.
Twist the socket and swap out the old bulb
Once you reach the rear of the lamp housing, swapping the bulb takes only a few minutes. Take your time to avoid damaging the wiring harness or dropping small parts into the car frame.
Follow these steps to remove the dead bulb and mount your replacement:
- Locate the correct socket. The rear housing holds several lights, including brake and reverse lights. Follow the colored wires or look through the front lens to identify which socket sits directly behind the turn signal chamber.
- Twist the socket counterclockwise. Grip the plastic twist-in bulb holder firmly and rotate it a quarter turn counterclockwise. You will feel a soft click as the locking tabs slide free. Pull the socket straight out of the lamp.
- Remove the old bulb from its holder. If the bulb has a flat glass end that pushes straight in (a wedge base), hold the socket and pull the glass straight out. If the bulb has a round metal base that pushes and twists (a bayonet base), press the bulb gently downward against its spring, turn it a quarter turn counterclockwise, and lift it out.
- Check the socket opening for damage. Look inside the plastic holder with your flashlight. The small metal contact pins should look clean. If you notice black burn marks, green corrosion, or moisture, wipe the metal clean with a dry cotton swab before installing the fresh bulb.
- Seat the new bulb with clean gloves. Never touch replacement bulbs with bare fingers. The natural oils from your skin leave a residue that creates hot spots on the glass, causing early failure. This careful handling matches the precautions you use when you change a halogen light bulb safely at home. Push a wedge bulb straight in until seated, or push and rotate a bayonet bulb clockwise until its side pins lock into the collar grooves.
Turn on hazard flashers before putting trim back together
Do not reassemble your trunk carpet, bolts, or trim panels yet. Confirming that your new bulb works while everything is still exposed saves you from taking the assembly apart again if a connection needs adjustment.
Follow these steps to confirm your repair:
- Leave the bulb socket hanging freely. Make sure the socket wires are relaxed and the glass bulb does not rest against carpet, rubber weatherstripping, or sharp metal edges.
- Turn on the vehicle hazard warning lights. Walk to the dashboard and press the hazard switch. Using hazard lights is the easiest way to inspect rear blinkers because it flashes both sides without needing a helper to hold the turn signal lever.
- Inspect the rear blinker pulse. Walk to the back of the car and watch the new bulb. It should flash steadily with bright, even pulses.
- Check the bulb orientation if it stays dark. If the bulb does not flash, switch off the hazard button. Pull the bulb out of the socket, rotate it 180 degrees, and push it back in. Some wedge base bulbs and LED alternatives use directional contacts that only work facing one specific way.
- Lock the socket back into the housing. Turn off the hazard lights. Align the plastic tabs on the socket with the notches in the lamp opening. Push the socket flush against the rubber gasket and twist it clockwise a quarter turn until it locks with a click. This rubber seal keeps moisture and road dust from entering the housing.
- Reinstall the housing and interior trim. If you removed the outer plastic rear light unit, line up the plastic guide pins with their body grommets and push the unit straight forward until it seats flush. Thread mounting screws in by hand first to avoid cross-threading, then snug them down with your screwdriver. Snap any interior trunk flaps or carpet clips back into place.
Rapid blinking signals an uneven electrical load or loose fit
If you install a new bulb and your dashboard indicator clicks twice as fast as normal, your car is experiencing hyperflash (rapid blinking caused by uneven electrical draw). Vehicle makers intentionally program the blinker circuit to flash rapidly when it detects an electrical mismatch.
The most common cause is a difference in power draw. Traditional flasher relays expect a specific level of electrical resistance from heated metal filaments. When you install an LED replacement bulb, the LED draws far less electricity than an incandescent bulb. The flasher relay assumes the bulb is burnt out because barely any current flows, triggering rapid dashboard clicking.
Another frequent culprit is mismatched bulb filaments. Many rear sockets serve as both a running taillight and a brighter turn signal. These dual-purpose sockets require dual-filament bulbs with two internal wires and two contact dots on the base. If you install a single-filament bulb into a dual-contact socket, the circuit cannot split power properly, causing erratic flashing or dim lights.
Rapid blinking can also occur if the front turn signal bulb on that same side is failing. A dying front bulb changes total resistance on the shared circuit, making your fresh rear bulb blink too quickly. Always walk around the car to verify that both front and rear signals pulse together.
Check the physical contacts inside the twist-in bulb holder if the bulb flickers over bumps. Over years of driving, the small metal prongs inside the plastic holder can bend downward, loosening their grip. With the ignition off and the bulb removed, gently lift the metal prongs upward with a toothpick to restore firm contact against the bulb base.
If you have verified the bulb number, cleaned the socket, checked both ends of the car, and still get rapid flashing, stop before cutting into wires. Unresolved flashing can point to a blown fuse, a broken ground wire, or a failing lighting control module. A certified automotive technician can scan the lighting circuit and locate electrical faults safely.
Pick the exact miniature replacement bulb your vehicle manual lists
Selecting the right replacement bulb comes down to matching the physical base and electrical demands of your vehicle circuit. Miniature automotive bulbs look similar on store shelves, but small differences in base width, locking pins, and filament design mean you cannot swap random sizes.
Always match the specific numerical code printed in your owner's manual or stamped into your old bulb base. Check whether your car calls for single-filament operation or dual-filament operation. A dual-filament bulb handles both steady nighttime marker illumination and bright flashing turn signals within one glass housing. Using the wrong filament configuration can leave your rear lights dark when your headlights turn on.
Pay close attention to lens color requirements. When your car's outer plastic rear light unit has a clear turn signal section, legal safety standards require an amber bulb so trailing drivers see a clear yellow signal. If the outer plastic lens is already molded in bright amber or red, standard clear replacement bulbs produce the correct legal color output.
Plan to replace your rear turn signal bulbs in matching pairs. Miniature incandescent bulbs endure identical operating hours, road vibration, and heat cycles. When one rear blinker filament breaks, the bulb on the opposite side has aged just as much and usually fails shortly after. Swapping both sides during the same afternoon saves you from repeating the entire disassembly process a few weeks down the road.

- LFR Score9.8
LFR Score is a ranking system developed by lightfansreviews.com. LFR Score has no relationship or impact from any manufacturers or sales agent websites. Learn more
- BrandSamWinGear
- LFR Score9.4
LFR Score is a ranking system developed by lightfansreviews.com. LFR Score has no relationship or impact from any manufacturers or sales agent websites. Learn more
- BrandSYLVANIA

- LFR Score9.4
LFR Score is a ranking system developed by lightfansreviews.com. LFR Score has no relationship or impact from any manufacturers or sales agent websites. Learn more
- BrandSYLVANIA
- LFR Score9.2
LFR Score is a ranking system developed by lightfansreviews.com. LFR Score has no relationship or impact from any manufacturers or sales agent websites. Learn more
- BrandKadiby

- LFR Score9.2
LFR Score is a ranking system developed by lightfansreviews.com. LFR Score has no relationship or impact from any manufacturers or sales agent websites. Learn more
- BrandBYVORS

- LFR Score9.0
LFR Score is a ranking system developed by lightfansreviews.com. LFR Score has no relationship or impact from any manufacturers or sales agent websites. Learn more
- BrandKadiby

- LFR Score8.8
LFR Score is a ranking system developed by lightfansreviews.com. LFR Score has no relationship or impact from any manufacturers or sales agent websites. Learn more
- BrandiBrightstar

- LFR Score8.8
LFR Score is a ranking system developed by lightfansreviews.com. LFR Score has no relationship or impact from any manufacturers or sales agent websites. Learn more
- BrandTesnaao

- LFR Score7.6
LFR Score is a ranking system developed by lightfansreviews.com. LFR Score has no relationship or impact from any manufacturers or sales agent websites. Learn more
- BrandFlygun

- LFR Score7.0
LFR Score is a ranking system developed by lightfansreviews.com. LFR Score has no relationship or impact from any manufacturers or sales agent websites. Learn more
- BrandHHZL
Last update on 2026-10-02 / Affiliate links / Images, Product Titles, and Product Highlights from Amazon Product Advertising API


Best Bulb For Exposed Light 2026 That Shines Bright

Best Industrial Light Bulb Reviews: Top Picks for 2026

Best Outdoor Light Bulb Reviews: Top-Rated Picks for 2026

Best LED Reading Light Bulb Reviews - Top Picks for 2026

Best Vintage Light Bulb 2026 With Style And Glow

Best Yellow Fog Light Bulb 2026 For Clearer Night Drives

Best Z Wave Light Bulb 2026 Top Picks For Smart Control

Best Light Bulb For Vanity Mirror 2026 Brightness Boost






