
How To Stop a Ceiling Fan From Squeaking Fast
How To Stop a Ceiling Fan From Squeaking usually sounds easier than it really is. That sharp chirp or grinding noise tends to show up right when the room gets quiet, and wow, it can drive anyone up the wall. A fan may look perfectly fine from below, yet hidden problems like dry bearings, loose screws, wobbling blades, or dust buildup often create that nonstop squeak. Ignoring it rarely helps. In fact, the sound usually gets louder over time, especially during warm nights when the fan runs for hours.
Most squeaking fans don’t need expensive replacement parts right away. Small adjustments often solve the issue faster than people expect. Tightening blade screws, checking the mounting bracket, or adding lubricant to moving parts can calm the noise almost immediately. Still, every fan behaves a little differently. Some older models develop motor wear after years of constant use, while others squeak simply because humidity caused parts to expand and shift slightly.
Ceiling fan maintenance also plays a bigger role than many realize. Dust collects around blade arms, motor housings, and rotating joints, creating friction that produces irritating sounds during operation. A neglected fan can start wobbling too, which adds clicking or squealing noises on top of the original squeak. Cleaning the blades carefully and balancing the fan sometimes changes everything. Funny enough, plenty of people replace a fan before trying these simple fixes first.
Noise problems often feel worse late at night because repetitive sounds become impossible to ignore once the house settles down. That tiny squeak turns into a constant distraction during sleep, work calls, or movie nights. How To Stop a Ceiling Fan From Squeaking focuses on practical troubleshooting instead of complicated electrical work, making it easier to narrow down the real cause without tearing the entire fixture apart.
Some solutions take only a few minutes, while others require a closer look inside the motor housing. Either way, understanding why the squeak started matters just as much as fixing it. A loose canopy cover creates a completely different sound than worn bearings or bent blade brackets. Spotting those differences early can save money, reduce frustration, and help the fan run smoother for much longer.
How To Stop A Ceiling Fan From Squeaking
A quiet room can make one tiny squeak feel like a smoke alarm with manners. The fan still spins, the air still moves, but that sharp little chirp keeps stealing attention from sleep, work, and plain old peace. That is where how to stop a ceiling fan from squeaking becomes less of a weekend chore and more of a sanity-saving fix. Most fan noise starts with friction, loose hardware, or dust buildup, not some mystery hidden deep inside the ceiling.
Stop The Squeak At The Source
Ceiling fan squeaks usually come from parts rubbing together while the motor turns. A fan has moving joints, blade arms, screws, bearings, and a mounting assembly, so one small loose point can make the whole thing sound tired. The trick is to slow down and listen before grabbing tools. A steady squeak often points toward friction, while a random squeak mixed with ticking may point toward loose screws.
Start by turning the fan off and letting the blades stop completely. Safety matters because even a slow-moving blade can knock a screwdriver out of your hand, and nobody needs that nonsense. Check the blade brackets, motor housing, downrod, canopy, and light kit if the fan has one. Each spot can create vibration noise that sounds like it is coming from somewhere else.
A squeak that appears only on one speed gives you a useful clue. Low speed may hide the noise, medium speed may bring it out, and high speed may turn it into a sharper squeal. That pattern often means the fan has dry contact points or a small wobble that gets worse as the motor works harder. Fixing the cause early helps prevent extra wear on the motor and blade brackets.
Dust can also act like grit between moving parts. It collects near the motor vents, on blade tops, around the light kit, and inside tiny seams where metal meets metal. Wipe these areas with a soft cloth before tightening anything, because dirt can hide cracks, loose screws, or bent brackets. Clean parts make it easier to spot the real noise source instead of chasing guesses around the room.
Tighten Loose Screws Without Overdoing It
Loose screws are one of the most common reasons a ceiling fan starts squeaking. Blade screws loosen slowly as the fan runs day after day, especially in bedrooms where the fan stays on for hours. Use a screwdriver that fits the screw head snugly, then tighten each screw with steady pressure. Do not crank it like you are fixing a tractor, because overtightening can strip the hole or stress the blade arm.
Check the screws where each blade connects to its bracket first. Then check the screws where each bracket connects to the motor housing. A tiny gap there can create metal-on-metal rubbing, and that rubbing becomes a squeak every time the blade passes through the same point. This is also a good moment to look for warped blades or bent brackets.
The canopy cover near the ceiling deserves attention too. A loose canopy can rub against the downrod or ceiling plate, creating a squeaking or scraping sound that seems to come from the motor. Gently adjust the canopy so it does not touch the rotating parts. Tighten the set screws lightly until the cover stays put without pressing hard against the rod.
Fans with light kits have more places for noise to hide. Glass shades, bulb sockets, pull chains, and decorative collars can all vibrate during operation. Secure loose glass carefully and make sure the bulbs sit firmly in their sockets. For a separate repair that deals with socket safety and fit, use a practical guide like install light bulb socket before blaming the fan motor.
Clean Dust From Blades And Motor Vents
Dust buildup does more than make a fan look neglected. Thick dust changes blade balance, adds drag, and can make the motor work harder than it should. A fan blade with uneven dust may dip slightly during rotation, and that small shift can trigger a squeak near the bracket. Clean the top and bottom of every blade so the fan spins with better balance.
Use a microfiber cloth or pillowcase to trap dust instead of scattering it across the room. Hold each blade gently while wiping so you do not bend the bracket. Avoid soaking the blade, especially if it is made from pressed wood or has a veneer finish. Moisture can cause blade swelling, and swollen blades may wobble more than they did before cleaning.
Motor vents need a lighter touch. Use a dry cloth, soft brush, or vacuum brush attachment to remove dust from the openings. Never push wet cleaners into the motor housing, because moisture and electrical parts are not buddies. Keeping vents clear supports cooler motor operation and may reduce the friction sounds that show up after long use.
A good cleaning also helps you spot damage. Look for hairline cracks near blade screw holes, chipped blade edges, or a bracket that sits at a slightly odd angle. Small defects can create uneven movement, especially at higher speeds. Fixing those details beats listening to the fan squeak through another sticky summer night.

Lubricate The Right Moving Parts
Lubrication can quiet a squeaking ceiling fan, but only if the fan design allows it. Some modern fans have sealed bearings, which means adding oil from the outside will not reach the bearing and may only make a greasy mess. Older fans may have an oil port near the motor housing. Look for a small hole marked for oil before adding anything.
Use only the type of oil recommended for ceiling fan motors or light machine use. Heavy grease can collect dust and gum up moving parts, while the wrong spray can damage finishes or plastic pieces. Add a small amount if the fan has an oil port, then let the fan run briefly at low speed. That gives the lubricant time to spread across dry bearings without flinging excess oil around.
Squeaks near blade brackets usually do not need oil. They usually need tightening, cleaning, or realignment. Spraying random joints can create stains on the ceiling, blades, or light kit, and it may hide the original problem for only a short while. A careful approach keeps the repair clean and protects the fan’s long-term reliability.
A quote worth remembering fits here: “Quiet usually comes from contact control, not force.” That means reducing rubbing, correcting movement, and securing hardware matter more than simply adding lubricant everywhere. If oil helps for a day and the squeak returns, the fan may have worn bearings or a misaligned motor part. At that point, deeper inspection makes more sense than repeated quick fixes.
Balance The Blades Before Blaming The Motor
Blade imbalance often creates squeaks that sound like motor trouble. A wobbly fan shifts weight with every rotation, pulling on screws, brackets, and the downrod. That movement can make parts rub together in a repeating pattern. Balance work feels fussy, sure, but it can make a loud fan feel almost new again.
Stand back and watch the fan from a safe distance while it runs on low speed. A small wobble may look harmless, yet it still creates enough movement to loosen parts over time. Turn the fan off, then measure the distance from each blade tip to the ceiling. A blade that sits higher or lower than the others may need gentle bracket adjustment or replacement.
Balancing kits usually include small clips and adhesive weights. Place the clip on one blade, test the fan, then move it along the blade until the wobble improves. Once you find the best spot, attach the weight as directed. This simple process can reduce vibration, squeaking, and blade stress without touching the wiring.
Room layout can make wobble more noticeable too. Low ceilings, tight bedrooms, and close furniture can amplify tiny noises because sound bounces around nearby surfaces. For rooms where clearance and noise control both matter, compare the fit of a low profile ceiling fan before replacing a noisy standard fan with another bulky model. A better match can reduce airflow noise and visual crowding at the same time.
Check The Mounting Bracket And Downrod
Mounting hardware carries the fan’s weight, so it has to stay firm. A loose ceiling bracket can cause squeaks, clicks, and low rattles that seem to move around the room. Turn off power at the breaker before inspecting anything near wiring or the ceiling box. Then check whether the fan body shifts more than it should when gently moved by hand.
The downrod connection can also cause trouble. Set screws near the downrod collar may loosen with vibration, especially if the fan has been running unbalanced. Tighten them carefully and make sure the safety pin or locking hardware sits correctly. A secure downrod reduces sway, rubbing, and the kind of squeak that gets worse at higher speeds.
Ceiling boxes matter more than many people think. A fan should be mounted to a fan-rated electrical box, not a box meant only for a light fixture. A light-only box may flex or loosen, which can create noise and safety concerns. If the box shifts, cracks, or feels weak, stop the repair and get proper help before running the fan again.
The U.S. Department of Energy notes that ceiling fans can let many households raise thermostat settings by about 4 degrees Fahrenheit without reducing comfort, but that only feels helpful if the fan runs smoothly. A squeaking fan turns energy savings into daily irritation. Keeping the mount stable protects comfort, safety, and the fan’s ability to move air without sounding worn out.
Separate Squeaks From Electrical Buzzing
Squeaking and buzzing are not the same problem. A squeak usually sounds mechanical, like rubbing, chirping, or dry movement. Electrical buzzing often has a steady hum that changes with fan speed or light dimmer settings. Mixing these up can send repairs in the wrong direction fast.
Dimmer switches are a common troublemaker. Many ceiling fans should not run on standard light dimmers because the motor can hum, buzz, or behave oddly. Use a fan-rated speed control instead of a regular dimmer if the wall control seems suspicious. That one change can reduce motor strain and clear up sounds that were never blade-related in the first place.
Light kits can add their own noise. A loose bulb, aging socket, or vibrating glass shade may squeak or rattle while the fan spins. Since light output and bulb type also affect comfort, it helps to know basics like what light has longest wavelength when choosing warmer bulbs for a calmer bedroom feel. The link between lighting and fan comfort is not about noise alone, but about making the whole room feel less harsh.
Power should stay off before touching switches, sockets, or internal wiring. Mechanical checks are one thing, but electrical repairs carry real risk if handled casually. If the sound smells like heat, comes with flickering lights, or changes after touching the switch, call a qualified electrician. Protecting the fan is useful, but protecting the house matters more.
Best Ways To Fix A Squeaky Ceiling Fan
Some ceiling fans start with a tiny chirp and slowly turn into the loudest thing in the room. Sleep gets interrupted, movie nights feel distracting, and even a peaceful afternoon nap can become irritating after the same squeak repeats for hours. A lot of people assume the fan motor is dying, but small mechanical issues, dust friction, and loose hardware create most ceiling fan noise problems. Getting ahead of those issues early usually saves money and keeps the fan running smoother for much longer.
Watch For Blade Warping And Humidity Damage
Humidity changes more than comfort levels inside a room. Wooden fan blades can absorb moisture over time, especially in older homes or rooms with weak ventilation. Once blades start warping, the fan may wobble slightly during rotation, and that wobble often creates squeaks near the brackets or motor housing. Even a tiny bend can throw off the fan’s balance.
Bathrooms, covered patios, and kitchens usually show these problems faster because moisture levels stay higher there. Outdoor fans deal with even more stress from rain, damp air, and temperature swings. Anyone installing a new exterior fan should review proper steps like install outdoor ceiling fan setups before assuming standard indoor mounting methods will hold up outside. A fan rated for dry spaces may start squeaking much earlier outdoors.
Blade warping can sometimes be spotted with the naked eye. Stand below the fan and check whether one blade sits lower than the others during rotation. Another trick involves measuring from the blade tip to the ceiling with a tape measure. Uneven spacing usually points toward blade distortion or a bent bracket.
Replacing one damaged blade may solve the problem, though matching blade weight matters. Random replacement blades can create new balance issues if they differ slightly in thickness or material. Fans spin thousands of times every week, so tiny differences become noticeable fast. A balanced blade set protects the motor from extra strain and reduces long-term wear.
Listen Closely To Motor Bearing Sounds
Motor bearings create a different kind of squeak compared to loose screws or wobbling blades. The sound often feels sharper, more constant, and more noticeable at medium or high speed. Older ceiling fans tend to develop bearing wear after years of daily operation. Once bearings dry out or wear unevenly, the motor starts producing friction sounds that simple tightening will not fix.
A fan with bad bearings may also feel warmer than usual after running for a while. Touch the motor housing carefully after switching the fan off and letting the blades stop. Excessive heat combined with squeaking can point toward internal motor friction. That does not always mean immediate replacement, but it does suggest the fan needs closer attention.
Some fans allow lubrication through an oil port, while sealed motors do not. Trying to force lubricant into a sealed system usually creates a mess instead of a repair. If the fan hums loudly, squeaks continuously, and struggles to start spinning, the motor may simply be nearing the end of its useful life. Repair costs sometimes exceed the value of replacing an aging fan.
Consumer Reports has repeatedly noted that ceiling fans with unstable or noisy motors often become more irritating over time rather than stabilizing naturally. That tracks with real-world experience too. A fan rarely “fixes itself” after weeks of squeaking. Addressing bearing wear early prevents the noise from turning into grinding or complete motor failure later on.
Reduce Noise From Fan Speed Settings
Fan speed changes can reveal hidden problems surprisingly fast. A fan that squeaks only at high speed usually points toward vibration, while a squeak at every speed may signal mechanical friction. Testing each speed separately helps narrow the issue down without tearing apart the entire fixture. That small troubleshooting step saves time and frustration.
Wall controls deserve a closer look too. Some older dimmer switches were never designed for ceiling fans, yet people still use them accidentally. Motors running through the wrong control may buzz, click, or squeal because the electrical flow stays inconsistent. Replacing the wall control with a fan-rated unit often improves both motor stability and overall sound levels.
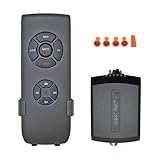
Remote-controlled fans introduce another layer of troubleshooting. Receiver modules inside the canopy can vibrate slightly if they loosen over time. That vibration may create rattling or squeaking sounds that seem like motor trouble from below. Removing the canopy cover carefully and securing loose receiver parts can eliminate surprising amounts of noise.
Noise sensitivity changes from room to room too. Bedrooms tend to amplify repetitive sounds because the environment stays quieter at night. Living rooms with televisions or conversation may hide faint squeaks during the day. Fans designed for quieter operation can make a noticeable difference in tighter sleeping spaces where consistent airflow matters more than raw fan speed.
Inspect Pull Chains And Light Fixtures
Pull chains can create annoying sounds that mimic mechanical squeaks. A chain tapping lightly against a glass shade or metal housing may sound much worse late at night once the house quiets down. Hold the chain gently while the fan runs to see whether the noise changes. That quick test helps rule out a surprisingly common issue.
Glass shades deserve attention too. Loose shades vibrate slightly during operation, especially on higher fan speeds. Tighten mounting screws evenly without forcing them, because overtightening can crack glass unexpectedly. Balanced pressure helps the fixture stay secure without stressing fragile parts.
Light bulbs may contribute to the noise in ways people overlook. A loose bulb can vibrate inside the socket while the fan spins overhead. Tightening the bulb carefully may stop rattling instantly. Some specialty bulbs also produce a faint electrical hum, particularly older LEDs or poorly matched dimmable bulbs.
Lighting comfort affects room atmosphere along with sound. Softer lighting often makes bedrooms and quiet spaces feel calmer overall. Fans paired with harsh lighting can make a room feel colder and more mechanical, while warmer lighting tones usually soften the space visually. For decorative lighting setups or specialty bulb ideas, some homeowners compare options like black light uranium glass displays for accent areas where unique lighting effects matter more than standard brightness.
Know When A Ceiling Fan Needs Replacement
Repair limits matter. A ceiling fan that squeaks despite repeated balancing, cleaning, tightening, and lubrication attempts may simply be worn out internally. Motors weaken over time, especially in fans that ran constantly for years. Spending hours chasing the same squeak every month gets old fast.
Replacement makes more sense once structural parts start failing. Cracked blade brackets, unstable mounting systems, or heavily worn bearings usually signal deeper problems than a quick repair can handle. Older fans may also lack modern motor efficiency, which means they create more heat and noise during operation. A newer fan can sometimes lower both energy use and maintenance headaches.
Pay attention to unusual warning signs. Grinding noises, burning smells, flickering lights, or noticeable motor overheating should never be ignored. Those issues move beyond basic squeaking and may point toward electrical hazards or serious mechanical failure. Turning the fan off completely is safer than hoping the sound fades on its own.
Ceiling fans should blend into the background instead of dominating the room with constant noise. Smooth airflow, steady balance, and quiet operation usually come from consistent maintenance and realistic expectations. A fan used heavily every day will eventually show wear, just like any other moving appliance. Catching small problems early protects comfort, sleep quality, and the overall feel of the room without turning every evening into another battle with an irritating squeak.


Best Small Flush Mount Ceiling Fans 2026 Ultimate Picks

Best Smart Ceiling Fan India 2026 For Effortless Comfort

Best Smart Ceiling Fans with Lights for 2026: Top Picks

Best Smart Home Non Ceiling Fans 2026 For Ultimate Comfort

Best Outdoor Misting Ceiling Fan 2026 For Ultimate Comfort

Best Ceiling Fans With Lights For Vaulted Ceilings 2026 Top Picks

Best Outdoor Ceiling Fans For Porch 2026 With Style And Breeze

Best WiFi Enabled Ceiling Fan 2026 For Effortless Comfort





