
How to Update Ceiling Fan: Breathe New Life Into Your Space
Updating your ceiling fan can make a world of difference in your home. Whether you're seeking improved efficiency, a style revamp, or simply want to keep up with the latest technology, a fan upgrade could be just the ticket. The process might seem daunting, but worry not, as this guide is here to make things simple. Unearth the secrets of a smooth ceiling fan update and breeze into a more comfortable living experience.
1. Exploring the Basics of a Ceiling Fan
To update a ceiling fan, it's essential to first familiarize yourself with its fundamental components. A typical ceiling fan includes several parts: the mounting bracket, downrod, motor housing, fan blades, and lighting fixture. Each of these parts plays a significant role in the function and aesthetics of the fan. Therefore, updating a ceiling fan may involve modifying or replacing one or multiple parts of the fan.
Ceiling fans vary in design, style, and functionalities. Some may come with additional features like remote control, varying speed settings, or direction switch for changing the rotation of the fan blades. When contemplating an update, it's essential to consider which features are most relevant and beneficial for your specific needs.
The updates can range from a simple change of fan blades or adding a lighting fixture to more complex tasks like adjusting the fan's rotation direction or installing a remote control mechanism. The choice of update would depend on your comfort with handling technical tasks, your budget, and the level of change you want to bring about in the fan's performance or aesthetics.
Finally, before embarking on a fan update, remember to consider safety precautions. Always ensure the power is turned off at the breaker before you start working on your ceiling fan to avoid any potential electrical hazards. It's also advised to have a helper around, especially when dealing with larger fans or when performing tasks that require you to reach out to the fan's higher parts.
2. Steps to Updating Fan Blades
Updating the fan blades can drastically change the look of your ceiling fan. This could mean either cleaning the existing blades, painting them a new color, or replacing them entirely with a new set. The first step in this process is to remove the existing blades. Using a screwdriver, unscrew the blades from the fan motor.
Next, if you plan to paint the blades, prepare them for the new coat. This involves cleaning the blades thoroughly, sanding them down lightly, and applying a primer. Allow the primer to dry completely before you move on to the next step. If you're replacing the blades, this step is unnecessary. Instead, you'd go ahead and prepare the new blades for installation.
When the primer has dried, you can now paint the blades in the color of your choice. It's often recommended to apply at least two coats of paint for a smooth, even finish. Allow the paint to dry fully between coats.
After the paint has dried, it's time to reattach the blades to the motor. Using a screwdriver, secure the blades back onto the fan motor. Make sure they are tightly fastened to avoid any wobbling when the fan is in operation.
3. Integrating a Lighting Fixture
Integrating a lighting fixture into your ceiling fan is an excellent way to enhance its functionality. Begin by purchasing a light kit that is compatible with your fan model. These kits usually include a light fixture, bulbs, and installation instructions.
The first step in integrating a lighting fixture is to remove the cover at the bottom of the fan, usually done by unscrewing it. Then, you will need to locate the wires for the light kit in the fan's motor housing. These wires are typically blue and white.
Next, you will need to connect the wires from the light kit to the wires in the fan. The white wire from the light kit connects to the white wire in the fan, and the blue wire from the light kit connects to the blue wire in the fan. Make sure to secure the connections using wire nuts.
Finally, attach the light fixture to the fan. This is usually done by aligning the holes in the light fixture with the holes in the fan and using screws to secure it. Once the light fixture is secure, insert the bulbs and attach the light cover. Now your fan has an integrated light that can provide both air circulation and illumination.
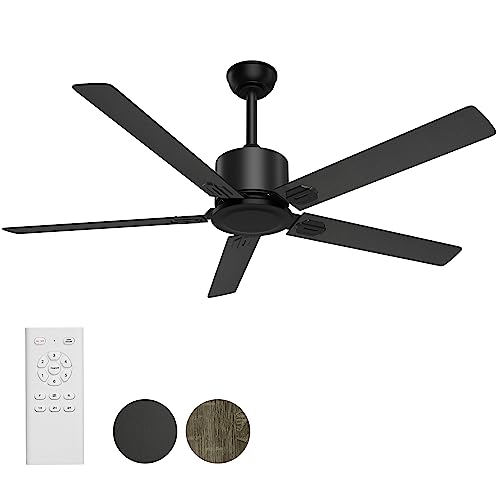
4. Adding a Remote Control Feature
Adding a remote control feature to your ceiling fan can make it more convenient to operate. The first step in this process is to purchase a remote control kit that's compatible with your ceiling fan. The kit typically includes a receiver, which needs to be installed inside the fan's housing, and a remote control.
The installation process starts with turning off the power to the ceiling fan at the breaker. Then, you'll need to remove the fan's canopy by loosening the screws holding it in place. Once the canopy is removed, you will see the wiring and the fan's bracket.
The next step is to install the receiver. The receiver should be placed in the bracket above the fan's motor housing. You will then need to connect the wires from the receiver to the corresponding wires in the fan and the ceiling.
Lastly, you'll need to replace the canopy and secure it with screws. Turn the power back on at the breaker, and test the fan using the new remote control. If everything is working correctly, you have successfully updated your fan with a remote control feature.
5. Enhancing the Fan's Efficiency
Enhancing your ceiling fan's efficiency is a worthwhile update that can result in energy savings. One way to do this is by adjusting the direction of the fan's rotation. During summer, the fan should rotate counterclockwise to create a cool downward airflow. In contrast, during winter, the fan should rotate clockwise at a low speed to circulate warm air that naturally rises to the ceiling.
You can also increase your ceiling fan's efficiency by ensuring it's the correct size for the room. A fan that's too small won't circulate air effectively, and one that's too large can create an uncomfortably strong breeze. As a rule of thumb, a room that's up to 75 square feet needs a fan that's 36 inches or less, while a room that's 225 to 400 square feet requires a fan that's 50 to 54 inches.
Regular maintenance is another key to keeping your fan running efficiently. This includes cleaning the blades regularly to prevent dust build-up, which can unbalance the fan and make it work harder.
Lastly, consider upgrading to an Energy Star-rated fan. These fans are about 60% more efficient than conventional fan models, thanks to their high-performance motors and improved blade designs. An upgrade to an Energy Star fan could lead to noticeable savings on your energy bills over time.
Uncover more details:


Best Small Flush Mount Ceiling Fans 2026 Ultimate Picks

Best Smart Ceiling Fan India 2026 For Effortless Comfort

Best Smart Ceiling Fans with Lights for 2026: Top Picks

Best Smart Home Non Ceiling Fans 2026 For Ultimate Comfort

Best Outdoor Misting Ceiling Fan 2026 For Ultimate Comfort

Best Ceiling Fans With Lights For Vaulted Ceilings 2026 Top Picks

Best Outdoor Ceiling Fans For Porch 2026 With Style And Breeze

Best WiFi Enabled Ceiling Fan 2026 For Effortless Comfort





