
How to Wire a Lighting Contactor: A Clear and Simple Guide
Wiring a lighting contactor might seem intimidating, but with the right approach and clear steps, it becomes a manageable task even for passionate DIYers. This guide focuses on the essential knowledge and practical tips that both professional electricians and homeowners need to safely and effectively wire a lighting contactor. Whether you're upgrading your lighting system for better energy control or troubleshooting an existing setup, understanding the wiring basics is crucial for safety and performance. You'll learn about the components involved, how to properly connect power sources, control circuits, and the importance of following electrical codes. By breaking down the process into simple, digestible steps, this guide helps you avoid common pitfalls, minimize risks, and achieve reliable lighting control that lasts. Clear wiring techniques not only enhance your electrical system’s efficiency but also give you peace of mind knowing everything is connected right. This content is tailored for those seeking hands-on, actionable insights to make wiring a lighting contactor straightforward and safe.
Tackling electrical wiring can feel like navigating a maze, especially when it involves components like a lighting contactor. But don’t sweat it—wiring a lighting contactor isn’t rocket science once you get the hang of the key parts and steps. This guide dives into the nuts and bolts of what you need to know to connect a lighting contactor correctly and safely. Whether you’re a seasoned electrician wanting a refresher or a curious DIYer eager to upgrade your lighting control, this breakdown offers practical tips, safety reminders, and easy-to-follow instructions. With a focus on making things crystal clear, you’ll see how the right wiring can transform your lighting setup—boosting efficiency, cutting down on energy waste, and giving you control at your fingertips. Get ready to roll up your sleeves and light up your knowledge with confidence!
A lighting contactor is the unsung hero behind many efficient lighting systems, especially in commercial and industrial settings. It acts like a giant relay switch, enabling multiple lighting circuits to be controlled from a single point without the need for high current to pass through the control switch. This clever design protects your control devices, minimizes wear and tear, and enhances overall system safety. If you’ve ever wondered how big buildings manage to turn on and off rows of lights effortlessly, chances are a lighting contactor is involved.
Before diving into wiring, it’s important to grasp the key function of the contactor—it bridges the gap between the low-voltage control circuit and the high-voltage lighting circuit. This separation is a major safety feature, ensuring that your control switches and timers handle only small currents while the contactor deals with the heavy lifting. For DIYers or electricians, this means wiring the contactor correctly is a must to avoid electrical hazards and system failures.
One critical pain point many encounter is the confusion between contactors and simple switches. Unlike switches that handle current directly, lighting contactors are designed for heavy loads and frequent switching cycles, making them ideal for commercial lighting or large-scale residential applications. Proper wiring ensures these robust devices perform at their best, offering reliable control and energy-saving opportunities.
Understanding the anatomy of a lighting contactor sets the stage: it typically includes a coil (control side), power terminals (load side), and auxiliary contacts. The coil energizes the device, closing the contacts to let current flow to your lights. Wiring the coil correctly, along with the power lines, is the core challenge—and the focus of this guide—to help you get your system humming safely and efficiently.
Tackling wiring a lighting contactor without the right tools is like trying to bake a cake without a mixer—possible but unnecessarily frustrating. You’ll want a set of insulated screwdrivers, wire strippers, a multimeter, and appropriate wire cutters to make clean and safe connections. The multimeter, in particular, is your best friend for verifying voltages, continuity, and ensuring the contactor coil gets the right current.
Safety gear is no afterthought here. Since you’re dealing with electrical wiring, wearing insulated gloves and safety glasses is a top priority. Don’t even think about skipping these; accidents from electrical shock or flying debris happen more often than you’d expect. Also, be sure to switch off power at the breaker panel before starting any work—this is a critical step to prevent injury and equipment damage.
Another common pitfall is neglecting proper grounding. Make sure your lighting contactor and all associated metal enclosures are well grounded. A solid grounding path will help protect your system from electrical faults and reduce the risk of electrical fires. Investing time in checking your tools and safety gear before wiring makes the entire process smoother and more secure.
Being organized is key—lay out your wires, tools, and wiring diagrams before starting. This planning prevents mid-task scrambling and reduces the chances of wiring errors, which can lead to costly troubleshooting later.
Before touching any wires, get cozy with the wiring diagram that comes with your lighting contactor. This document is the map that guides you through every terminal, coil, and contact point. Many beginners skip this step, only to realize later they connected something backwards or to the wrong terminal. Take a few minutes to trace the control circuit and load circuit paths, noting how the coil activates the contacts.
Pay special attention to the coil voltage rating indicated on the diagram and the contactor itself. Using a coil rated for 120V on a 240V circuit, for example, can cause permanent damage. Conversely, a coil designed for a higher voltage won’t operate properly if the voltage is too low. Matching voltage is one of the most overlooked but crucial steps in wiring a lighting contactor.
The wiring diagram also shows how auxiliary contacts (if present) are wired to additional control devices like timers, switches, or relays. These small terminals often confuse novices but provide valuable control functions like interlocking circuits or signaling. Mark these clearly on your workspace to avoid accidental cross-wiring.
Keep in mind that not all wiring diagrams are identical—some may use different symbols or terminal numbering. Cross-check the manufacturer’s manual and look for clear terminal labeling on the contactor body itself. This double-check ensures you’re not flying blind.
Wiring the power side of the lighting contactor is where things get serious because you’re handling the high-voltage load feeding your lighting fixtures. Start by identifying your incoming power wires (line) and the outgoing load wires that head to your lights. Typically, these wires are thicker gauge to handle the current safely.
First, connect the incoming power lines to the L1, L2, and L3 terminals (depending on whether it’s single-phase or three-phase). Ensure each terminal is tightened firmly—loose connections can cause overheating and dangerous arcing. Then, connect the load wires to the corresponding T1, T2, and T3 terminals on the contactor.
Always check wire colors and labels carefully to avoid mixing phases or neutral lines. A common mistake is confusing neutral with line, which can cause the lighting to malfunction or the contactor coil to fail to energize. Use your multimeter to verify voltage presence and polarity before proceeding.
Once connections are made, organize the wires neatly within the panel or enclosure. This neatness is more than aesthetic; it helps with troubleshooting and prevents accidental shorts. Never force wires—use wire guides or clips to secure everything firmly in place.
The control circuit energizes the contactor coil and dictates when your lights turn on or off. Usually, this circuit is low voltage (like 24V, 120V, or 240V), and the wiring here involves connecting the coil terminals to your control devices such as switches, timers, or sensors.
Start by identifying the coil terminals, often labeled A1 and A2. One terminal will connect to your control voltage source, while the other goes to the switching device. If you have a timer or occupancy sensor, these will interrupt or complete the circuit to energize the coil.
An important factor here is ensuring your control voltage matches the coil rating exactly. Mismatched voltages can either prevent operation or cause coil burnout. If your control devices have neutral or ground terminals, wire them accordingly to maintain proper circuit function.
Additionally, installing a control circuit fuse or breaker adds an extra layer of safety, preventing damage if something goes wrong. Also, many pros recommend adding a snubber or surge suppressor across the coil terminals to protect the contacts from voltage spikes caused by coil switching.
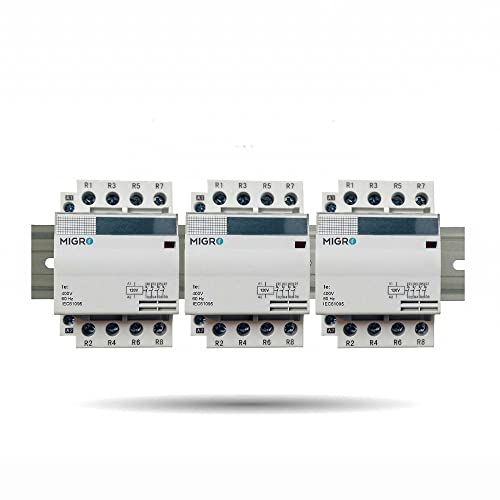
Even experienced electricians can fall into wiring traps that cause headaches down the road. One frequent error is mixing up line and load terminals, which can cause the contactor to fail or behave unpredictably. Double-check labels and test voltages with your multimeter before making permanent connections.
Another mistake is failing to use proper wire sizes. Undersized wires heat up under load, increasing fire risk and reducing efficiency. Always refer to electrical codes and manufacturer specs for wire gauge based on your lighting load.
Forgetting to ground the contactor or enclosing panel is a dangerous oversight. Grounding not only protects equipment but also guards anyone who might touch the system. Skipping this step can lead to severe shocks or equipment damage.
Finally, ignoring coil voltage ratings or miswiring auxiliary contacts can cause the control circuit to malfunction or cause premature wear on the contactor. Taking the time to wire carefully and test at every stage saves time, money, and frustration.
Once wiring is complete, it’s tempting to flip the switch and hope for the best—but hold on. Testing is your chance to catch mistakes before they turn into costly disasters. Use your multimeter to verify continuity and correct voltage levels at the coil and load terminals.
Start by energizing the control circuit only and listen for the distinct click of the contactor engaging. If you don’t hear it, recheck coil connections and control wiring. If the coil energizes, use the meter to check that power is passing through to the load terminals properly.
Look out for any unusual sounds, sparks, or smells—these are clear signs something’s amiss. If all tests pass, only then should you turn on the full power to the lighting circuit. Perform a final check by operating your control device (switch, timer) multiple times to ensure reliable switching.
Incorporating a thorough testing routine is one of the best ways to guarantee a smooth, safe installation and long-term durability of your lighting contactor setup.

Adding timers and sensors to your lighting contactor setup can dramatically improve energy efficiency and convenience. Timers allow your lights to operate only during preset hours, while occupancy sensors switch lights on or off based on room usage. These devices connect into the control circuit, sending signals to energize or de-energize the contactor coil.
One major benefit is the reduction of wasted electricity, which can slash utility bills in commercial buildings. For example, studies show that installing occupancy sensors can reduce lighting energy consumption by up to 30%. Incorporating these smart devices ensures lights aren’t left on unnecessarily, enhancing both environmental friendliness and cost savings.
Wiring timers or sensors requires careful attention to wiring diagrams and terminal labeling. The key is to wire the control inputs so they can interrupt or complete the coil circuit without affecting the power side. Incorrect wiring here can cause erratic operation or even damage to the devices.
Moreover, some lighting contactors come with built-in auxiliary contacts designed for easy integration of such control devices. Leveraging these features not only simplifies wiring but also boosts overall system reliability and longevity.
Lighting contactors come in versions for single-phase and three-phase electrical systems, and knowing the difference is crucial for safe, efficient wiring. Single-phase setups are common in residential or small commercial applications, while three-phase systems are typical for larger commercial or industrial buildings.
The main challenge with three-phase wiring is correctly identifying and connecting all three line inputs (L1, L2, L3) and matching them to the load terminals (T1, T2, T3). Missing or swapping a phase can cause uneven power distribution, flickering lights, or equipment damage.
Also, three-phase contactors often have heavier duty ratings, designed to handle larger currents and more frequent switching cycles. Wiring these correctly demands extra attention to wire gauge, terminal torque, and phase sequence.
In contrast, single-phase wiring is simpler but still requires the same discipline regarding coil voltage, grounding, and secure connections. Knowing which system you’re dealing with and wiring accordingly is a critical key factor to avoid costly mistakes.
Once wired and operational, regular maintenance keeps your lighting contactor in tip-top shape, preventing unexpected failures and costly downtime. One simple but effective practice is periodically inspecting the contactor for signs of wear like pitted contacts, overheating marks, or loose terminals.
Cleaning dust and debris from the contactor and enclosure also helps maintain proper heat dissipation, which can prolong the life of the device. Remember, heat buildup is a common enemy of electrical components.
Tightening terminal screws during routine checks prevents connection loosening caused by vibration or thermal expansion. A loose connection can lead to arcing, causing damage and safety risks. Using a torque wrench to meet manufacturer specifications ensures the right tightness without overdoing it.
Additionally, testing coil resistance with a multimeter helps identify coil degradation before failure. If you notice coil resistance outside normal ranges, it’s time to replace the contactor. Preventive maintenance saves money and keeps your lighting system dependable.
For buildings still relying on manual switching or outdated control methods, wiring a lighting contactor presents a fantastic opportunity to modernize and boost efficiency. Retrofitting a contactor allows centralized control, enabling automation with timers, sensors, or building management systems.
One big advantage is reducing wear on control switches. Instead of high current flowing through wall switches, the contactor handles the load, significantly extending switch lifespan. This upgrade also improves safety by isolating high voltage from everyday control points.
When planning an upgrade, carefully map out existing wiring to integrate the contactor without disrupting current operations. Often, the old wiring can be repurposed as the control circuit, simplifying the transition.
Upgrading can also make your lighting system more flexible. For instance, you can easily add zones, customize lighting schedules, or integrate with energy management software, giving building managers better control and reducing operational costs.

Even with the best wiring practices, problems can pop up, and knowing how to diagnose them saves time and frustration. A lighting contactor that won’t energize might point to issues like a blown fuse in the control circuit, incorrect coil voltage, or faulty wiring.
Start troubleshooting by measuring voltage at the coil terminals—no voltage means control circuit problems, while voltage present but no operation suggests mechanical failure or coil burnout. Listening for the “click” when energizing the coil is a simple yet effective test.
Flickering lights can be caused by loose power connections, poor wire gauge, or worn contactor contacts. Inspecting terminals and replacing damaged parts are typical fixes. If auxiliary contacts control other devices, verify those circuits for proper operation too.
Always approach troubleshooting systematically—checking control circuits, power wiring, and mechanical components—to pinpoint the root cause quickly and get your lighting back on track.
Wiring a lighting contactor isn’t just about making connections; it must comply with local electrical codes and standards. These codes ensure installations meet safety and performance criteria to protect people and property.
A key point is that wiring methods, wire types, and breaker sizes must follow the National Electrical Code (NEC) or equivalent local standards. Using approved materials and adhering to torque specs for terminals are often mandated.
Many regions require permits and inspections for lighting system modifications involving contactors. Ensuring compliance prevents legal headaches and guarantees that your wiring meets industry best practices.
Consulting licensed electricians or inspectors during planning and after installation is wise. Their expertise helps spot potential violations and ensures your lighting contactor system is both safe and code-compliant.
One of the biggest perks of wiring lighting contactors correctly is the significant boost in energy efficiency. Contactors enable automated control strategies that reduce unnecessary lighting operation, translating directly into energy and cost savings.
According to the U.S. Department of Energy, automated lighting controls, including contactors combined with timers and sensors, can reduce lighting energy use by 25% to 60%. This is especially impactful in commercial buildings where lights might otherwise run 24/7.
Proper wiring ensures the contactor responds accurately and reliably to control signals, preventing wasted energy from lights being left on or flickering. The improved lifespan of contactors and switches also reduces replacement frequency and waste.
Investing time to wire your lighting contactor correctly pays dividends in the long run—lower bills, better environmental impact, and smoother operation for your lighting system.



Best Boat Black Lights 2026 For Nighttime Adventure

Best Black 30 Inch Light Bar Reviews – Top Picks of 2026

Best Black Light For Aquarium 2026 For Vibrant Glow

Best Black Light for Authenticating Glass 2026 Top Picks

Best Waterproof Spotlight 2026 That Outshines Expectations

Best Solar Spotlight For Yard 2026 Brighten Outdoor Spaces With Ease
Best Led Spotlight Rechargeable 2026 Bright Picks

Best Rechargeable Spotlight For Boat 2026 That Cuts Through Darkness





