
How to Wire Bathroom Light and Fan Safely and Easily
Wiring a bathroom light and fan might sound intimidating, but with the right guidance, it becomes a straightforward task anyone can tackle. Whether you're a DIY enthusiast or a homeowner looking to improve your bathroom’s lighting and ventilation, understanding the electrical setup is crucial for safety and functionality. This guide covers essential wiring techniques, safety tips, and practical insights to help you get the job done without headaches or costly mistakes. It addresses common pain points such as dealing with moisture, circuit requirements, and the best wiring practices. With clear steps, you'll learn how to connect switches, lights, and fans in a way that keeps your bathroom comfortable and code-compliant. No need to fear electrical work here — just a simple roadmap to achieving a perfectly wired bathroom setup that lasts.
Tackling the wiring of a bathroom light and fan can seem like a daunting chore, especially if you’ve never worked with household electricity before. But don’t sweat it — many homeowners get it done with a little know-how and the right tips. The key factor here is ensuring your wiring is not only functional but also safe, especially in the wet environment of a bathroom where moisture can cause trouble. This article breaks down the wiring process into bite-sized, manageable steps, from understanding your circuit to connecting the switches and devices properly. Plus, you’ll get insider tips on avoiding common pitfalls that could lead to malfunctions or hazards. Stick around, and you’ll be confident enough to wire your bathroom light and fan like a pro — without the typical fuss and stress that usually comes with electrical work.
When it comes to wiring your bathroom light and fan, the first step is to ensure safety is your top priority. Bathrooms are tricky spaces because moisture and electricity don’t mix well, making proper wiring crucial to prevent hazards like shocks or fires. Before diving in, turn off the power at the circuit breaker to avoid any surprises. Using a voltage tester to double-check that no current is flowing is an essential safety measure that many overlook.
Another key factor is selecting the right circuit. Bathrooms often require a dedicated circuit to handle the electrical load of both the light and the fan. This ensures consistent performance without tripping breakers. Remember, many local electrical codes demand that bathroom fans be connected to a dedicated circuit or at least a GFCI (Ground Fault Circuit Interrupter) protected circuit to cut off power if water contact occurs. Taking the time to familiarize yourself with these regulations will save headaches later.
Additionally, identifying the correct wiring setup for your bathroom devices is vital. Some bathrooms have separate switches for the light and fan, while others combine them into a single switch. Knowing your switch type helps in planning the wiring layout. Preparing all necessary tools — wire strippers, connectors, electrical tape, and screwdrivers — beforehand streamlines the process and keeps frustration at bay.
Lastly, keep in mind that bathroom fans typically require a vent duct to the outside to expel moisture properly. Although it’s not wiring per se, this component affects fan performance and overall bathroom comfort. Wiring the fan correctly only matters if it’s paired with a functioning ventilation system to avoid mold and mildew issues.
To successfully wire your bathroom light and fan, you need to grasp the main components involved. Wires come in various colors, each serving a specific function: black or red wires typically carry the “hot” current, white wires act as neutrals, and green or bare copper wires are grounding wires that protect you from electrical faults. Mixing these up can cause equipment failure or dangerous electrical conditions.
Switches control the power flow to your devices. If your bathroom has two separate switches, you’ll run individual hot wires from the switch box to both the light and fan. For a single switch controlling both, wiring becomes a bit simpler but less flexible. Installing a double switch can be a savvy upgrade, giving you separate control over lighting and ventilation — a small investment with big convenience benefits.
Connectors and wire nuts are the unsung heroes of any wiring project. These secure wire ends safely together and maintain solid connections over time. Using cheap or wrong-sized connectors can lead to loose wiring, which is a fire risk. Always opt for connectors that match your wire gauge and are rated for the environment they’ll be in, especially since bathrooms have high humidity.
Grounding is the often ignored but absolutely critical part of electrical safety. Ensuring that both your light fixture and fan are properly grounded prevents electrical shocks if wiring faults happen. Modern fixtures come with grounding wires, but older homes might require adding grounding conductors — don’t skip this step.
Starting your wiring project, locate the power source in your bathroom — usually a cable coming from your main electrical panel. From there, run a cable to your switch box, then onwards to your light and fan locations. The most important step is connecting the wires correctly: hot to hot (black to black), neutral to neutral (white to white), and ground to ground (green or bare copper).
For separate switches, you’ll run individual hot wires from the switches to the light and fan respectively. If you’re using a combo switch, the hot wire splits inside the box to both devices. Don’t forget to cap any unused wires safely with wire nuts to avoid accidental contact.
Next, attach the grounding wires to the metal boxes and fixtures — this ensures everything is safely earthed. Using a continuity tester can confirm your grounding connections are solid before restoring power.
After all wiring is secured and insulated, carefully mount your light fixture and fan according to manufacturer instructions. Remember, improper mounting can lead to vibration noise or electrical shorts over time. Always double-check connections and clearances for moisture exposure.
Once done, switch on your breaker and test each device individually. Both should operate smoothly without flickering lights or humming fans — signs of wiring issues. If anything feels off, turn off the power and recheck your connections.
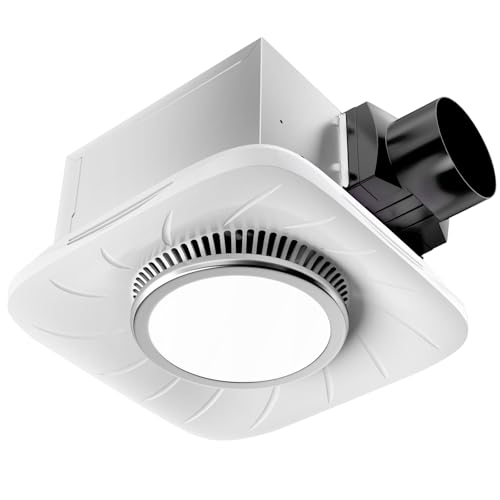
Many DIYers stumble over a handful of avoidable mistakes when wiring bathroom lights and fans. One glaring issue is neglecting to install GFCI protection where required. This lifesaving device detects current leaks and instantly cuts power, preventing electric shocks in wet environments. Skipping GFCI installation is a costly oversight that endangers your family.
Another frequent misstep is improper wire connections, especially mixing neutrals and hots. This can cause malfunctioning devices or even pose a fire hazard. Take your time to match wire colors precisely and use appropriate connectors to maintain safe, lasting joints.
Overloading circuits by adding bathroom fans without dedicated wiring is also common. Bathroom fans draw significant power, and lumping them on general lighting circuits can cause nuisance trips or overheating. Investing in a dedicated circuit or upgrading your panel ensures reliable operation.
Lastly, failing to ground fixtures properly not only violates code but increases shock risks. Always prioritize grounding and use a continuity tester to confirm good contact between your metal boxes, fixtures, and ground wires.
If your bathroom wiring looks like it belongs to the previous century, upgrading is a wise move. Old knob-and-tube or aluminum wiring can be unsafe with modern appliances and may lack grounding altogether. The biggest benefit of rewiring is peace of mind knowing your bathroom meets today’s electrical safety standards.
Start by turning off power and carefully removing old wires and fixtures. Take notes or photos to keep track of existing wiring paths. Plan for additional circuits or switches if you want separate control over lights and fans — this adds convenience and efficiency.
Use modern wiring materials rated for wet areas, including cables with proper insulation and GFCI breakers. Adding new switch boxes with enough space for wires prevents cramped connections, reducing fire hazards. If unsure about local codes or how to handle wiring upgrades, consulting a licensed electrician is the safest bet.
Don’t forget to test your new setup thoroughly before sealing walls or ceilings. Proper wiring upgrades boost your bathroom’s functionality, reduce electrical risks, and even increase your home’s resale value.

Picking the perfect fan and light fixtures isn’t just about looks—it’s a critical factor that influences your bathroom’s comfort and safety. Fans come with varying airflow capacities, measured in CFM (cubic feet per minute), which indicates how well they can ventilate your space. A fan with too low a CFM won’t remove moisture effectively, risking mold growth. Meanwhile, oversized fans can waste energy and be unnecessarily noisy. Selecting a fan with the right airflow rating based on your bathroom size is essential for optimal performance.
Lighting choices matter just as much. LED fixtures are a popular pick for bathrooms because of their energy efficiency and longevity. Plus, LEDs handle moisture better than traditional bulbs, reducing replacement hassle. Another important feature is whether your light is rated for damp or wet locations—this protects it from steam and humidity that could cause early failure.
Combining a fan and light in a single unit can save space, but keep in mind that this often means less flexibility in controlling each device independently. Separate units may be pricier upfront but give you the advantage of turning on just the light or just the fan, conserving energy. Consider your daily routine and preferences before making a choice.
Don’t forget noise level—fans are rated in sones, with lower numbers meaning quieter operation. A quiet fan is a subtle yet vital feature to keep your bathroom peaceful, especially in homes with tight layouts or shared walls.
Switch wiring can be a game-changer for how you interact with your bathroom light and fan. Installing separate switches gives you full control, allowing you to turn the light off while leaving the fan running to clear moisture. This setup enhances energy savings and extends the life of your fixtures.
If space or wiring constraints push you toward a combined switch, consider smart switches or timer switches as upgrades. Timer switches automatically shut off the fan after a preset period, ensuring ventilation runs long enough to prevent mold but doesn’t waste electricity. Smart switches can even be controlled remotely via phone apps, adding a tech-savvy touch to your bathroom.
Wiring for separate switches requires running distinct hot wires to each device, which can be more complex but offers the greatest flexibility. Ensure your wiring layout accommodates this without crowding switch boxes, and use proper connectors to prevent loose wires.
For the adventurous DIYer, adding a 3-way switch setup to control bathroom lights from multiple locations (such as near the door and vanity) is possible. While trickier, this adds convenience and enhances the bathroom’s user experience. Just be sure to plan your wiring path carefully to avoid headaches during installation.
Safety isn’t just a checkbox—it’s the cornerstone of any bathroom wiring project. Beyond shutting off the breaker and using GFCI protection, wearing insulated gloves and using insulated tools can protect you from accidental shocks. Never rush through wiring; slow and steady wins the safety race.
Moisture-resistant electrical boxes and covers are a must in bathrooms. These prevent water infiltration that could cause short circuits or corrosion over time. Using properly sealed fixtures and sealing gaps around boxes also helps keep your wiring dry.
Make sure your wiring connections are tight and secure. Loose connections generate heat, which could ignite fires in worst-case scenarios. Using wire nuts rated for the wire gauge and environment, along with electrical tape, keeps connections reliable.
Finally, test everything with a circuit tester before turning power back on. Verifying that GFCIs trip properly, switches work as intended, and fans run quietly without flickering lights ensures you’ve done the job right — and safely.
Even the best plans can hit snags. Flickering lights, fans that won’t start, or breakers that trip often point to wiring errors or component faults. A common culprit is reversed wires—mixing up hot and neutral wires can cause erratic operation. Double-check color coding and connections if you notice issues.
Loose connections are another headache. Over time, vibration or poor installation can cause wires to loosen, interrupting power flow. Inspect wire nuts and terminals to tighten anything suspicious.
If your fan hums but doesn’t spin, it might be a bad capacitor or motor issue, unrelated to wiring but worth knowing. Similarly, flickering lights can sometimes be due to incompatible dimmer switches or poor bulb quality rather than wiring faults.
Breakers tripping frequently? Overloaded circuits or short circuits are likely. Verify that your fan and light are on appropriate circuits with the correct breaker sizes. Consider upgrading circuits or spreading loads if needed.
Addressing these issues quickly not only restores function but keeps your bathroom safe from escalating electrical hazards.

While DIY wiring is rewarding, knowing your limits is a key strength in protecting your home and family. Complex wiring setups, outdated panels, or unfamiliar electrical codes call for professional expertise. Electricians bring the experience to handle tricky problems safely and efficiently.
If you encounter unexpected wiring configurations, damaged cables, or if your home’s wiring doesn’t meet current codes, it’s time to call in the pros. Licensed electricians can also pull permits and ensure inspections go smoothly, saving you headaches with home insurance or resale.
Hiring a professional can be a smart investment, especially if your bathroom requires extensive rewiring or new circuit installation. They’ll also have the tools to troubleshoot hard-to-find issues and guarantee work quality.
That said, simple wiring projects like installing a new light or fan with straightforward instructions are still well within the DIY realm, provided you follow safety guidelines closely.
Once your bathroom light and fan are wired correctly and working smoothly, maintenance becomes your best ally to keep them in top shape. Regularly cleaning your fan’s vent and blades prevents dust buildup, which can hamper airflow and cause the motor to overheat. A well-maintained fan runs quieter and lasts longer.
Checking wiring connections during routine bathroom inspections is also wise. Moisture and temperature swings can loosen connections over time. Tightening loose wires and inspecting for corrosion helps avoid electrical faults before they happen.
Replacing bulbs with energy-efficient LEDs not only cuts your electricity bills but also reduces heat around wiring, lowering fire risks. Opt for bulbs and fixtures rated for bathroom use to handle humidity well.
Lastly, listening to your fan and light operation can alert you to early problems. Strange noises, flickering lights, or intermittent operation are signs to investigate before minor issues snowball into costly repairs.


Best Boat Black Lights 2026 For Nighttime Adventure

Best Black 30 Inch Light Bar Reviews – Top Picks of 2026

Best Black Light For Aquarium 2026 For Vibrant Glow

Best Black Light for Authenticating Glass 2026 Top Picks

Best Waterproof Spotlight 2026 That Outshines Expectations

Best Solar Spotlight For Yard 2026 Brighten Outdoor Spaces With Ease
Best Led Spotlight Rechargeable 2026 Bright Picks

Best Rechargeable Spotlight For Boat 2026 That Cuts Through Darkness





