What Is a Flush Mount Light and When Do You Need One?

A bedroom closet door swings open and scrapes the glass of a hanging ceiling lamp. A flush mount light fixes that problem because it attaches flat against the ceiling, leaving no open gap, hanging rod, or chain. It gives you dependable overhead light while keeping the path underneath completely open.
Deciding whether you need one comes down to a few basic details in the room. Ceiling height is the main factor, especially in rooms eight feet tall or lower where hanging pendants steal valuable headroom. You also need to check how nearby doors swing and measure the width of the room, since larger spaces need wider fixtures to spread brightness evenly. Here is how these lights work, how they compare to semi-flush options, and how to pick the right size for your space.
Look for a Base That Sits Flat Against the Drywall
A flush mount light is an overhead fixture that attaches directly to the ceiling without any chain, cord, or drop rod. Its metal or plastic ceiling base plate mounts flush against the drywall, hiding the ceiling electrical box where the wires connect. Because the base plate covers the entire opening, all electrical hardware stays out of sight.
The defining feature of this fixture is its compact profile. While chandeliers and pendants drop down into the room, a flush mount extends only three to six inches below the ceiling. The light source sits inside a shallow frame, covered by a glass, fabric, or plastic shade that softens glare and spreads light across the room.
Because there is no gap between the fixture and the ceiling, dust and insects cannot settle on top of the shade. Unlike hanging bowls that collect grime above head height, a flush mount stays clean with an occasional wipe. It provides dependable overhead light while keeping your room airspace completely clear.
Measure Your Ceiling Height Before Choosing Between Flush and Semi-Flush
The difference between a flush mount and a semi-flush mount comes down to a short stem. A semi-flush fixture hangs down on a small metal rod, leaving an open gap of two to eight inches between the ceiling base plate and the shade. A true flush mount has zero gap, resting its top edge right against the ceiling.
Ceiling height is the main factor in deciding between the two. Safe building practice calls for at least seven feet of clearance between the bottom of a light and the floor. In a room with an eight-foot ceiling, you have only twelve inches of vertical space before dipping below that safe mark. A semi-flush light hanging down ten or twelve inches leaves very little margin for tall guests.
For ceilings measuring eight feet or lower, a flush mount is the safest choice. Nobody will brush the shade with their head, bump it while carrying tall boxes, or clip it when changing clothes. If your ceilings measure nine feet or higher, a semi-flush light becomes a great option. That small gap lets light bounce off the ceiling, softening shadows and making a tall room feel warm.
Put Flush Mounts in Walkways and Rooms With Low Ceilings
Certain areas in a home need low-profile overhead lighting to keep pathways safe and functional. Here are the most practical rooms for a flush mount light:
- Hallways and entryways: People move through these spaces with coats, groceries, and luggage. A flat fixture prevents head bumps and will not block opening doors. Many homeowners pair their overhead hall lighting with motion sensor lights for hallways and stairs to ensure quick guidance at night.
- Walk-in and reach-in closets: Tight storage areas need overhead clarity without the fire risk of hot bulbs touching stacked items. A flush mount stays snug against the ceiling, well above upper storage shelves and swinging doors.
- Bedrooms with standard ceilings: A hanging pendant in a room with an eight-foot ceiling can make the space feel crowded. A sleek flush mount provides full ambient brightness while keeping sightlines open.
- Bathrooms: Steam and close quarters make hanging fixtures impractical. A flush mount delivers broad illumination without blocking tall medicine cabinet doors or crowding shower enclosures.
- Basements and attics: Basements frequently lose headroom to ductwork and floor joists. When your ceiling measures seven feet or less, a flush mount is often the only overhead option that keeps the space usable.
Calculate Your Room Size to Pick the Right Width and Brightness
Picking a fixture that looks natural on your ceiling comes down to proportions. A light that is too small looks lost in the room, while an oversized fixture can overwhelm a modest space. A simple measurement rule helps you find the right diameter before you shop.
Measure the length and width of the room in feet, then add those two numbers together. That total is your target fixture diameter in inches. For example, if your hallway measures 6 feet wide by 8 feet long, add 6 and 8 to get 14. A 13-inch or 14-inch fixture fits that space well. If a bedroom measures 12 feet by 12 feet, 12 plus 12 equals 24, pointing to a 22-inch to 24-inch fixture.
Next, focus on brightness in lumens instead of wattage. Wattage only measures electrical power draw, while lumens measure actual brightness. For general ambient lighting, aim for roughly 20 to 30 lumens per square foot of floor space.
- A 40-square-foot hallway needs about 800 to 1,200 lumens of total brightness.
- A 100-square-foot bedroom needs 2,000 to 3,000 lumens to light every corner.
- A 150-square-foot kitchen usually requires 3,000 to 4,500 lumens, split between overhead and under-cabinet lights.
You also need to select your color tone or warmth using the Kelvin scale. The color of the light changes the feel of the room and how you use it every day.
- 2700K (Warm Soft White): Delivers a cozy, gentle glow similar to traditional incandescent bulbs, ideal for relaxing in bedrooms.
- 3000K (Warm White): A crisp, clean warmth that brightens hallways, living areas, and dining spaces.
- 4000K (Neutral White): A clean, vibrant tone that aids focus in home offices, laundry rooms, and kitchens.
- 5000K (Daylight): A crisp tone with a cool cast that mimics bright midday sun, useful for utility rooms and work benches.
Finally, check the color accuracy rating, listed as CRI. A rating of 90 or higher ensures paint colors, wood stains, and fabrics look rich and true to life rather than dull or washed out.
Shut Off the Power at the Panel Before Touching Any Wires
Replacing an existing ceiling light is a manageable project, but electrical safety comes first. Follow these steps to handle the job safely:
- Shut off the circuit breaker at the main electrical panel. Never rely solely on the wall light switch, because switches can leave live current in the ceiling box. Confirm the power is off by flipping the wall switch, or hold a voltage detector pen near the ceiling box to verify no current is flowing.
- Remove the old shade and base plate. Loosen the decorative screws holding the shade, then remove the mounting screws attaching the base plate to the ceiling electrical box. Support the base plate with your hand so it never hangs by the wires.
- Inspect the ceiling electrical box. Check inside the opening to make sure the ceiling electrical box is securely attached to a ceiling joist. Tighten any loose mounting screws before attaching the new light, as a wobbly box cannot support a flush fixture firmly.
- Connect the matching wires. Twist the matching wires together using screw-on wire nuts. Join black to black (hot), white to white (neutral), and bare copper or green to the ground screw or house ground wire. Give each wire nut a gentle pull to ensure the connection is solid.
- Mount the base plate and attach the shade. Gently tuck the wires into the ceiling electrical box without pinching them. Align the ceiling base plate over the mounting screws, push it flat against the drywall, and tighten the screws until snug. Add your bulbs or attach the shade.
If you uncover brittle wire insulation, frayed cloth wiring, or an ungrounded box, stop right there. Leave the breaker off and call a licensed electrician to update the wiring safely.
Choose Fixtures That Match Your Room Moisture and Lighting Controls
Finding the right fixture means matching its construction to the environment of your room. Always verify the moisture rating on the packaging. Choose dry-rated fixtures for living rooms, bedrooms, and hallways. Select damp-rated fixtures for steamy bathrooms, laundry areas, and covered porches. For locations exposed to direct rain or water spray, choose a wet-rated model.
Decide whether you prefer a standard screw-in bulb base (E26 medium base) or a built-in LED fixture. Screw-in sockets allow you to replace bulbs anytime you want a different brightness or color warmth. Built-in LED fixtures provide a sleek, ultra-thin profile and eliminate bulb changes, though the entire fixture must be replaced once the light panel wears out.
If you want adjustable lighting, verify that the fixture is labeled as dimmable and pair it with an LED-compatible dimmer switch. Older wall dimmers can cause annoying hums or flickering. Updating your wall switch also makes it simple to integrate your overhead light into dependable home automation lighting setups for custom schedules.
- LFR Score9.6
LFR Score is a ranking system developed by lightfansreviews.com. LFR Score has no relationship or impact from any manufacturers or sales agent websites. Learn more
- Brandhepside

- LFR Score8.9
LFR Score is a ranking system developed by lightfansreviews.com. LFR Score has no relationship or impact from any manufacturers or sales agent websites. Learn more
- Brandszzgco

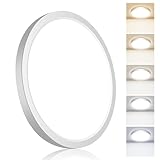
13 inch Flush Mount LED Ceiling Light Fixture, 2700K/3000K/3500K/4000K/5000K Adjustable
View on Amazon- LFR Score8.7
LFR Score is a ranking system developed by lightfansreviews.com. LFR Score has no relationship or impact from any manufacturers or sales agent websites. Learn more
- Brandhykolity

- LFR Score7.2
LFR Score is a ranking system developed by lightfansreviews.com. LFR Score has no relationship or impact from any manufacturers or sales agent websites. Learn more
- BrandSKEJAO
Last update on 2026-10-17 / Affiliate links / Images, Product Titles, and Product Highlights from Amazon Product Advertising API
FAQs
Can a single flush mount light brighten an entire room?
A single flush mount light can illuminate a small or medium room if its total brightness matches the room size. A 100-square-foot bedroom typically needs 2,000 to 2,500 lumens for clear overhead visibility. For larger rooms or spaces with dark walls, adding table lamps or wall sconces helps eliminate shadows in far corners.
How do you change bulbs in a flush mount light?
Most traditional flush mounts have a center finial nut or small screws along the metal rim. Support the glass shade with one hand while unscrewing the fasteners, lower the shade, and replace the screw-in bulbs. If the fixture uses a built-in LED panel, there are no bulbs to change because the internal light diodes are designed to run for years.
Can you install a flush mount light on a sloped ceiling?
Standard flush mount lights are designed for flat ceilings and will sit at an odd angle on a sloped surface. This can cast uneven light and look out of place. If your ceiling is angled, choose a fixture with an adjustable swivel base or pick a semi-flush light with a pivoting stem that allows the shade to hang level.
Will a flush mount light make a small room look bigger?
A flush mount helps a compact room feel larger by keeping overhead space clear. Hanging lights draw your gaze downward and visually slice up the room, which makes low ceilings feel even lower. A flat fixture stays out of your field of view, creating clean sightlines that make the ceiling feel taller.


Best Lighting For Makeup 2026 Bright Ideas For Flawless Looks

Best Wall Sconces For Staircase 2026 Brighten Your Home
Best Lighting For Computer Desk 2026 For Focused Work

Best Boat Black Lights 2026 For Nighttime Adventure

Best Black 30 Inch Light Bar Reviews – Top Picks of 2026

Best Black Light For Aquarium 2026 For Vibrant Glow

Best Black Light for Authenticating Glass 2026 Top Picks
Best Waterproof Spotlight 2026 That Outshines Expectations