What Is the Right Lighting for a Bathroom Without Shadows?

Unflattering bathroom shadows are completely normal and surprisingly simple to fix. The best setup relies on eye-level sconces on both sides of the mirror paired with a soft ceiling fixture for general room brightness. Shining light directly toward your face from the sides washes out deep shadows under your eyes and chin, making shaving or applying makeup feel effortless.
The right arrangement for your home depends on a few specific details. Narrow walls might force you to place a single bar above the glass rather than beside it, while steamy rooms require damp-rated fixtures built to handle humidity. Natural daylight from a window also changes how much overall brightness you need. Here is how to balance your fixture layout, bulb warmth, and spacing to get clear, comfortable light every day.
Mount Wall Sconces at Eye Level Instead of Staring Down from the Ceiling
A single ceiling fixture in the center of the bathroom is the most common reason you see harsh shadows in the mirror. When light shines straight down from above your head, your brow bone blocks the rays from reaching your eye sockets. Your nose casts a dark shadow over your lips, and your chin throws your entire neck into darkness. Shaving becomes a guessing game, and blending makeup evenly across your jawline is nearly impossible.
Mounting wall sconces on both sides of the mirror solves this immediately through cross-illumination. When two fixtures sit to the left and right of your face, their light beams meet in the middle. The light washes across your cheeks, forehead, and chin simultaneously, filling in hollow areas and eliminating dark patches under your eyes. You see your face clearly and evenly without needing to tilt your head toward the ceiling.
If your bathroom layout prevents side sconces, you can still improve an overhead fixture. Many small bathrooms have edge-to-edge mirrors or adjacent corner walls that leave no room for side fixtures. In that situation, choose a horizontal multi-bulb vanity light that spans at least two-thirds of the mirror width. Pick fixtures with shades that direct light outward and downward through frosted glass, rather than downward-pointing spotlights that shine straight down on your scalp.
Always pair your mirror lights with a separate ceiling light to handle general room illumination. Sconces provide task lighting for grooming, but they cannot brighten dark corners, the shower stall, or the floor. A damp-rated ceiling fixture mounted flat against the ceiling (a flush mount) or hanging down a few inches on a short stem (a semi-flush mount) gives the rest of the room a balanced, welcoming feel.
Choose Warm White Bulbs Between 2700K and 3000K for True Skin Tones
The warmth or coolness of a light bulb changes how healthy and natural your skin looks in the mirror. Manufacturers measure this warmth in Kelvin, which describes the tone of the light from warm yellow to cool blue. Low Kelvin numbers mean warm, amber tones, while high Kelvin numbers mean cool, crisp blue tones. Picking the wrong Kelvin rating can make an otherwise beautiful bathroom feel cold and unwelcoming.
The sweet spot for bathroom vanity lighting is between 2700K and 3000K. A 2700K bulb provides a soft, warm white glow that mimics traditional incandescent bulbs, creating a flattering and relaxing mood for evening baths. A 3000K bulb produces a clean, crisp warm white that feels slightly brighter and more modern. Both color temperatures keep skin looking natural, lively, and warm without casting sickly yellow or cold blue tints.
Avoid bulbs marked as 5000K or 6000K daylight for your vanity mirror. Many people buy daylight bulbs assuming they will recreate clean morning sunlight indoors. In reality, bulbs at 5000K and higher produce an intense blue-white beam similar to commercial parking lots or hospital hallways. In a bathroom, this cool light drains the warm tones from your complexion, emphasizes blemishes, and tricks you into applying too much makeup to compensate for washed-out skin.
Look for bulbs with a high color accuracy score, known as the Color Rendering Index (CRI). CRI is scored on a scale from 0 to 100 to show how accurately a light bulb reveals the true colors of skin, clothing, and paint. Always look for a score of 90 CRI or higher on the bulb box. Bulbs with low CRI ratings make skin look dull or greenish-gray, which makes matching foundation or checking your complexion frustrating.
Calculate Your Lumens to Get Bright Light Without Painful Glare
Forget about wattage when shopping for modern bathroom lights. Watts only tell you how much electrical power a fixture draws, while brightness in lumens tells you how much light the bulb actually produces. For example, an old incandescent bulb needed 60 watts to produce 800 lumens of light, while a modern LED bulb produces that same 800 lumens using only 8 to 10 watts.
To light your bathroom properly, calculate your total lumens based on the room size and task areas:
- Overall bathroom space: Aim for 50 to 75 lumens per square foot of floor space. For an average 8-by-10 foot bathroom (80 square feet), you need between 4,000 and 6,000 total lumens spread across all ceiling and vanity fixtures.
- Vanity task lighting: Plan for 1,600 to 2,000 total lumens at the mirror. If you install two side sconces, choose bulbs that provide roughly 800 to 1,000 lumens each to get clear, shadow-free grooming light.
- Shower area: A dedicated shower light needs about 800 lumens to illuminate the stall without feeling blinding behind a glass door or curtain.
High brightness can quickly turn into painful glare if the bulb is completely exposed. Clear glass shades with bare filament bulbs look stylish in photos, but staring directly at exposed filaments leaves bright spots in your vision. Choose fixtures with frosted, opal, or milky glass shades that diffuse the light and spread it out evenly across the room.
Install an LED-compatible dimmer switch so you can adjust brightness throughout the day. You need crisp, full brightness when shaving or applying makeup at sunrise, but you want a soft, low glow when walking into the bathroom in the middle of the night. Standard older dimmer switches designed for incandescent bulbs will cause modern LEDs to buzz, hum, or flicker rapidly, so always verify that the wall switch is labeled for LED use.
Measure Your Mirror Space Before Drilling Any Holes
Mounting your fixtures at the correct height is critical for shadow-free lighting. For side sconces, the center of the light bulb or light source should sit roughly 60 to 65 inches above the finished floor. This places the light source right around average adult eye level, ensuring the beams travel directly across your face rather than pointing up from below or down from above. If multiple family members of different heights share the bathroom, 63 inches is an ideal middle ground.
Spacing the sconces correctly across the wall prevents dark gaps in the center of the mirror. Place side sconces roughly 28 to 36 inches apart from each other, leaving 3 to 4 inches of space between the edge of the mirror frame and the fixture base. If you place the sconces farther than 36 inches apart, the light beams lose intensity before they meet, leaving a shadow across the bridge of your nose and chin.
If you must install an over-mirror light bar, mount it 75 to 80 inches above the finished floor. The fixture should sit at least 2 to 3 inches above the top edge of your mirror frame. Pick a fixture length that covers about 75 percent of the mirror width so it looks balanced and illuminates both sides of your face from above.
Inspect the wall electrical box (the J-box where the home wiring meets the fixture) before purchasing any new light. Builders often place a single J-box centered directly above the sink. If you want to switch to side sconces, an electrician will need to run wires to two new wall boxes and patch the original center hole. If you prefer to avoid drywall repairs, choose an over-mirror fixture with a wide mounting backplate that covers the existing wall box completely.
Check for Damp Ratings and Shut Off the Breaker Before Wiring
Bathrooms produce heavy steam, condensation, and splashing water that can quickly damage regular light fixtures. Standard fixtures meant for dry areas like bedrooms will corrode over time, leading to loose connections or electrical shorts. Look for specific location ratings on the fixture packaging to make sure it is safe for your space:
- Dry-rated fixtures: Safe only for living rooms, hallways, and dry bedrooms. Never install these in a bathroom with a shower or bathtub.
- Damp-rated fixtures: Built with sealed electrical parts that withstand high humidity, steam, and condensation. All vanity sconces and ceiling lights in a full bathroom must be damp-rated.
- Wet-rated fixtures: Designed with watertight seals to handle direct water spray or splashing. Any light installed directly inside a shower stall or directly over an open soaking tub must be wet-rated.
Always practice safe electrical habits when replacing or inspecting a light fixture. Shut off the circuit breaker at the main electrical panel before removing an old light or touching any wires. Never trust the wall light switch alone, because someone can easily bump the switch and turn the power back on while you are working. Use a non-contact voltage tester (a small pen-like tool that lights up or beeps near live current) to confirm the wires inside the box are completely dead.
If you also keep humidity-loving greenery on a bathroom shelf or windowsill where window sunlight cannot reach, standard bathroom lights will not meet their growth needs. Setting up dedicated grow light strips for indoor plants underneath a floating shelf provides the right light spectrum for your plants without altering the warm grooming light you need at the vanity.
Know when to stop and call a licensed professional. If you open the wall box and find brittle, crumbling wire insulation, loose ground wires, or no ground wire at all, call a qualified electrician. You should also hire a professional if you need to run new electrical cables through wall studs to add side sconces.
Look for Sconces with Diffused Glass and Standard Sockets Before You Buy
When shopping for vanity lights, prioritize fixtures that feature frosted, milky, or etched glass shades. These shades soften the raw intensity of the light, spreading a smooth, even glow across your face without creating harsh glare points. Avoid metal shade designs or dark tinted glass that funnel light into narrow spotlights, as these recreate the exact shadows you are trying to eliminate.
Decide whether you want a fixture with built-in LEDs or standard screw-in bulb sockets. Built-in LED fixtures offer slim, modern profiles, but if the internal lighting components fail after several years, you usually have to replace the entire fixture. Fixtures with a standard screw-in bulb base (E26 medium base) give you long-term flexibility because you can replace individual bulbs anytime or easily test different lumen levels and warm white tones.
Finally, measure the mounting backplate of the fixture to ensure it covers your existing wall opening. A backplate measuring at least 4.5 to 5 inches across will cleanly cover standard junction boxes, hiding any gaps, unpainted drywall, or plaster damage left behind by older hardware.

- LFR Score9.3
LFR Score is a ranking system developed by lightfansreviews.com. LFR Score has no relationship or impact from any manufacturers or sales agent websites. Learn more
- BrandCombuh

- LFR Score8.3
LFR Score is a ranking system developed by lightfansreviews.com. LFR Score has no relationship or impact from any manufacturers or sales agent websites. Learn more
- BrandEJIAXIN

- LFR Score7.6
LFR Score is a ranking system developed by lightfansreviews.com. LFR Score has no relationship or impact from any manufacturers or sales agent websites. Learn more
- BrandTorondo

- LFR Score7.6
LFR Score is a ranking system developed by lightfansreviews.com. LFR Score has no relationship or impact from any manufacturers or sales agent websites. Learn more
- BrandEspird
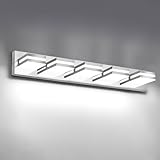
IZORRO LED Modern Bathroom Lights Fixtures(5-Light,Dimmable,360°Rotate),Chrome Acrylic Wall Lighting,Vanity Lights
View on Amazon- LFR Score7.3
LFR Score is a ranking system developed by lightfansreviews.com. LFR Score has no relationship or impact from any manufacturers or sales agent websites. Learn more
- BrandIZORRO
Last update on 2026-11-17 / Affiliate links / Images, Product Titles, and Product Highlights from Amazon Product Advertising API
FAQs
Is cool white or warm white better for applying makeup?
Warm white light between 2700K and 3000K with a 90+ CRI rating is much better for applying makeup than cool white. Cool white light produces heavy blue tones that wash out your complexion, making your skin look pale and causing you to over-apply foundation or blush. Warm white light reveals skin tones naturally so your makeup looks balanced both indoors and outdoors.
Can you use a regular ceiling light fixture in a bathroom?
You can only use a ceiling fixture if it is explicitly labeled as damp-rated by a recognized safety testing laboratory. Standard fixtures designed for dry rooms lack protective gaskets and moisture-resistant coatings. In a bathroom with a shower or tub, steam can penetrate unsealed wiring boxes, leading to corroded wires, rust, and electrical shorts.
What should you do if your mirror is too wide for side sconces?
If your mirror extends wall-to-wall without leaving side space for sconces, install a multi-bulb vanity light bar centered above the mirror. Choose a fixture with downward-facing or forward-facing frosted glass shades that spans at least two-thirds of the mirror width to distribute light evenly. You can also replace the glass with an illuminated mirror that features built-in frosted LED lighting along the outer edges.
Why are my bathroom LED lights buzzing or flickering?
LED lights usually buzz or flicker because they are connected to an older dimmer switch that was designed for high-wattage incandescent bulbs. Traditional switches cannot properly manage the low electrical draw of modern LEDs, creating circuit interference and rapid flickering. Replacing the wall control with an LED-compatible dimmer switch will stop the noise and stabilize the light.


Best Lighting For Makeup 2026 Bright Ideas For Flawless Looks

Best Wall Sconces For Staircase 2026 Brighten Your Home
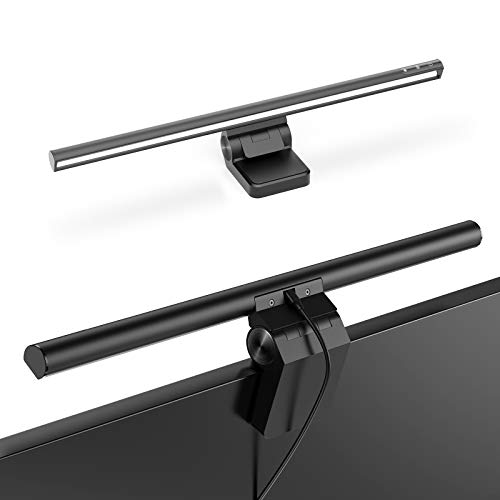
Best Lighting For Computer Desk 2026 For Focused Work

Best Boat Black Lights 2026 For Nighttime Adventure

Best Black 30 Inch Light Bar Reviews – Top Picks of 2026

Best Black Light For Aquarium 2026 For Vibrant Glow

Best Black Light for Authenticating Glass 2026 Top Picks
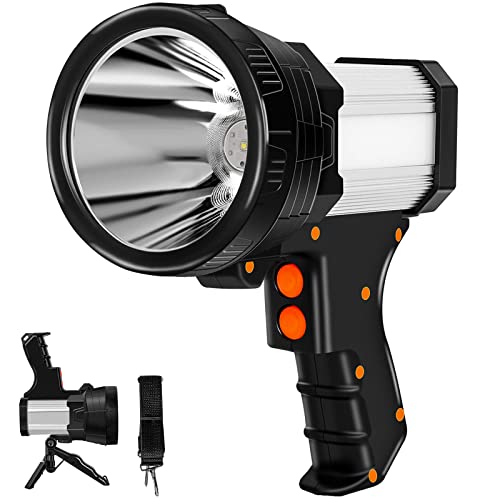
Best Waterproof Spotlight 2026 That Outshines Expectations