
How To Clean Quickie Ceiling Fan Duster Right
How To Clean Quickie Ceiling Fan Duster sounds simple at first, but wow, things can get messy fast if dust starts flying across the room instead of staying trapped inside the fibers. A dirty duster doesn't just leave streaks behind either. It spreads old dust, pet hair, and fine debris back onto fan blades, furniture, and even curtains. That's usually the moment people realize their cleaning tool needs attention too.
Sticky buildup creates another headache that sneaks up over time. Ceiling fans collect grease from kitchens, humidity from bathrooms, and tiny airborne particles that cling to microfiber strands like glue. Once that happens, the duster loses flexibility and struggles to grab dust evenly. Proper cleaning habits help maintain softness, improve dust pickup, and prevent that annoying “smearing” effect left behind on fan blades.
Warm water alone sometimes won't cut it, especially after months of use. Mild dish soap helps loosen oily residue without damaging microfiber material or causing stiffness after drying. Some people toss dusters into the washing machine without checking labels first, and honestly, that's where problems begin. Aggressive cycles can weaken stitching, flatten fibers, or bend internal support frames.
Drying matters just as much as washing, oddly enough. Tossing a damp duster into a storage closet creates musty odors that linger longer than expected. Air drying in a well-ventilated spot keeps the fibers fluffy and prevents mildew from creeping in. Clean microfiber strands trap dust far more efficiently than compressed or damp material.
Another issue pops up with extension handles and pivot joints. Dust and grime settle into those small moving areas, making the duster harder to maneuver around angled blades or tight ceiling corners. Wiping those sections down with a lightly damp cloth helps maintain smooth movement during cleaning sessions. Little maintenance steps like that often get overlooked, yet they make a noticeable difference.
Storage habits also shape how long a ceiling fan duster lasts. Shoving it beside heavy tools bends the head and crushes microfiber strands flat over time. Hanging the duster vertically or storing it inside a breathable container helps preserve shape and performance. Consistent upkeep keeps the duster effective without needing frequent replacements.
Dust allergies make the situation even more frustrating for many households. A poorly maintained duster can release particles back into the air, turning a quick cleaning task into a sneezing fit. Keeping the tool fresh and debris-free reduces airborne dust and helps rooms feel cleaner overall. Small maintenance routines save time, reduce frustration, and keep ceiling fan cleaning from becoming a dreaded chore.
How To Clean Quickie Ceiling Fan Duster
Dusty fan blades can turn a tidy room into a sneeze trap in a hurry, especially after the duster itself starts carrying old grime from one job to the next. A clean tool matters just as much as a clean surface, and how to clean quickie ceiling fan duster comes down to protecting the fibers, removing hidden buildup, and keeping the handle parts moving smoothly.
Quickie Duster Care Basics
Ceiling fan dusters pick up more than dry dust. They grab skin flakes, pet hair, kitchen film, pollen, and that gray fuzz that somehow hides on blade edges for weeks. Once the fibers get packed down, the duster starts pushing debris around instead of trapping it. That’s the point where a quick shake outside just won’t cut it anymore.
Quickie ceiling fan duster cleaning should start with a dry debris removal step before water touches the fibers. Tap the duster gently outdoors or over a trash bag, then use your hand to loosen clumps caught near the base. This keeps the sink from filling with dusty sludge and helps the wash water work better. Simple, yes, but it saves a mess.
Mild soap is usually enough for routine cleaning. Harsh cleaners can leave residue, stiffen microfiber, or weaken the stitching around the head. A small amount of dish soap in warm water loosens oily film without beating up the material. Keep the water warm, not hot, because heat can make fibers curl, shrink, or lose their soft grab.
Air drying is the safer move after washing. Heat from dryers can flatten the fibers and bend flexible parts on some duster heads. Set the duster somewhere with airflow, then fluff the fibers once they’re fully dry. Storing it while damp is asking for mildew, musty smell, and a tool that feels gross the next time you reach for it.
Remove Dust Before Washing
Dry dust removal sounds boring, but it does the heavy lifting. Ceiling fan dust often forms thick little ropes along the blade edge, especially in rooms with open windows or pets. Shake the duster outside first, then tap the handle lightly against your palm to loosen packed debris. Don’t smack it against concrete or furniture, since that can bend the head or crack plastic joints.
Vacuuming the duster head can help if the fibers are loaded with pet hair. Use a brush attachment on low suction and move with the direction of the fibers. This pulls away loose fuzz without ripping at the material. It’s a smart trick for homes where hair clings to everything, including tools that are supposed to clean.
Sticky dust needs patience. Greasy kitchen air can coat fan blades, then transfer that film to the duster. Before washing, pinch the fibers lightly and separate matted spots with your fingers. That small step gives soap better access to grime trapped deep inside the cleaning head.
Fan blade residue may also signal bigger maintenance issues around the fixture. If the fan model is unknown and replacement parts or instructions are hard to track down, compare the label location with this practical guide to find ceiling fan model before guessing. Matching the model helps avoid using the wrong cleaner, blade finish method, or replacement accessory.
Wash Fibers Without Ruining Them
Warm soapy water handles most duster cleanup without drama. Fill a sink or bucket, add a few drops of mild dish soap, and swish the duster head through the water. Squeeze the fibers gently instead of twisting them like a towel. Twisting can pull the head out of shape and make the fibers bunch unevenly.
Microfiber material needs a light touch. Scrubbing with a stiff brush can rough up the strands and reduce their ability to hold dust. Use your fingers to work soap through dirty areas, especially around seams and corners. If the water turns gray fast, drain it and refill the bucket rather than washing the duster in dirty water.
Rinsing thoroughly matters more than people think. Leftover soap creates a film that attracts dust faster next time. Run clean water through the fibers until the water looks clear and the head no longer feels slippery. Give it a gentle squeeze, then repeat if the duster still feels heavy or grimy.
Fabric softener should stay far away from microfiber dusters. It coats the fibers and makes them less grabby, which defeats the whole point of using a duster in the first place. Bleach is another bad idea because it can weaken fabric and discolor parts. Stick with basic soap, clean water, and patience.
Clean The Handle And Pivot Joint
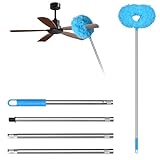
The handle area gets ignored all the time, yet it touches hands, storage shelves, dusty walls, and sometimes ladder rails. Wipe the pole with a damp cloth and a tiny bit of soap if it feels sticky. Pay close attention to textured grips because grime settles inside those grooves. A clean handle gives better control while reaching overhead.
Pivot joints collect dust in small gaps. That buildup can make the duster head feel stiff or jerky while cleaning angled fan blades. Use a cotton swab or soft cloth corner to clean around the hinge area. Avoid soaking the joint, especially if the duster has internal metal pieces that could rust over time.
Extension poles should slide smoothly without grinding. If the pole feels gritty, wipe each section before collapsing it. Trapped dust can scratch the surface and make the locking mechanism harder to use. Dry every section before storage so moisture doesn’t sit inside the tube.
Ceiling fixtures often share dust problems with nearby lights, especially where airflow pushes lint upward. If cleaning reveals flickering or weak lighting around the fan, troubleshoot the fixture separately with this guide to fix led ceiling light instead of treating it like a dust issue. Electrical problems and dirty surfaces can look related, but they need different fixes.
Dry The Duster The Right Way
Drying slowly protects the cleaning head better than blasting it with heat. Press the fibers inside a clean towel to remove extra water, then reshape the head with your fingers. Don’t wring it hard. That rough move can stretch seams, flatten strands, and leave the duster looking lopsided.
Airflow keeps mildew from sneaking in. Hang the duster or lay it across a rack where air can reach all sides. A closed cabinet is the wrong place for a damp cleaning tool. The fibers may smell fine at first, then turn musty after a day or two.
Sun drying can help for a short period, but too much direct sun may make plastic parts brittle over time. A shaded porch, laundry rack, or breezy utility area usually works better. Flip the duster once during drying if one side stays damp. Small habits like that keep the tool fresher between uses.
Fully dry fibers should feel fluffy, light, and flexible. If they feel stiff, soap may still be trapped inside. Rinse again and dry properly rather than forcing the tool back into rotation. A stiff duster won’t hug fan blade edges well, and it may leave streaks on dusty surfaces.
Prevent Dust From Spreading Again
Prevention starts before the duster touches the fan. Turn the fan off and let the blades stop completely, then place an old sheet or towel under the area if the blades are heavily coated. This catches falling dust and saves you from cleaning the floor twice. Nobody needs extra chores from one ceiling fan.
Slow strokes work better than fast swipes. Move the duster along the blade from the motor outward so debris travels toward the tip instead of back toward the housing. Keep light pressure on the blade surface. Pressing too hard can bend flexible blades or smear greasy dust across the finish.
Room size changes the cleanup routine, especially with large fans that sit high above open living areas. Bigger blade spans collect more surface dust, and long reach tools need steadier handling. For large rooms with serious airflow needs, compare proportions with a best 84 inch ceiling fan guide before assuming any duster or ladder setup will feel comfortable. Scale matters more than it seems.
Cleaning frequency depends on pets, cooking habits, humidity, and open windows. Monthly cleaning works for many rooms, but kitchens and bedrooms with pets may need attention sooner. A clean Quickie duster makes those shorter touch-ups less annoying. Waiting until dust turns into a gray blanket only makes the job slower and messier.
Store It So Fibers Stay Useful
Proper storage keeps the duster ready for the next cleaning day. Hang it vertically if possible, with the head free from pressure. Crushing the fibers under other tools makes them lie flat and reduces their dust-grabbing texture. A duster tossed into a crowded closet usually ages faster than one stored with a little breathing room.
Breathable storage beats sealed plastic when the tool has recently been cleaned. Even a slightly damp microfiber head can trap odor inside a closed bag. Let it dry fully before putting it away, then choose a spot away from bathroom humidity or laundry steam. Clean tools deserve clean storage, or the cycle starts all over again.
Handle protection also matters. Don’t store the pole where heavy buckets or vacuums can bend it. A warped extension pole makes overhead cleaning feel awkward and less safe. Keep it along a wall, on a hook, or in a slim utility rack where it won’t get knocked around.
Routine inspection helps catch wear before the duster becomes frustrating. Check for loose stitching, bent joints, flattened fibers, and cracked plastic around the head. A worn-out duster can still look okay from a distance, but it won’t trap dust evenly. Replace it once cleaning takes more effort than it should.
Best Way To Wash Quickie Ceiling Fan Duster
Ceiling fan cleaning gets irritating fast once the duster starts leaving streaks, dropping lint, or spraying old dust across freshly cleaned furniture. A lot of that frustration comes from worn microfiber, trapped grease, and rushed cleaning habits. The best way to wash quickie ceiling fan duster focuses on keeping the fibers soft, the handle reliable, and the tool clean enough to trap debris instead of recycling it around the room.
Signs Your Duster Needs Deep Cleaning
Visible gray buildup is the obvious warning sign, but some problems sneak up quietly. A duster that smells musty or leaves thin dust trails behind usually has debris trapped deep in the fibers. That trapped grime keeps the microfiber from opening properly. Once that happens, the duster starts gliding over dust instead of grabbing it.
Kitchen ceiling fans often create the worst buildup because cooking grease sticks to airborne dust. The fibers start feeling tacky, especially near the center of the duster head where pressure stays highest during cleaning. Warm water alone may not break through oily residue anymore. A second wash cycle with mild soap sometimes becomes necessary after months of neglected buildup.
Static cling can also fade over time. Fresh microfiber tends to attract dust naturally, but overloaded fibers lose that pull and become sluggish during cleaning. If fan blade edges still look fuzzy after wiping them once, the duster likely needs deeper care. Reusing it without cleaning usually spreads more debris onto nearby walls and shelves.
Lighting conditions can reveal hidden dust problems people miss during daytime cleaning. Rooms with decorative bulbs or specialty lighting make leftover residue stand out sharply against blade surfaces. For spaces using fluorescent or specialty effects, compare surface visibility under black light colors to spot grime hiding along blade edges and ceiling corners. Dust loves hiding where regular light barely catches it.
Keep Microfiber Soft And Flexible
Soft microfiber strands clean more effectively because they wrap around blade edges instead of dragging across them. Stiff fibers usually mean soap residue, heat damage, or compressed material from poor storage. Washing the duster gently and drying it naturally helps preserve flexibility. Tiny cleaning habits make a surprisingly big difference over time.
Hot water creates problems many people never notice right away. Excess heat can curl microfiber strands and weaken glue points inside the duster head. Lukewarm water loosens dirt without stressing the material. That balance keeps the cleaning surface fluffy enough to trap fine dust particles.
Fiber separation matters too. After washing, use your fingers to fluff compacted spots while the duster dries. This prevents clumping and helps restore the fuller texture needed for better dust pickup. Ignoring flattened areas often leaves uneven cleaning patches during the next use.
Drying location changes the final texture more than expected. Damp basements or cramped utility closets slow evaporation and leave the fibers feeling heavy. Open airflow keeps the material lighter and fresher. A fully dried duster feels noticeably softer against your hand.
Handle Large Ceiling Fans Without Extra Mess
Bigger ceiling fans collect more dust simply because the blades cover more surface area. Long blade spans also push stronger airflow through the room, which pulls lint upward toward the motor housing and ceiling corners. Cleaning these fans with a dirty duster quickly turns into a dusty snowstorm. Starting with a freshly washed tool reduces airborne debris right away.
Extension reach becomes more important in large living rooms or vaulted ceilings. Stretching too far with a weak grip makes the cleaning angle awkward and tiring. A clean handle with smooth extension locks helps maintain control while reaching overhead. Slippery poles create more strain than people expect after a few minutes.
Blade shape changes how dust settles. Wide modern blades often collect thicker dust lines along the rear edge where airflow slows down. Narrow blades usually spread debris more evenly across the surface. Slow, controlled passes remove buildup better than aggressive swipes.
Fan design differences can also affect cleaning routines and blade spacing. Some decorative models place blades closer to light kits or motor housings, making dust harder to reach without bumping nearby parts. Before replacing oversized fixtures, compare layouts and blade clearance from brands covered in this guide about who makes fanimation ceiling fans. Certain designs simply need more careful maintenance than others.
Prevent Moldy Smells Inside Fibers
Moisture buildup creates that sour smell people notice after storing a damp duster for too long. Bathrooms, laundry rooms, and humid closets make the problem worse because microfiber holds moisture deep inside the strands. Even if the surface feels dry, the center may still stay damp. That hidden moisture slowly creates mildew odor.
Complete drying should always happen before storage. Hanging the duster vertically allows trapped water to drip downward instead of sitting inside folded fibers. Spreading the strands apart slightly during drying also improves airflow. Little adjustments like that help prevent stale smells from settling in.
Air circulation matters more than heat. Blasting the duster with high dryer heat may damage the fibers before the interior fully dries. Natural airflow works slower, but it keeps the material softer and safer. Patience beats rushing this step.
Storage containers can accidentally trap humidity. Plastic bins without airflow hold moisture longer than open utility hooks or breathable baskets. A fresh-smelling duster stays usable longer and feels less unpleasant during regular cleaning sessions. Nobody wants a cleaning tool that smells dirtier than the room itself.

Reduce Dust Around Fan Motors And Lights
Motor housings collect fine dust layers that often get ignored because they sit above eye level. That buildup can drift downward whenever the fan starts spinning again. A clean duster with flexible fibers helps reach curved surfaces around the motor without scratching finishes. Gentle pressure matters here because decorative coatings can scuff easily.
Light kits attached to ceiling fans attract extra debris from heat and static. Dust gathers around bulb bases, glass shades, and vent openings where warm air circulates. Cleaning these areas with an overloaded duster usually smears grime across the glass. Fresh microfiber lifts particles more cleanly without leaving cloudy streaks behind.
Dust near bulbs sometimes looks darker or stickier than regular fan debris. Heat from lighting fixtures causes particles to cling tightly to nearby surfaces. Wiping carefully with a freshly cleaned duster prevents scratching delicate finishes or spreading grime onto ceilings. Small circular motions usually work better than fast side-to-side swipes.
Cleaning schedules help keep buildup manageable. Waiting six months between cleanings often creates thick layers that overwhelm the duster quickly. Short monthly touch-ups feel easier and produce less airborne dust. Consistency beats marathon cleaning sessions every time.
Common Mistakes That Ruin Ceiling Fan Dusters
Throwing the duster into the washing machine with heavy towels sounds harmless, but rough agitation can twist the head and damage seams. Some microfiber heads survive it, while others come out flattened or misshapen. Hand washing stays safer for long-term durability. Gentle handling keeps the fibers from wearing out too soon.
Using bleach weakens microfiber material over time. The fibers may look cleaner initially, but they often lose softness and flexibility afterward. Strong chemicals can also fade colored handles or damage adhesive points inside the head. Mild soap keeps things simpler and safer.
Skipping rinsing leaves soap trapped inside the fibers. That leftover residue attracts dust faster during the next cleaning session and creates a sticky texture. A properly rinsed duster feels soft and light after drying. Slippery or stiff fibers usually signal leftover detergent.
Overstuffed storage spaces flatten microfiber faster than regular use sometimes does. Crushing the duster beneath cleaning buckets or toolboxes bends the head and reduces fiber lift. Hanging storage helps preserve the shape better. The duster stays easier to maneuver around curved fan blades that way.
Make Ceiling Fan Cleaning Less Annoying
Preparation changes the entire cleaning experience. Setting out a towel, using a stable step stool, and starting with a freshly cleaned duster prevents half the usual frustration. Small routines cut down on repeated wiping and airborne dust clouds. A little planning keeps the process manageable.
Slow cleaning passes remove dust more evenly than rushed swiping. Glide the duster from the inner blade section outward while keeping gentle pressure along the surface. Fast movements scatter particles before the microfiber can trap them properly. Patience actually saves time here.
Room airflow matters during cleaning too. Running air conditioning or open windows while dusting can push debris around the room before it settles. Turning off airflow temporarily keeps dust contained near the cleaning area. Less floating dust means less extra cleanup afterward.
Regular duster maintenance keeps ceiling fan cleaning from becoming one of those dreaded household jobs people postpone for months. Clean fibers trap dust better, handles stay easier to control, and blade surfaces wipe down faster overall. A cared-for Quickie ceiling fan duster feels noticeably different during use. That smoother cleaning experience alone makes the extra maintenance worthwhile.


Best Small Flush Mount Ceiling Fans 2026 Ultimate Picks

Best Smart Ceiling Fan India 2026 For Effortless Comfort

Best Smart Ceiling Fans with Lights for 2026: Top Picks

Best Smart Home Non Ceiling Fans 2026 For Ultimate Comfort

Best Outdoor Misting Ceiling Fan 2026 For Ultimate Comfort

Best Ceiling Fans With Lights For Vaulted Ceilings 2026 Top Picks

Best Outdoor Ceiling Fans For Porch 2026 With Style And Breeze

Best WiFi Enabled Ceiling Fan 2026 For Effortless Comfort





