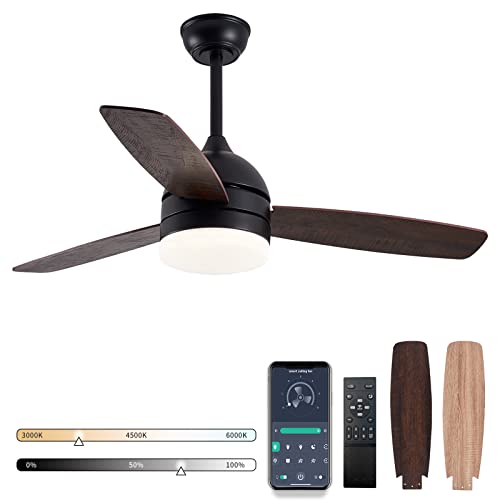
How to Make a Cardboard Table Fan That Blows Air

Making a functional desk fan with cardboard takes cutting angled blades, gluing them to a small electric toy motor, and securing everything onto a sturdy base. The critical catch is giving each blade a slight twist, because flat pieces of cardboard will whip around quickly without pushing any air.
Real personal airflow also relies on using stiff corrugated cardboard so the blades stay rigid at high speeds. Your power source makes a big difference too, as pairing the small motor with the correct battery pack keeps it spinning smoothly without straining the tiny wires. Switching the wire connections can even reverse the rotation, pulling air backward instead of pushing it out front. Follow these straightforward steps to cut, balance, and assemble your parts for a steady tabletop breeze.
Gather the right household parts before starting
You do not need fancy workshop tools to build a working desk fan. Most of what you need sits in your recycling bin or utility drawer right now. Gathering everything on a clear table before you plug in a glue gun saves you from scrambling midway through the build.
Start with the cardboard. Choose stiff, corrugated shipping cardboard from a brown delivery box rather than thin cereal box paperboard. Corrugated board has wavy paper ridges sandwiched inside that give it strength. Thin paperboard bends and flutters the second your motor starts spinning, which kills your airflow.
Here is the short checklist of materials and tools to grab:
- Cardboard scraps: One clean, medium-sized shipping box gives you plenty of flat material for the blades, stand, and base.
- Small electric toy motor: A standard 3-volt to 6-volt DC hobby motor. You can salvage one from an old broken toy car, battery-powered pencil sharpener, or buy a basic hobby motor online.
- Plastic bottle cap: A clean soda or water bottle cap works as the fan hub where all the blades attach.
- Power source: A 2-slot or 4-slot AA battery holder with wire leads, or an old, spare USB cable you do not mind cutting open.
- Adhesive and cutting tools: A low-temperature hot glue gun with several glue sticks, a pair of sharp scissors, a utility craft knife, a pencil, and a ruler.
- Safety pins or a small nail: Useful for punching a clean pilot hole right through the center of your bottle cap.
Keep a small strip of electrical tape nearby as well. You will use it to cover exposed wire ends once you confirm your motor spins the right way.
Slant your cardboard blades to push real airflow
The single biggest mistake people make with homemade cardboard fans is cutting flat paddles and gluing them straight across the hub. If your blades are completely flat, they simply slap the air sideways. The fan will buzz and spin fast, but you will feel zero breeze standing in front of it.
Real fan blades act like airplane wings or wood screws. They bite into the air and shove it forward. To create that forward push, you must tilt each blade at an angle, also known as blade pitch. A tilt angle between 30 and 45 degrees gives the best personal breeze without putting too much strain on a small electric toy motor.
- Make the central hub: Take your plastic bottle cap and find the exact center of the top face. Use your ruler to measure across the cap in two directions, marking an X where the lines cross. Push a small nail or safety pin through that center mark to make a tiny hole. This hole must fit tightly over the motor shaft, which is the tiny spinning metal rod on the motor.
- Draw three identical blades: Place a scrap of corrugated cardboard flat on your table. Draw a simple paddle shape about 2.5 to 3 inches long and 1 inch wide. Make the outer edge gently rounded and the base slightly narrower. Cut this first blade out with your craft knife. Use it as a stencil to trace two more blades so all three match in length, width, and weight.
- Mark your hub spacing: You want three blades spaced evenly around the outside rim of the bottle cap. Imagine the cap is a clock face: place a pencil mark at roughly 12 o'clock, 4 o'clock, and 8 o'clock. Even spacing stops the fan from wobbling out of control later.
- Cut blade mounting slots: Take your utility knife and make a shallow, angled slice into the side wall of the bottle cap at each pencil mark. Angle the cut at about 35 degrees from the vertical face. If your bottle cap plastic is too hard to cut safely, you can glue the blades directly against the outer rim at that same 35-degree tilt instead.
- Glue the blades firmly: Put a generous drop of hot glue into the first slot or against your first mark. Slide the base of a blade into the glue at your chosen slant. Hold it completely still for twenty seconds until the glue sets firm. Repeat this step for the other two blades, making sure every single blade slants in the exact same direction.
Set your finished propeller assembly aside to cool. If one blade points one way and another points the opposite way, they will fight each other and cancel out the airflow completely.
Build a stiff stand that prevents motor vibration
Small hobby motors spin at thousands of revolutions each minute. Even a tiny imbalance in your cardboard blades creates vibration. If your stand is too light or made from a single floppy cardboard stick, the whole fan will dance across your desk or tip over immediately.
You can prevent vibration by creating a weighted, multi-layered base and a rigid triangular column. Triangles hold their shape under vibration far better than flat upright sticks.
- Layer a heavy base: Cut three 5-inch by 5-inch squares out of your stiffest corrugated cardboard. Glue them together face to face using hot glue to create one thick, solid block. If you want extra stability, tape a few metal washers or spare coins between the layers before gluing. A heavier base absorbs motor hum and keeps the fan planted.
- Construct a sturdy upright tower: Cut a cardboard rectangle measuring 6 inches tall and 4 inches wide. Score the cardboard lightly with your craft knife along two parallel lines to divide it into three equal panels. Fold those panels into a tall, hollow triangular column. Run a bead of hot glue along the seam to lock the triangle together.
- Form the motor cradle: Cut a small cardboard strip about 1 inch wide and 3 inches long. Wrap this strip snugly around the metal body of your toy motor to create a custom collar. Glue the ends of the strip together, but slide the motor out before applying hot glue so you do not accidentally gum up the spinning parts.
- Assemble the frame: Glue the bottom of your triangular column directly to the center of your layered base. Let that joint harden completely. Then glue your motor collar horizontally onto the top of the column. Slide your motor into the collar so the tiny spinning metal rod sticks out freely past the front edge.
Check the spinning rod by rolling it between your fingers. It should turn smoothly with zero cardboard rubbing against it. If glue dripped anywhere near the front bearing where the rod enters the motor can, peel it away carefully before wiring things up.
Connect the motor wires to spin air forward
Wiring a small electric toy motor is very straightforward. A basic direct current hobby motor only has two metal tabs on the back, called terminals. When you feed electricity into those terminals from a battery pack or USB wire, an internal magnetic field forces the rod to spin.
Direct current motors have what electricians call polarity, which simply means the wire connection that sets spin direction. If you connect positive to the left tab and negative to the right tab, the motor spins clockwise. If you flip those connections, the motor spins counterclockwise. This detail determines whether your fan blows a cooling breeze forward into your face or sucks air backward toward the wall.
If you use a battery pack, choose a holder for two or three AA batteries. Two fresh AA batteries provide 3 volts, which runs a small hobby motor quietly at a comfortable speed. Strip a quarter-inch of plastic insulation off the red and black wires coming from the battery holder. Thread the bare copper ends through the small holes in the motor terminals, but do not glue or tape them yet.
If you prefer running your fan from a computer port or phone charger brick, grab an old USB charging cable. Cut off the small phone connector end using scissors. Carefully slice away two inches of the outer rubber jacket. Inside, you will see four small wires: red, black, green, and white. The green and white wires carry data, so snip them short and ignore them. The red wire carries positive 5-volt power, and the black wire is ground.
Press your plastic bottle cap propeller onto the motor shaft. Turn your power source on or touch the bare wires to the motor terminals. Hold your hand in front of the blades:
- If you feel air blowing forward across your hand, your wiring is correct.
- If you feel air pulling backward toward the stand, your motor is spinning in reverse. Swap the two wires onto the opposite terminals. This change flips the spin direction instantly and forces the blades to push air forward.
If your fan pushes air backward instead of forward, the fix is similar to why people need to reverse fan direction on household fans: you must change which way the blades turn to match the tilt of your blades. Once the air blows directly forward, twist the wire ends tightly through the motor tabs and wrap each terminal in a small piece of electrical tape so they cannot touch each other and cause a short.
Quick fixes solve fan wobbles and weak airflow
If your homemade fan does not work perfectly on the first try, do not throw it away. Small handmade projects almost always need tiny tweaks to balance the moving parts and line everything up. Work through this troubleshooting checklist to solve the most common issues.
The fan spins fast, but you feel almost no air
This problem usually comes down to flat blades or incorrect blade tilt. If your cardboard blades do not have an angle of at least 30 degrees, they slice cleanly through the air without moving it forward. You can learn how to make a ceiling fan pull air better by understanding that airflow requires blades to physically scoop and redirect the air stream.
Turn off the motor and inspect each blade from the side. If they look completely flat, gently twist the cardboard along its base to increase the slant. Make sure all three blades slant in the same direction. Then turn the motor back on and verify that the blades are spinning toward their scooped face rather than running backward.
The whole stand rattles and walks across the table
Heavy vibration happens when your propeller assembly is unbalanced. If one cardboard blade is slightly longer, wider, or heavier than the other two, centrifugal force pulls the spinning rod sideways with every rotation.
Check the center hole of your bottle cap hub. If the tiny spinning metal rod is even one millimeter off-center, the fan will shake violently. To fix this, pull the bottle cap off, mark the true center, and reseat it. If the hole is centered, trim a tiny sliver of cardboard off the outer tip of the heaviest blade until the shaking stops. Adding a blob of hot glue or a strip of masking tape to the underside of the base also dampens vibrations.
The motor hums and gets hot, but the blades will not turn
When an electric motor hums without turning, the motor is jammed. Turn off the power immediately so you do not burn out the small internal copper coils. Remove the bottle cap from the shaft. Does the shaft spin easily with your bare fingers? If it feels stiff, hot glue has likely leaked into the front motor bushing. Scrape away any dried glue around the spinning metal rod using a wooden toothpick.
Also check whether your batteries have enough charge. A motor that needs 3 volts to break friction might simply hum if old, dead batteries only provide 1.5 volts. Try a fresh pair of AA batteries.
The cardboard blades bend backward when spinning
If your blades droop or flex backward under high speed, your cardboard is too soft. You can stiffen existing cardboard blades without rebuilding the whole fan. Apply a thin, smooth smear of hot glue or school glue along the back ridge of each blade. Once the glue dries rock-hard, it acts as a rigid spine that stops the blade from flattening out under wind resistance.
Follow simple safety limits for homemade paper fans
Building a tabletop fan from household items is a rewarding project, but cardboard and low-cost hobby motors have real physical limits. Keeping a few basic safety guidelines in mind ensures your craft project stays fun and hazard-free.
Never power a small toy motor with high household voltage. Only use low-voltage direct current power sources, such as AA batteries, AAA batteries, or a standard 5-volt USB port. Never attempt to wire cardboard fan parts into a wall outlet or an AC power plug. AC household current carries serious shock and fire risks that paper products cannot handle safely.
Always turn off the fan when you leave your desk. Small electric toy motors are not built for continuous multi-hour operation. They lack internal cooling fans and overheat if run constantly under a heavy cardboard load. If you touch the metal casing and it feels too hot to touch comfortably, unplug it and let it rest for ten minutes.
Keep your cardboard fan away from sinks, open windows, and humid rooms. Cardboard absorbs moisture directly from humid air. Over several days in a damp space, the paper fibers soften, causing the angled blades to wilt and lose their pitch. Keep the fan on a dry, level indoor desk where the spinning blades will not catch on loose papers or tangled cords.
Choose a manufactured desk fan for lasting daily airflow
A handmade cardboard fan is a fantastic weekend science build, but it cannot replace a dedicated cooling fan if you need reliable airflow all summer. When you want strong, silent breeze for sleeping, studying, or cooling an entire home office, an actual manufactured table fan makes much more sense.
Manufactured desk fans solve the inherent flaws of paper crafts. Instead of open, exposed cardboard blades, they feature sturdy protective grilles that keep fingers and desk items completely safe. They use quiet, brushless motors designed to run continuously for hours without getting hot or vibrating off your desk. Many modern compact desk fans also offer multiple speed settings, smooth 360-degree tilt adjustments, and built-in rechargeable batteries that let you carry cooling air anywhere in your home.
If you decide to pick up a permanent fan for your workspace, check the dimensions to ensure it fits comfortably on your desk without crowding your monitors. Look for a model that operates under 35 decibels if you plan to use it while sleeping or working, and check whether it includes variable speed controls so you can dial in the exact airflow you need.

- LFR Score10.0
LFR Score is a ranking system developed by lightfansreviews.com. LFR Score has no relationship or impact from any manufacturers or sales agent websites. Learn more
- BrandFRONTSUN

- LFR Score9.4
LFR Score is a ranking system developed by lightfansreviews.com. LFR Score has no relationship or impact from any manufacturers or sales agent websites. Learn more
- BrandDREO
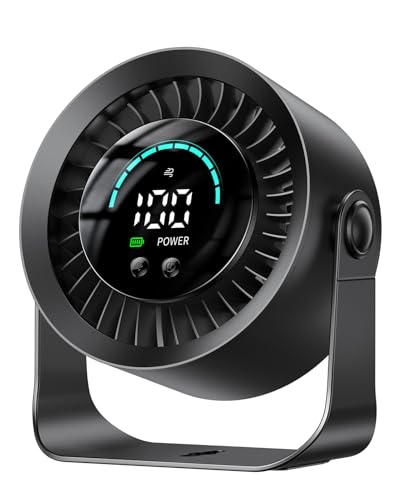
- LFR Score9.2
LFR Score is a ranking system developed by lightfansreviews.com. LFR Score has no relationship or impact from any manufacturers or sales agent websites. Learn more
- BrandDIGIX

- LFR Score9.2
LFR Score is a ranking system developed by lightfansreviews.com. LFR Score has no relationship or impact from any manufacturers or sales agent websites. Learn more
- BrandHoneywell
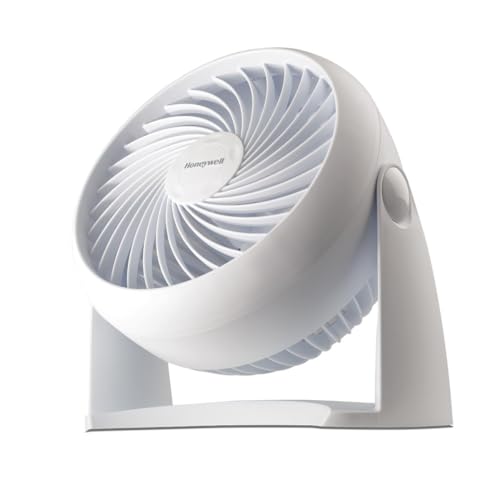
- LFR Score9.2
LFR Score is a ranking system developed by lightfansreviews.com. LFR Score has no relationship or impact from any manufacturers or sales agent websites. Learn more
- BrandHoneywell

- LFR Score9.0
LFR Score is a ranking system developed by lightfansreviews.com. LFR Score has no relationship or impact from any manufacturers or sales agent websites. Learn more
- BrandDREO
- LFR Score9.0
LFR Score is a ranking system developed by lightfansreviews.com. LFR Score has no relationship or impact from any manufacturers or sales agent websites. Learn more
- BrandDREO

- LFR Score8.8
LFR Score is a ranking system developed by lightfansreviews.com. LFR Score has no relationship or impact from any manufacturers or sales agent websites. Learn more
- BrandBEYOND BREEZE

- LFR Score8.4
LFR Score is a ranking system developed by lightfansreviews.com. LFR Score has no relationship or impact from any manufacturers or sales agent websites. Learn more
- BrandHiCFM

- LFR Score8.2
LFR Score is a ranking system developed by lightfansreviews.com. LFR Score has no relationship or impact from any manufacturers or sales agent websites. Learn more
- BrandKONSIDEN
Last update on 2026-10-02 / Affiliate links / Images, Product Titles, and Product Highlights from Amazon Product Advertising API


Best Small Flush Mount Ceiling Fans 2026 Ultimate Picks

Best Smart Ceiling Fan India 2026 For Effortless Comfort

Best Smart Ceiling Fans with Lights for 2026: Top Picks

Best Smart Home Non Ceiling Fans 2026 For Ultimate Comfort

Best Outdoor Misting Ceiling Fan 2026 For Ultimate Comfort

Best Outdoor Ceiling Fans For Porch 2026 With Style And Breeze

Best Smart Bulb For Ceiling Fan 2026 That Brightens Life
Best Smart Ceiling Fan Control 2026 For Effortless Comfort